TITLE: DIY disc pasture meter in action
DATE: 2019-04-05
AUTHOR: John L. Godlee
====================================================================
In a previous post I talked about designing a Disc Pasture Meter
from readily available parts that should be present in most small
towns around the world.
The design I went for involves using waste pipe fittings and a
plywood or plastic disc.
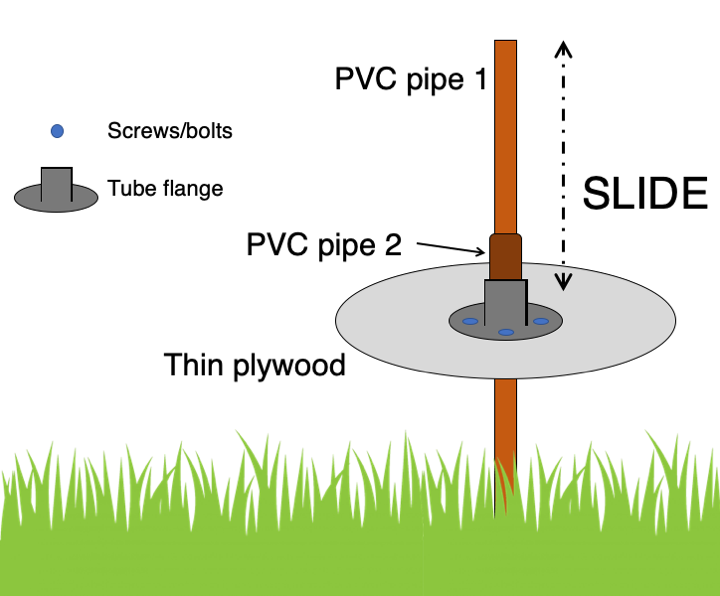
Here is a schematic diagram of the build:
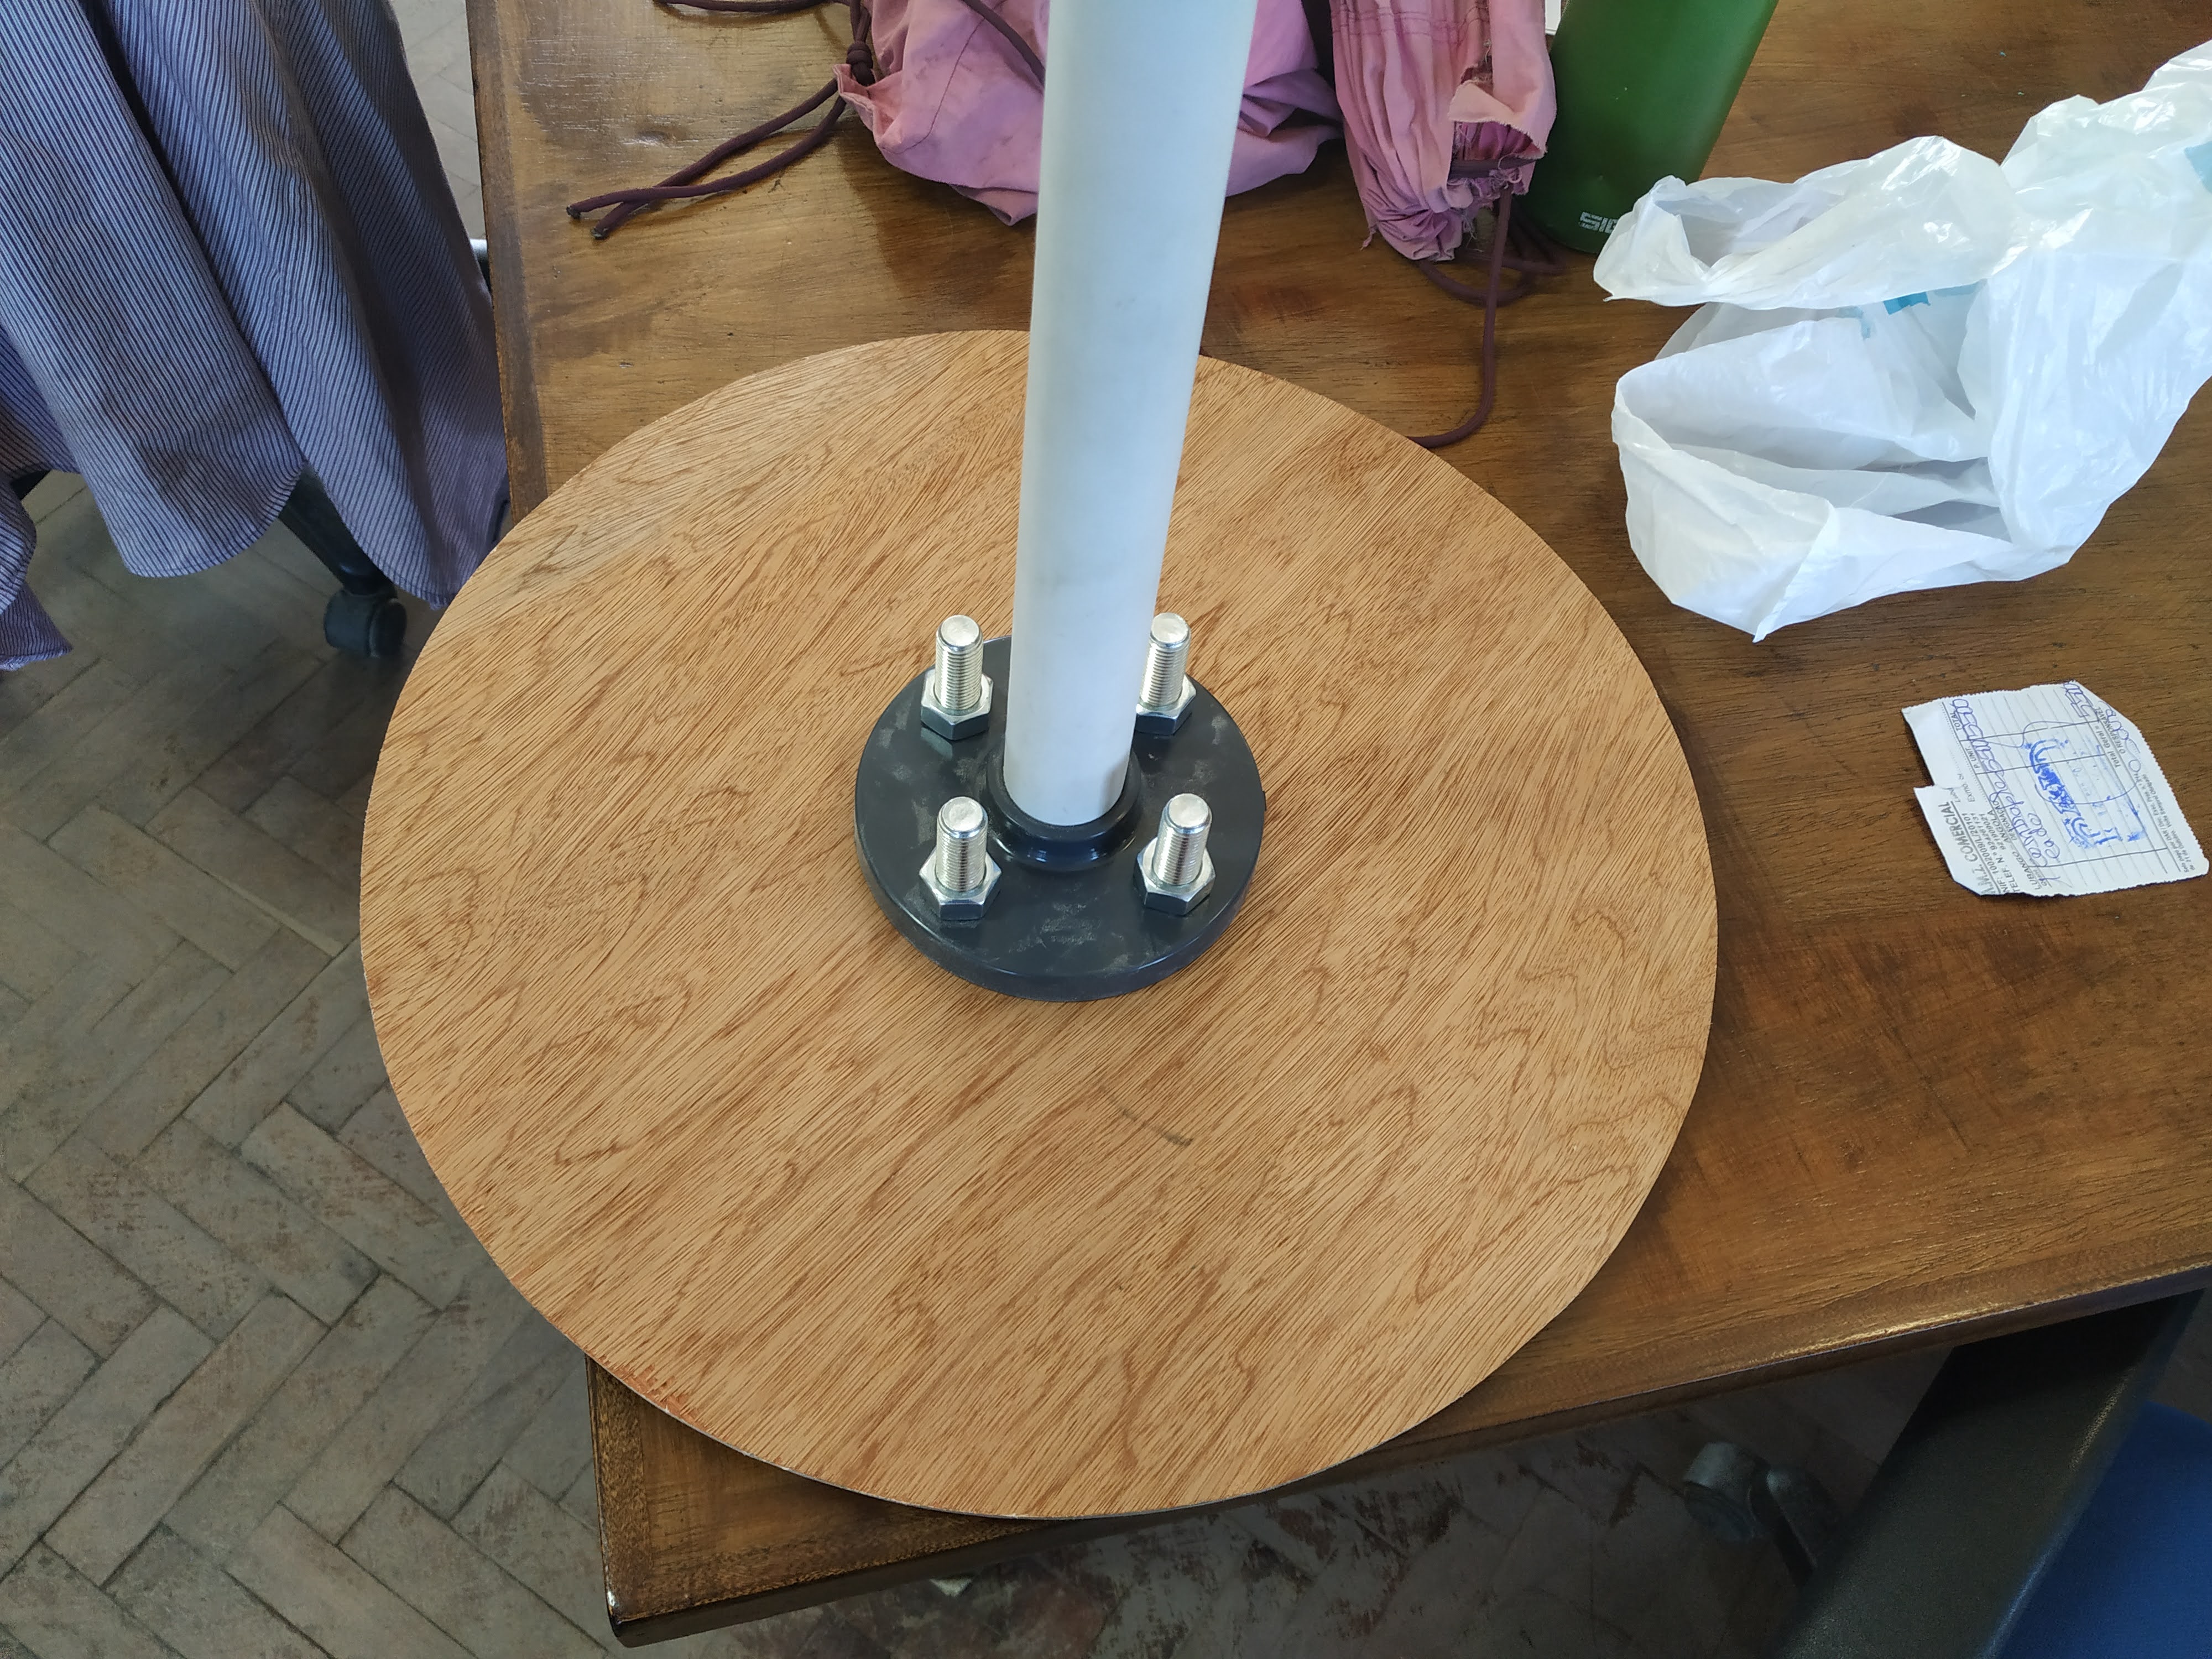
And here is the finished article:
The specific parts I used were:
- 30 cm length of 32 mm waste pipe - bought from screwfix in the
UK as a 3 m length
- 2 m length of generic water pipe with an internal diameter
smaller than the 32 mm waste pipe - bought in Lubango from a
builders' merchants
- full face flange to fit a 32 mm waste pipe - bought on Amazon
from Waterline Products in the UK
- 4x M16X70 hex bolts with nuts and washers - bought on Amazon as
a pack of 10 from Bescol in the UK
- 46 cm diameter 5 mm plywood disc - bought as a rectangular
piece in Lubango from a builders' merchants, cut to shape and
drilled at a different builders merchants. I took the flange, 30 cm
pipe and the bolts with me to get the size and position of the
holes correct
The equipment I used to put it together was:
- Black sharpie marker
- 5 m tape measure
- Hacksaw
- Power drill
The method:
1. Smooth the cut ends of the 2 m pipe and the 30 cm pipe to
ensure that nothing gets snagged.
2. Insert the 30 cm pipe into the flange as far as it will go, to
the base of the flange. This may require some taps
3. Thread the bolts through the four small holes in the disc and
secure with the nuts to the bottom of the flange. The head of the
bolt should be facing down towards the ground, with the nut on the
top side of the flange.
4. Slide the 30 cm pipe with the disc and flange over the longer
section of pipe.
5. Let the disc descend slowly and completely to rest on a patch
of ground unobstructed by grass or anything else. A concrete floor
is best.
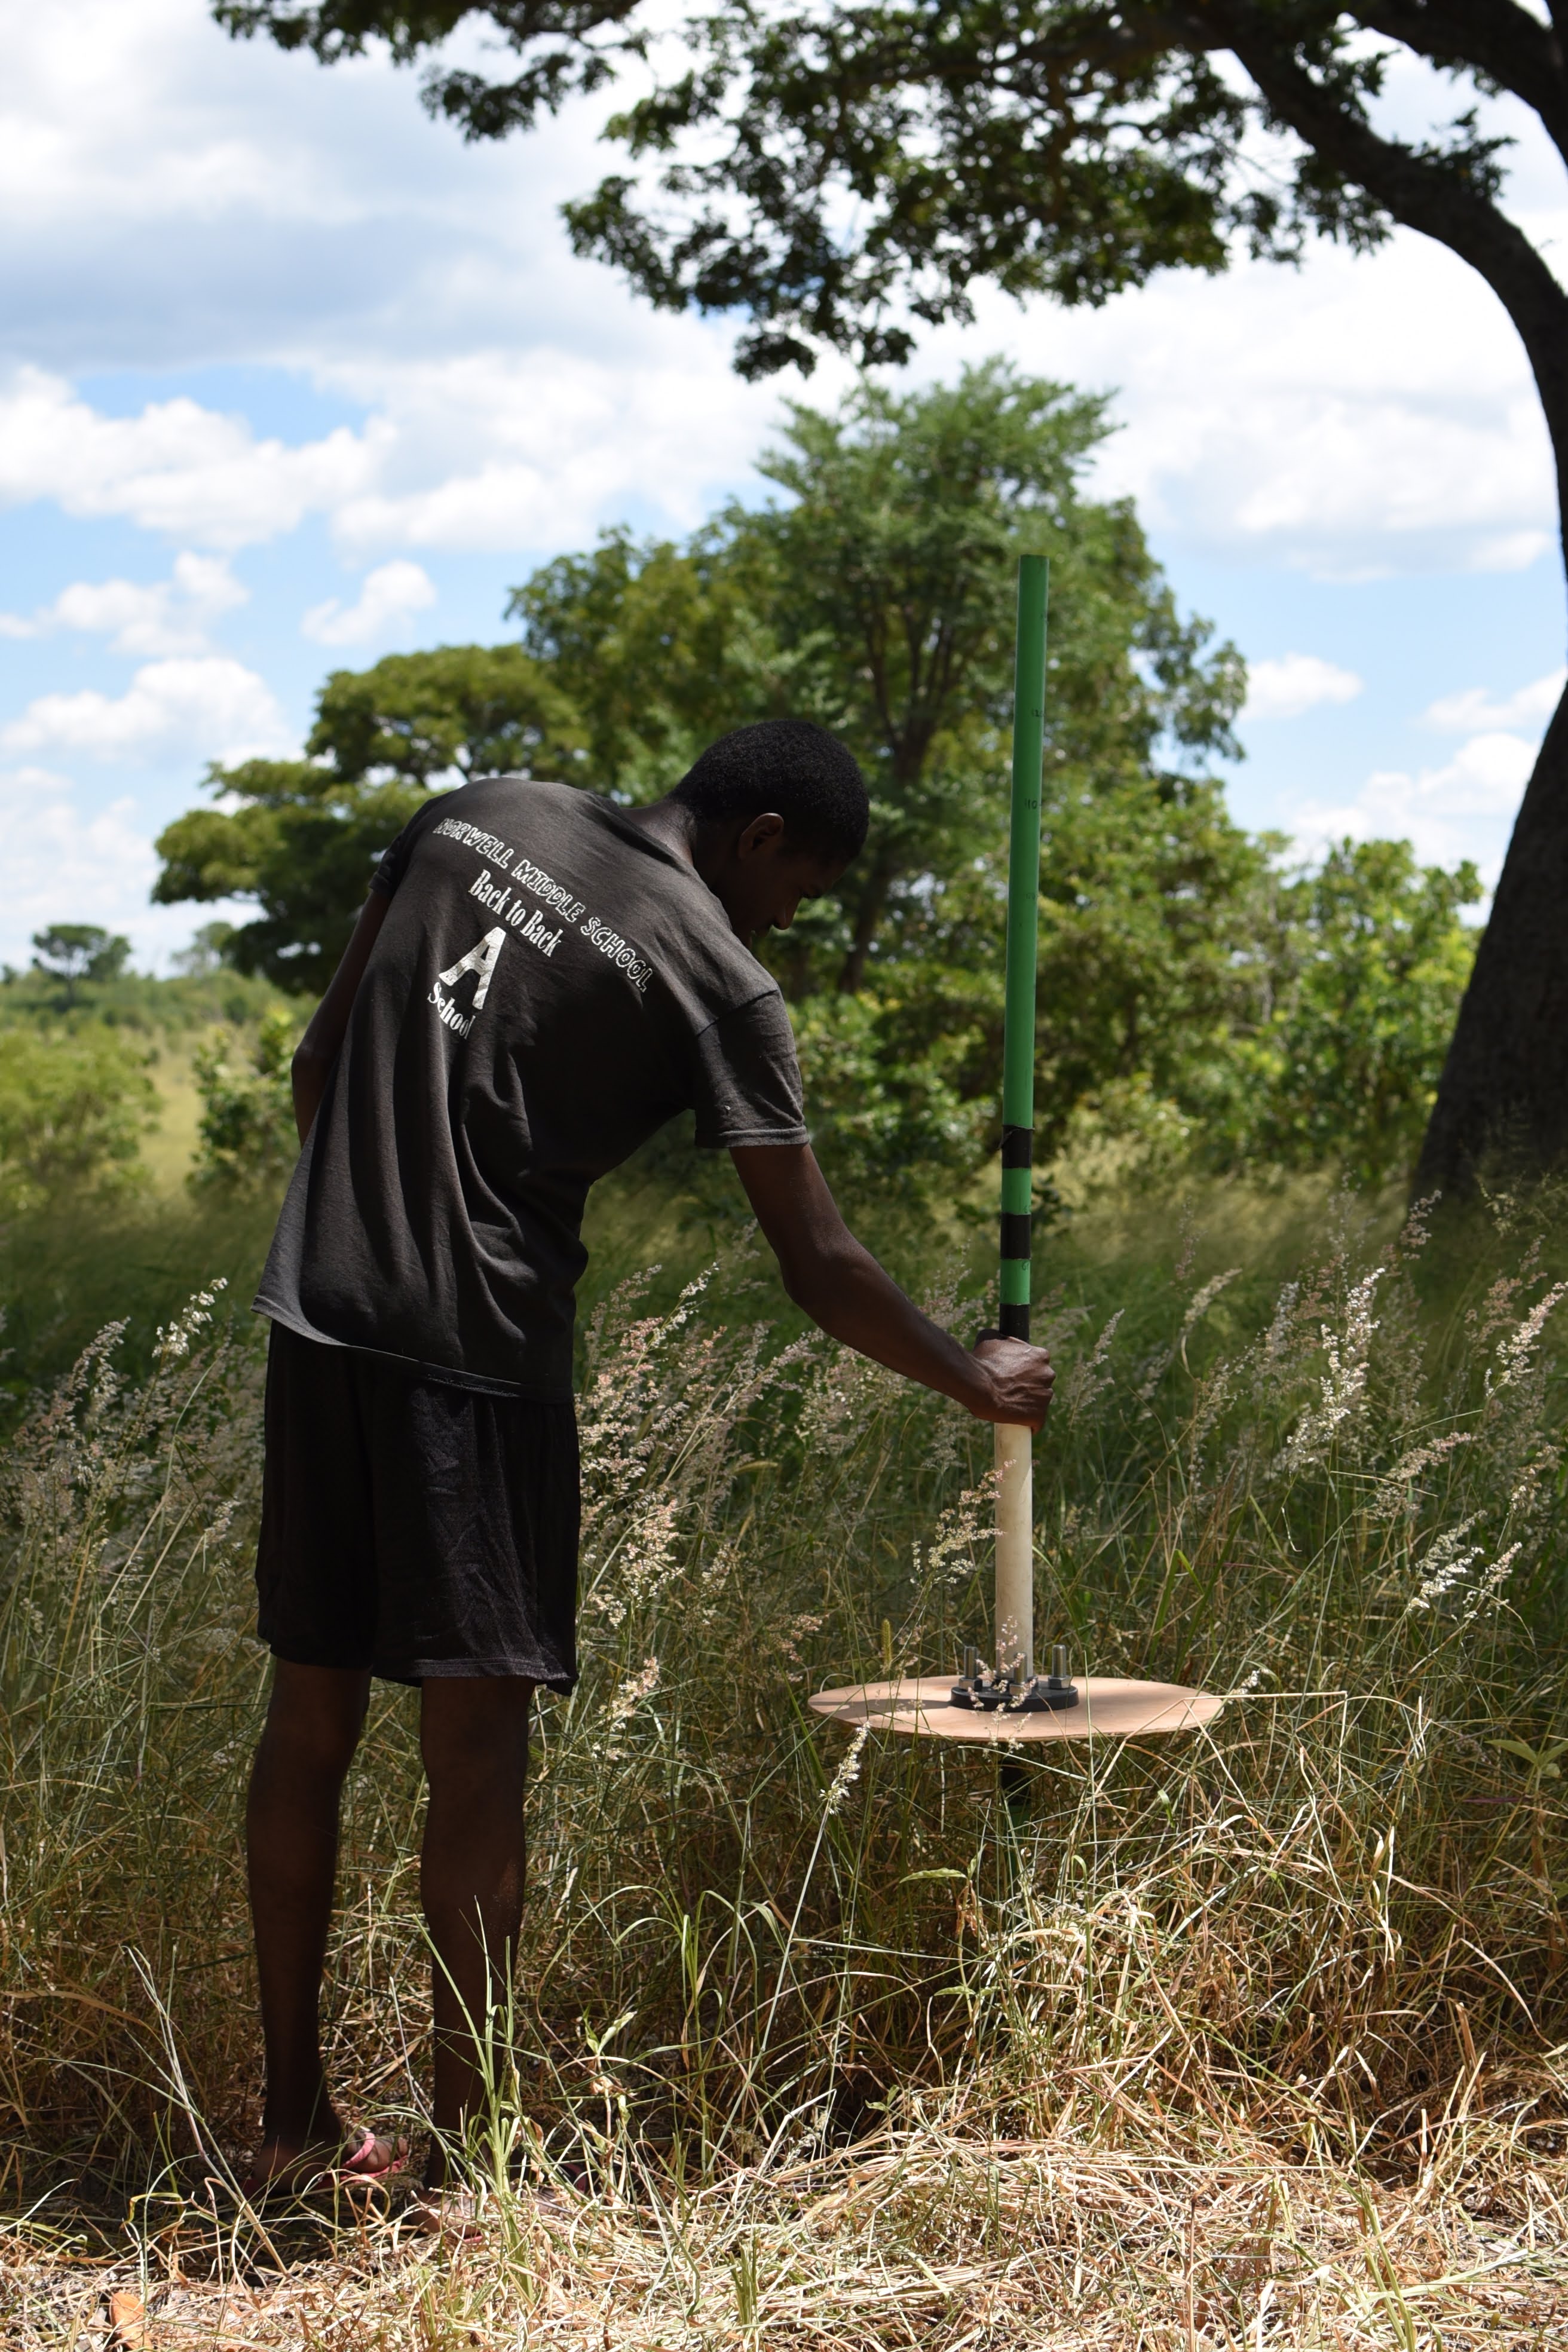
6. Mark the long pipe with the sharpie marker at the top of the 30
cm waste pipe as 0 cm.
7. Continue in 5 cm gradations up the 2 m length of pipe. These
markings can be reinforced by scratching into the pipe at a 1 cm
interval, as the sharpie marker may wipe off with extended use. I
also found out later that 3M branded duct tape is 5 cm width, so
wrapping that around the pipe also works well as a 5 cm interval.

While some of the items were bought in the UK ahead of time, these
were all small items, and they're very robust. I imagine the thing
that will break first will be the disc, followed by the long pipe,
and these are easy to get hold of basically anywhere. It helps that
the long pipe doesn't have to be a specific diameter, only as large
as possible while still moving freely through the 30 cm sleeve
pipe. Unfortunately another thing to think about is the effect of
moisture on the disc. I found that over the course of a few weeks,
the disc warped slightly, only a few mm, but this may affect
measurements in a trivial way.
The cost of all the parts was:
- 30 cm sleeve pipe 3 m length - GBP4.59
- 2 m pipe - 1500Kz = GBP3.68
- Flange - GBP11.28
- Disc x3 - 3000Kz (materials) + 4000Kz (labour) = 7000Kz =
GBP17.15
- Bolts - GBP12.90
- Total cost - GBP49.60
N.B. - Some other sources I've read have expressed concern over
absorption of water by the plywood disc, which could alter the
weight of the DPM and also warp the disc. I got around this by
soaking the disc in PVA glue after drilling to make it waterproof.