This is a text-only version of the following page on
https://raymii.org:
---
Title : Boot to Vim, Vim as Pid 1
Author : Remy van Elst
Date : 18-09-2014
URL :
https://raymii.org/s/blog/Vim_as_PID_1_Boot_to_Vim.html
Format : Markdown/HTML
---
- **Update 22-04-2023:** I've figured out [how to boot to Vi bare metal][9], no operating system required!
![image][1]
This is a response on a great article from [Pascal Bourguignon][2], namely how
to run [Emacsas PID 1][3].
As we all know, nobody uses emacs.
The above statement is ment to start a flamewar. Please do so, see the contact
page to contact me.
No, all joking aside, I found it to be a good article and wanted to see how I
could do that with Vim. Not in User Mode Linux, but by creating an actual ISO.
Boot to Vim, as you might want to call it.
This is actually fairly simple. Compile vim statically, set it as `init=` at
boot and you're done.
We are going to use small (9MB) distro named [Tiny Core, Core edition][4] and
customize that to boot right into our static build of Vim.
<p class="ad"> <b>Recently I removed all Google Ads from this site due to their invasive tracking, as well as Google Analytics. Please, if you found this content useful, consider a small donation using any of the options below:</b><br><br> <a href="
https://leafnode.nl">I'm developing an open source monitoring app called Leaf Node Monitoring, for windows, linux & android. Go check it out!</a><br><br> <a href="
https://github.com/sponsors/RaymiiOrg/">Consider sponsoring me on Github. It means the world to me if you show your appreciation and you'll help pay the server costs.</a><br><br> <a href="
https://www.digitalocean.com/?refcode=7435ae6b8212">You can also sponsor me by getting a Digital Ocean VPS. With this referral link you'll get $100 credit for 60 days. </a><br><br> </p>
### Building Vim
Please read and follow my [tutorial on building a statically linked Vim][6].
This will give you an executable we will use later on in the tutorial.
### Preparation
You will need a few tools to build the ISO, namely `cpio`, `tar`, `gzip`,
`advdef` and `mkisofs`. These can probably be installed with your package
manager. Please do that first.
First create a folder for building:
mkdir vim-as-pid-1
cd vim-as-pid-1
Also create a few folders for the ISO build:
mkdir /tmp/isomount
mkdir extract
Download the latest Tiny Core, Core edition (without GUI):
wget
http://distro.ibiblio.org/tinycorelinux/5.x/x86/release/Core-current.iso
Copy the files from the ISO:
mount Core-current.iso /tmp/isomount/ -o loop,ro
cp -a /tmp/isomount/boot /tmp/
This creates a `/tmp/boot` folder with the `core.gz` and boot loader. Don't
forget to umount it:
umount /tmp/isomount
We will use the `/tmp/boot` folder later on when putting back together the ISO.
### Changing the ISO
Go into the folder where we will extract the `core.gz` root filesystem:
cd extract
Use `zcat` and `cpio` to extract the `core.gz` rootfs:
zcat /tmp/boot/core.gz | cpio -i -H newc -d
We now have an extracted root filesystem:
# ls
bin dev etc home init lib linuxrc mnt opt proc root run sbin sys tmp usr var
Place the [earlier built static Vim][6] in the `bin/` folder:
cp ~/vim bin/
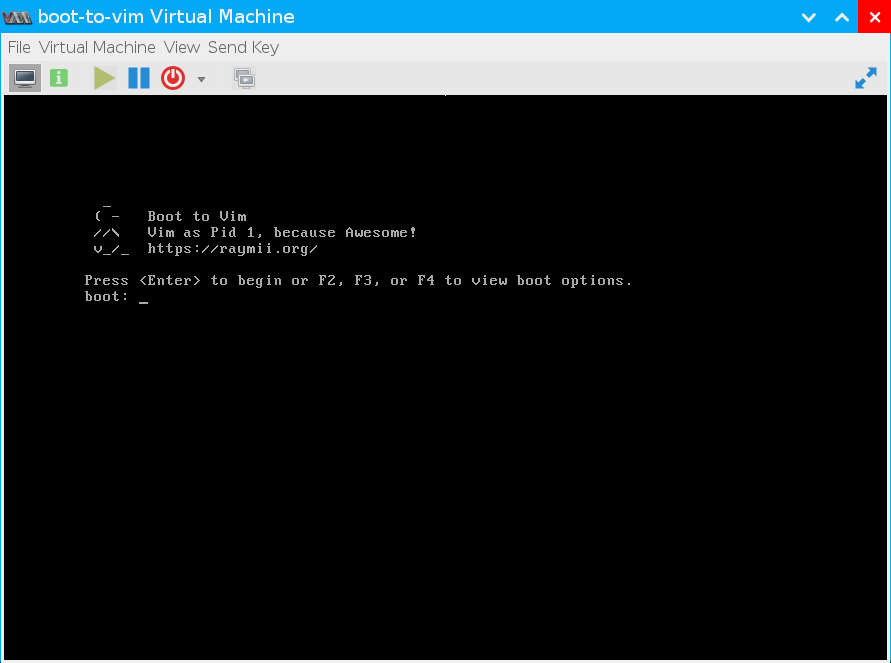
You can do more customizations, for example, editing the boot loader message.
That is in a file named `boot.msg` in `/tmp/boot/isolinux/`:
# vim /tmp/boot/isolinux/boot.msg
^L
_
( - Boot to Vim
//\ Vim as Pid 1, because Awesome!
v_/_
https://raymii.org/
Press <Enter> to begin or F2, F3, or F4 to view boot options.
### Changing the inittab
To boot in to Vim right away we need to change the init configuration. Edit the
following file:
vim etc/inittab
Change the following lines:
::sysinit:/etc/init.d/rcS
tty1::respawn:/sbin/getty 38400 tty1
To:
::sysinit:/bin/vim
tty1::respawn:/bin/vim
Do note that this does not actually make Vim PID 1. Init will still manage Vim,
and do stuff like `fsck` and mount the root partition read/write. If you want to
go barebones, add `init=/bin/vim` to the bootloader (`isolinux.cfg`). Then, from
Vim, do `:!fsck /dev/sda` and `mount -o remount,rw /`.
### Building a new ISO
Make sure you are still in the `extract` folder. Issue the following command to
build a new `tinycore.gz` file which the ISO will use as it's `initramfs`:
find | cpio -o -H newc | gzip -2 > ../tinycore.gz
Copy that over the original `core.gz` file in `/tmp/boot` which we copied
ealier:
cp ../tinycore.gz /tmp/boot/core.gz
Create a new folder for the new ISO build files:
mkdir /tmp/newiso
Copy the `/tmp/boot` folder to it:
cp -a /tmp/boot /tmp/newiso/
Build a new ISO using `mkisofs`:
cd /tmp/
mkisofs -l -J -R -V Boot_To_Vim -no-emul-boot -boot-load-size 4 -boot-info-table -b boot/isolinux/isolinux.bin -c boot/isolinux/boot.cat -o Boot_to_Vim.iso newiso
You now have a file in `/tmp` named `Boot_to_Vim.iso`:
ls -la /tmp/Boot_to_Vim.iso
-rw-r--r-- 1 root root 11044864 Sep 17 08:05 /tmp/Boot_to_Vim.iso
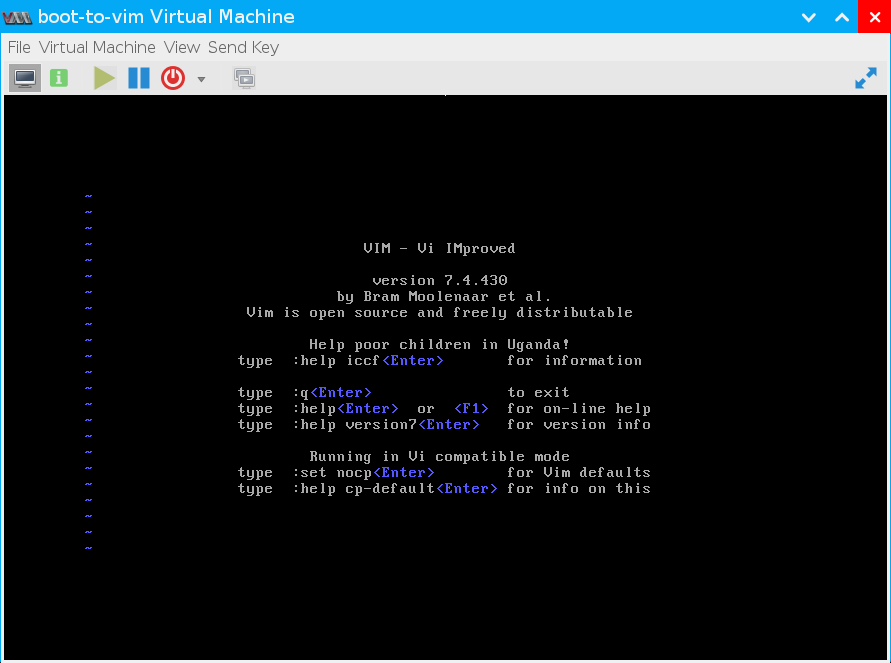
You can use this to boot a VM, or burn an ISO. If you exit `vim`, it will
restart.
You can start up a real shell by giving the `:!sh` command, in command mode. To
shut down, issue the `:!halt` command.
More info on remastering Tiny Core can be found [here][7].
![image][8]
[1]:
https://raymii.org/s/inc/img/boot-to-vim-1.png
[2]:
http://www.informatimago.com/index.html
[3]:
http://www.informatimago.com/linux/emacs-on-user-mode-linux.html?raymii.org
[4]:
http://distro.ibiblio.org/tinycorelinux/
[5]:
https://www.digitalocean.com/?refcode=7435ae6b8212
[6]:
https://raymii.org/s/blog/Statically_cross_compiled_vim_for_x86_x86-64_and_mips.html
[7]:
http://wiki.tinycorelinux.net/wiki:remastering
[8]:
https://raymii.org/s/inc/img/boot-to-vim-2.png
[9]: /s/blog/Bare_Metal_Boot_to_Vi.html
---
License:
All the text on this website is free as in freedom unless stated otherwise.
This means you can use it in any way you want, you can copy it, change it
the way you like and republish it, as long as you release the (modified)
content under the same license to give others the same freedoms you've got
and place my name and a link to this site with the article as source.
This site uses Google Analytics for statistics and Google Adwords for
advertisements. You are tracked and Google knows everything about you.
Use an adblocker like ublock-origin if you don't want it.
All the code on this website is licensed under the GNU GPL v3 license
unless already licensed under a license which does not allows this form
of licensing or if another license is stated on that page / in that software:
This program is free software: you can redistribute it and/or modify
it under the terms of the GNU General Public License as published by
the Free Software Foundation, either version 3 of the License, or
(at your option) any later version.
This program is distributed in the hope that it will be useful,
but WITHOUT ANY WARRANTY; without even the implied warranty of
MERCHANTABILITY or FITNESS FOR A PARTICULAR PURPOSE. See the
GNU General Public License for more details.
You should have received a copy of the GNU General Public License
along with this program. If not, see <
http://www.gnu.org/licenses/>.
Just to be clear, the information on this website is for meant for educational
purposes and you use it at your own risk. I do not take responsibility if you
screw something up. Use common sense, do not 'rm -rf /' as root for example.
If you have any questions then do not hesitate to contact me.
See
https://raymii.org/s/static/About.html for details.