This is a text-only version of the following page on
https://raymii.org:
---
Title : Self Hosted CryptoCat - Secure self hosted multiuser webchat
Author : Remy van Elst
Date : 09-11-2013
URL :
https://raymii.org/s/tutorials/Self_Hosted_CryptoCat_-_Secure_Self_Hosted_Multiuser_Webchat.html
Format : Markdown/HTML
---
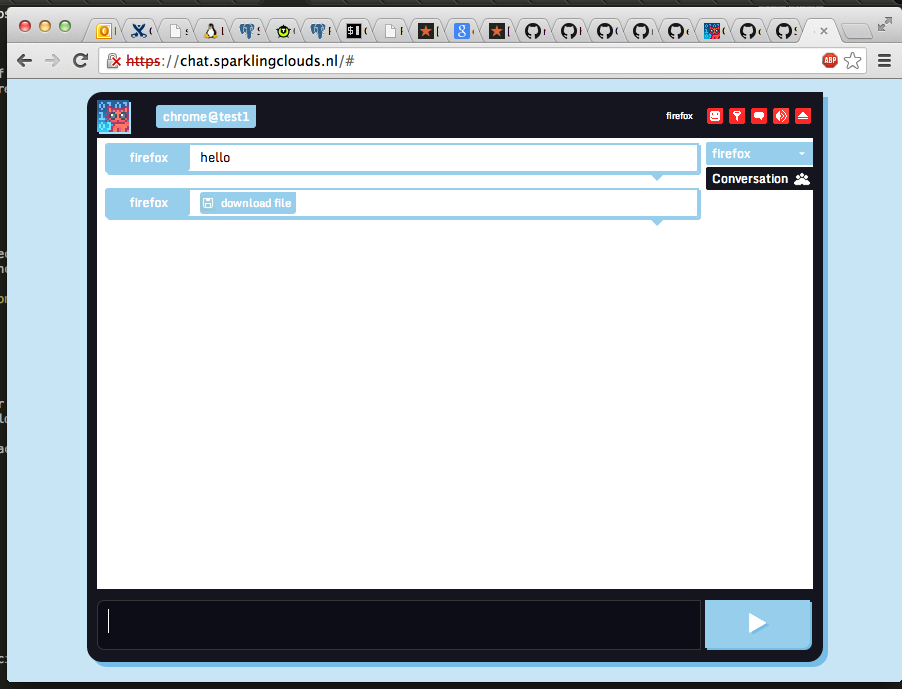
[![cryptocat][1]][1]
This is a guide on setting up a self hosted secure multiuser webchat service
with CryptoCat. It covers the set up of ejabberd, nginx and the web interface
for CryptoCat. It supports secure encrypted group chat, secure encrypted private
chat and file and photo sharing.
[There were/are some issues with the encryption provided by CryptoCat. These
seem to be fixed now, but still, beware.][2]
<p class="ad"> <b>Recently I removed all Google Ads from this site due to their invasive tracking, as well as Google Analytics. Please, if you found this content useful, consider a small donation using any of the options below:</b><br><br> <a href="
https://leafnode.nl">I'm developing an open source monitoring app called Leaf Node Monitoring, for windows, linux & android. Go check it out!</a><br><br> <a href="
https://github.com/sponsors/RaymiiOrg/">Consider sponsoring me on Github. It means the world to me if you show your appreciation and you'll help pay the server costs.</a><br><br> <a href="
https://www.digitalocean.com/?refcode=7435ae6b8212">You can also sponsor me by getting a Digital Ocean VPS. With this referral link you'll get $100 credit for 60 days. </a><br><br> </p>
This tutorial is tested on Ubuntu 12.04.
[If you want to set up a federated XMPP Chat Network with ejabberd, see my
tutorial how to do that.][4]
### Set up a DNS record
Make sure you set up two DNS A records to your chat server. One should be for
example `chat.sparklingclouds.nl` and the other is for the conferencing:
`conference.chat.sparklingclouds.nl`. You should contact your provider if you
need help with this.
**In the configuration files, you should replace`chat.sparklingclouds.nl` with
your own domain name.**
### Install required packages
First we install the required packages:
apt-get install ejabberd nginx vim git
### ejabberd configuration
Edit the ejabberd configuratio file located:
/etc/ejabberd/ejabberd.cfg
And place the following contents in it, replacing chat.sparklingclouds.nl with
your own domain:
%% Hostname
{hosts, ["chat.sparklingclouds.nl"]}.
%% Logging
{loglevel, 0}.
{listen,
[
{5222, ejabberd_c2s, [
{access, c2s},
{shaper, c2s_shaper},
{max_stanza_size, infinite},
%%zlib,
starttls, {certfile, "/etc/ejabberd/ejabberd.pem"}
]},
{5280, ejabberd_http, [
http_bind,
http_poll
]}
]}.
{s2s_use_starttls, true}.
{s2s_certfile, "/etc/ejabberd/ejabberd.pem"}.
{auth_method, internal}.
{auth_password_format, scram}.
{shaper, normal, {maxrate, 500000000}}.
{shaper, fast, {maxrate, 500000000}}.
{acl, local, {user_regexp, ""}}.
{access, max_user_sessions, [{10, all}]}.
{access, max_user_offline_messages, [{5000, admin}, {100, all}]}.
{access, c2s, [{deny, blocked},
{allow, all}]}.
{access, c2s_shaper, [{none, admin},
{normal, all}]}.
{access, s2s_shaper, [{fast, all}]}.
{access, announce, [{allow, admin}]}.
{access, configure, [{allow, admin}]}.
{access, muc_admin, [{allow, admin}]}.
{access, muc, [{allow, all}]}.
{access, register, [{allow, all}]}.
{registration_timeout, infinity}.
{language, "en"}.
{modules,
[
{mod_privacy, []},
{mod_ping, []},
{mod_private, []},
{mod_http_bind, []},
{mod_admin_extra, []},
{mod_muc, [
{host, "conference.@HOST@"},
{access, muc},
{access_create, muc},
{access_persistent, muc},
{access_admin, muc_admin},
{max_users, 500},
{default_room_options, [
{allow_change_subj, false},
{allow_private_messages, true},
{allow_query_users, true},
{allow_user_invites, false},
{anonymous, true},
{logging, false},
{members_by_default, false},
{members_only, false},
{moderated, false},
{password_protected, false},
{persistent, false},
{public, false},
{public_list, true}
]}
]},
{mod_register, [
{welcome_message, {"Welcome!"}},
{access, register}
]}
]}.
[If you want a signed ejabberd ssl certificate you can read my tutorial how to
do that][5]
### NGINX Configuration
We need an SSL certificate for the web server. You can generate one yourself
using the following command:
cd /etc/ssl/certs
openssl req -nodes -x509 -newkey rsa:4096 -keyout key.pem -out cert.crt -days 356
Or generate a CSR and let it sign by a "official" CA like verisign or digicert:
cd /etc/ssl/certs
openssl req -nodes -newkey rsa:4096 -keyout private.key -out CSR.csr
When the certificate is in place you can continue to configure NGINX.
Edit the file or create a new virtual host.
vim /etc/nginx/sites-enabled/default
And place the following contents in it, replacing chat.sparklingclouds.nl with
your own domain:
server {
listen 80;
listen [::]:80 default ipv6only=on;
server_name chat.sparklingclouds.nl;
rewrite ^ https://$server_name$request_uri? permanent;
add_header Strict-Transport-Security max-age=31536000;
location / {
root /var/www;
index index.html index.htm;
}
}
# HTTPS server
server {
listen 443;
server_name chat.sparklingclouds.nl;
add_header Strict-Transport-Security max-age=31536000;
ssl on;
ssl_certificate /etc/ssl/certs/cert.crt;
ssl_certificate_key /etc/ssl/certs/key.pem;
ssl_session_cache shared:SSL:10m;
ssl_session_timeout 5m;
ssl_protocols TLSv1.1 TLSv1.2;
ssl_ciphers ECDHE-ECDSA-AES256-GCM-SHA384:ECDHE-RSA-RC4-SHA:ECDHE-RSA-AES128-SHA:RC4:HIGH:!MD5:!aNULL:!EDH;
ssl_prefer_server_ciphers on;
location / {
root /var/www;
index index.html index.htm;
}
location /http-bind {
proxy_buffering off;
tcp_nodelay on;
keepalive_timeout 55;
proxy_pass
http://127.0.0.1:5280/http-bind;
}
}
Save it and restart NGINX:
/etc/init.d/nginx restart
### Cronjob for ejabberd
This is important, it cleans up unused ejabberd accounts. Create a new crontab
like so:
crontab -e
And place the following in it:
1 1 * * * ejabberdctl delete-old-users 1
That way once every 24 hours the ejabberd server gets cleaned up.
### Web Frontend
Note that you now already can use your own server with the CryptoCat frontend
via: <
https://crypto.cat>. We are going to set up our own frontend on our
webserver so we don't need Crypto.Cat.
Setting up a web frontend is not recommended by the cryptocat developers. See
the comment below, [and read the full thread on this Reddit post][6]
When you host Cryptocat as a website, this means that every time someone wants to use it, they technically will need to re-download the entire code by visiting the website. This means that every use needs a full re-download of the Cryptocat code. By centralizing the code redistribution in a "web front-end" and making it necessary for everyone to redownload the code every time, you create an opportunity for malicious code poisoning by the host, or code injection by a third party. This is why the only recommended Cryptocat download is the browser extension from the official website, which downloads only once as opposed to every time (just like a regular desktop application), and is authenticated by Cryptocat's development team as genuine.
Kaepora - 12-11-2013 on Reddit
Take that into consideration when setting up the frontend. A use case could be
an internal cryptocat chat service where people don't need to change the default
server address and such.
First get the source code:
cd /tmp
git clone
https://github.com/cryptocat/cryptocat.git
Then place it in the right folder;
cp -r cryptocat/src/core /var/www/
Edit the config file to use your own server:
cd /var/www
vim js/cryptocat.js
And place the following contents in it, replacing chat.sparklingclouds.nl with
your own domain:
/* Configuration */
// Domain name to connect to for XMPP.
var defaultDomain = 'chat.sparklingclouds.nl'
// Address of the XMPP MUC server.
var defaultConferenceServer = 'conference.chat.sparklingclouds.nl'
// BOSH is served over an HTTPS proxy for better security and availability.
var defaultBOSH = '
https://chat.sparklingclouds.nl/http-bind/'
Now save the file.
You are finished now. Go to your website and test the chat out.
[1]:
https://raymii.org/s/inc/img/cryptocat.png
[2]:
http://en.wikipedia.org/wiki/Cryptocat
[3]:
https://www.digitalocean.com/?refcode=7435ae6b8212
[4]:
https://raymii.org/s/tutorials/Set_up_a_federated_XMPP_Chat_Network_with_ejabberd.html
[5]:
https://raymii.org/s/tutorials/Ejabberd_SSL_Certificate.html
[6]:
http://www.reddit.com/r/linux/comments/1q8zha/self_hosted_cryptocat_secure_self_hosted/
---
License:
All the text on this website is free as in freedom unless stated otherwise.
This means you can use it in any way you want, you can copy it, change it
the way you like and republish it, as long as you release the (modified)
content under the same license to give others the same freedoms you've got
and place my name and a link to this site with the article as source.
This site uses Google Analytics for statistics and Google Adwords for
advertisements. You are tracked and Google knows everything about you.
Use an adblocker like ublock-origin if you don't want it.
All the code on this website is licensed under the GNU GPL v3 license
unless already licensed under a license which does not allows this form
of licensing or if another license is stated on that page / in that software:
This program is free software: you can redistribute it and/or modify
it under the terms of the GNU General Public License as published by
the Free Software Foundation, either version 3 of the License, or
(at your option) any later version.
This program is distributed in the hope that it will be useful,
but WITHOUT ANY WARRANTY; without even the implied warranty of
MERCHANTABILITY or FITNESS FOR A PARTICULAR PURPOSE. See the
GNU General Public License for more details.
You should have received a copy of the GNU General Public License
along with this program. If not, see <
http://www.gnu.org/licenses/>.
Just to be clear, the information on this website is for meant for educational
purposes and you use it at your own risk. I do not take responsibility if you
screw something up. Use common sense, do not 'rm -rf /' as root for example.
If you have any questions then do not hesitate to contact me.
See
https://raymii.org/s/static/About.html for details.