This is a text-only version of the following page on
https://raymii.org:
---
Title : Nagios 4 + Nagiosgraph (latest) installation on Ubuntu 12.04 & 14.04
Author : Remy van Elst
Date : 11-09-2016
URL :
https://raymii.org/s/tutorials/Nagios_Core_4_Installation_on_Ubuntu_12.04.html
Format : Markdown/HTML
---
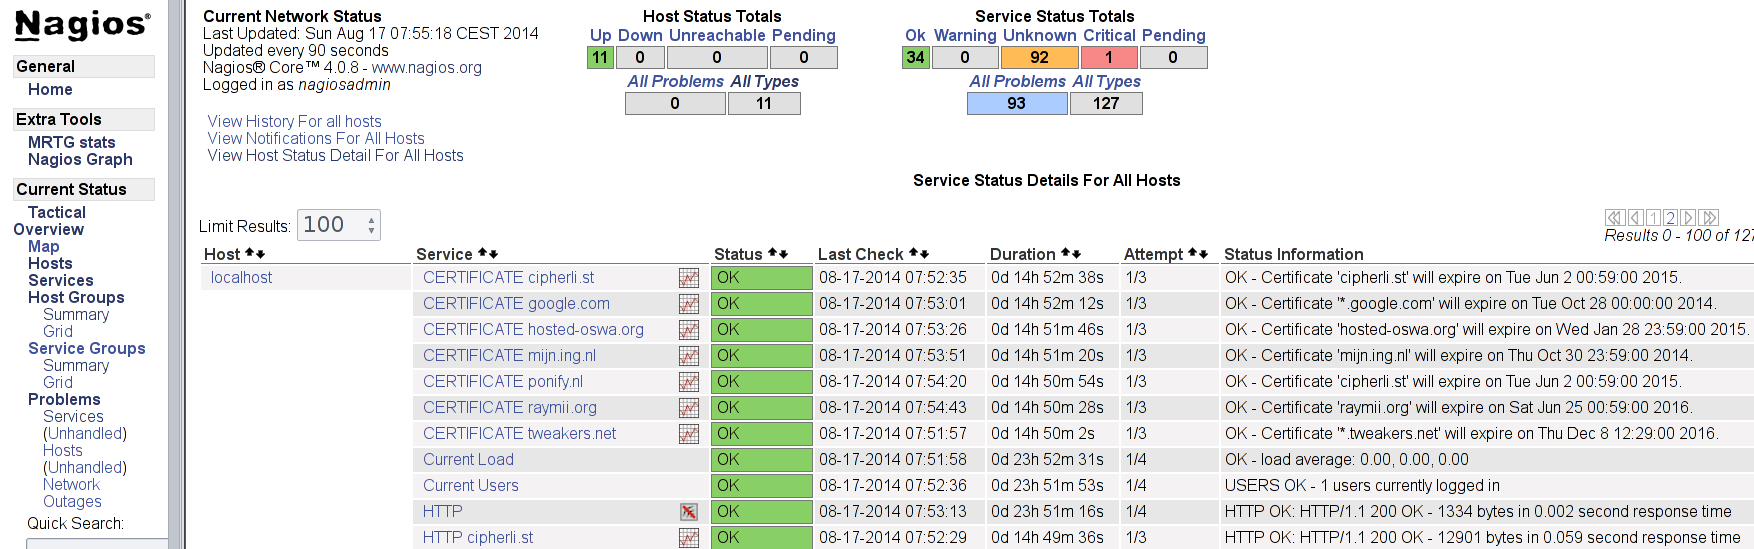
![Nagios 4][1]
This is a guide on installing the latest Nagios Core (4.2.1) on Ubuntu 12.04 and
14.04. Nagios is an open source computer system monitoring, network monitoring
and infrastructure monitoring software application. Nagios offers monitoring and
alerting services for servers, switches, applications, and services. It alerts
the users when things go wrong and alerts them a second time when the problem
has been resolved. The version in the Ubuntu 12.04 repositories is quite old, it
is still the in the 3 branch. This guide helps to fix that by using the latest
Nagios version. We also install Nagiosgraph, a plugin for Nagios which gives you
graps of the metrics.
<p class="ad"> <b>Recently I removed all Google Ads from this site due to their invasive tracking, as well as Google Analytics. Please, if you found this content useful, consider a small donation using any of the options below:</b><br><br> <a href="
https://leafnode.nl">I'm developing an open source monitoring app called Leaf Node Monitoring, for windows, linux & android. Go check it out!</a><br><br> <a href="
https://github.com/sponsors/RaymiiOrg/">Consider sponsoring me on Github. It means the world to me if you show your appreciation and you'll help pay the server costs.</a><br><br> <a href="
https://www.digitalocean.com/?refcode=7435ae6b8212">You can also sponsor me by getting a Digital Ocean VPS. With this referral link you'll get $100 credit for 60 days. </a><br><br> </p>
You can find more information about Nagios on the official website: [
http://ww
w.nagios.org/projects/nagioscore][3].
The description of Nagios Core from their website:
Nagios Core is the monitoring and alerting engine that serves as the
primary application around which hundreds of Nagios projects are built. It
serves as the basic event scheduler, event processor, and alert manager
for elements that are monitored. It features several APIs that are used to
extend its capabilities to perform additional tasks, is implemented as a
daemon written in C for performance reasons, and is designed to run native
on Linux/*nix systems.
### Contents
We are going to do the following:
* Install required packages
* Create the Nagios user
* Download and Compile Nagios Core
* Download and Compile the Nagios Plugins
* Download and Compile NRPE
* Setup the upstart script
* Set up Apache
* Install NagiosGraph
* Configure MRTG
At the end of this tutorial you will have a fully up to date Nagios Core
installation, with the latest plugins, the latest NRPE, the webinterface set up
with authentication and ssl, Nagios Graph integrated and MRTG installed to
monitor the health of Nagios.
This was written and tested on Ubuntu 12.04 and 14.04, both 32 and 64 bit.
### Whats new in Nagios Core 4?
**Major performance increases** :
* Core Workers - Core workers are lightweight processes whose only job is to perform checks. Because they are smaller they spawn much more quickly than the the old process which forked the full Nagios Core. In addition, they communicate with the main Nagios Core process using in-memory techniques, eliminating the disk I/O latencies that could previously slow things down, especially in large installations.
* Configuration Verification - Configuration verification has been improved so that each configuration item is verified only once. Previously configuration verification was an O(n2) operation.
* Event Queue - The event queue now uses a data structure that has O(log n) insertion times versus the O(n) insertion time previously. This means that inserting events into the queue uses much less CPU than in Nagios Core 3.
**Other nice changes** :
* The host address attribute is now optional. The address attribute is set to the host name when it is absent. Most configurations set the host name attribute to the DNS host name making the address attribute redundant.
* Both hosts and services now support an hourly value attribute. The hourly value attribute is intended to represent the value of a host or service to an organization and is used by the new minimum value contact attribute.
* Services now support a parents attribute. A service parent performs a function similar to host parents and can be used in place of service dependencies in simple circumstances.
**No more embedded perl** :
* Embedded Perl - Embedded Perl has historically been the least tested and the most problem prone part of Nagios Core. A significant part of the issue is that there are so many versions of Perl available. The performance enhancements provided by the new worker process architecture make up for any performance loss due to the removal of embeddd Perl. In addition, the worker process architecture makes possible the implementation of a special purpose worker to persistently load and run Perl plugins. The following configuration variables that were related to embedded Perl have been obsoleted: use _embedded_ perl _implicitly, enable_ embedded _perl, p1_ file.
[See this page for the full listing of new stuff in Nagios 4][4]
### Note about currently installed Nagios versions
Make sure you remove all currently installed Nagios versions and packages.
Better yet, start on a new empty server/vm.
### Note about the plugins and NRPE
We are compiling the latest version of the plugins and NRPE on the Nagios
Server. On the Nagios clients, you **do not have to do this**. The version of
NRPE in the Ubuntu repositories works with this newer Nagios version. The same
goes for the plugins.
### Note about packages and checkinstall
We are using checkinstall here to create a debian package of the source we
compile. I do this because it gives more flexibility in managing the software
afterwards. Upgrading or uninstalling the packages is easier than removing all
the things make install placed. Furthermore, it makes it more clear for other
administrators which software is installed.
If you for example want to upgrade Nagios when it was installed via this
tutorial with checkinstall, repeat the tutorial with only the version number
changed.
### Install required packages
Install the packages required for compilation, apache and mail functionality:
apt-get install apache2 libapache2-mod-php5 build-essential libgd2-xpm-dev
libssl-dev sendmail-bin sendmail heirloom-mailx wget apache2-utils curl
daemon apt-file libnet-snmp-perl libperl5.14 libpq5 libradius1 libsensors4
libsnmp-base libtalloc2 libtdb1 libwbclient0 samba-common samba-common-bin
smbclient snmp whois mrtg libmysqlclient15-dev libcgi-pm-perl librrds-perl
libgd-gd2-perl
### Create the Nagios user
Nagios runs as its own user and has its own groups. We need to create this user
and groups. We also make sure the user Apache runs as can access the Nagios
files by adding the www-data user to the nagios groups.
groupadd -g 3000 nagios
groupadd -g 3001 nagcmd
useradd -u 3000 -g nagios -G nagcmd -d /usr/local/nagios -c 'Nagios Admin' nagios
adduser www-data nagcmd
### Download and Compile Nagios Core
If necessary, create `/usr/local/src/nagios4`:
mkdir -p /usr/local/src/nagios4
cd into `/usr/local/src/nagios4`:
cd /usr/local/src/nagios4
(I like to keep my source code and compilation files in one place).
Use wget to download the latest Nagios Core from sourceforge:
wget
http://prdownloads.sourceforge.net/sourceforge/nagios/nagios-4.2.1.tar.gz
Extract it:
tar xf nagios-4.2.1.tar.gz
cd nagios-4.2.1
Create a few folders:
mkdir -p /usr/local/nagios/share/{stylesheets,images}
Now start the compilation process. First configure:
./configure --prefix=/usr/local/nagios --with-nagios-user=nagios --with-
./nagios-group=nagios --with-command-user=nagios --with-command-
./group=nagcmd
Output should look like this:
General Options:
-------------------------
Nagios executable: nagios
Nagios user/group: nagios,nagios
Command user/group: nagios,nagcmd
Event Broker: yes
Install ${prefix}: /usr/local/nagios
Install ${includedir}: /usr/local/nagios/include/nagios
Lock file: ${prefix}/var/nagios.lock
Check result directory: ${prefix}/var/spool/checkresults
Init directory: /etc/init.d
Apache conf.d directory: /etc/apache2/conf.d
Mail program: /usr/bin/mail
Host OS: linux-gnu
Web Interface Options:
------------------------
HTML URL:
http://localhost/nagios/
CGI URL:
http://localhost/nagios/cgi-bin/
Traceroute (used by WAP): /usr/sbin/traceroute
Review the options above for accuracy. If they look okay,
type 'make all' to compile the main program and CGIs.
Then the make process:
make all
Then the use checkinstall, for all the parts:
# This installs the main program, CGIs, and HTML files
checkinstall
In the depends section of the package, make sure to add `libc6, perl`. Name the
package `nagios4` and give it the correct version, namely `4.2.1`. Repeat for
all following packages created.
# This installs the init script in /etc/init.d
checkinstall --pkgname=nagios-init make install-init
# This installs *SAMPLE* config files in /usr/local/nagios/etc
checkinstall --pkgname=nagios-config make install-config
#This installs and configures permissions on the directory for holding the external command file
checkinstall --pkgname=nagios-commandmode make install-commandmode
# This installs the Apache config file for the Nagios web interface
checkinstall --pkgname=nagios-webconf make install-webconf
The above command fails on Ubuntu 14.04:
/usr/bin/install -c -m 644 sample-config/httpd.conf /etc/httpd/conf.d/nagios.conf
/usr/bin/install: cannot create regular file '/etc/httpd/conf.d/nagios.conf': No such file or directory
make: *** [install-webconf] Error 1
Execute it manually with the correct paths:
/usr/bin/install -c -m 644 sample-config/httpd.conf /etc/apache2/conf-available/nagios.conf
ln -s /etc/apache2/conf-available/nagios.conf /etc/apache2/conf-enabled/nagios.conf
Continue on:
# This installs the Exfoliation theme for the Nagios web interface
checkinstall --install=no --pkgname=nagios-exfoliation make install-exfoliation
dpkg --force-overwrite -i nagios-exfoliation*.deb
If this all goes well, we can continue to the next part.
### Download and Compile the Nagios Plugins
Same as above. First create the right folders:
mkdir -p /usr/local/src/nagios-plugins
cd /usr/local/src/nagios-plugins
Download the files and untar them:
wget
https://www.nagios-plugins.org/download/nagios-plugins-2.1.2.tar.gz
tar -xf nagios-plugins-2.1.2.tar.gz
cd nagios-plugins-2.1.2
Start the compile process:
./configure --with-nagios-user=nagios --with-nagios-group=nagios --with-openssl=/usr/bin/openssl --enable-perl-modules --enable-libtap
Then the make and make install:
make
checkinstall
Here again, make sure to set `libc6, perl` as dependencies, name it `nagios-
plugins` and give it the correct version (`2.1.2)`.
This should also go fine. Continue on to NRPE.
### Download and Compile NRPE
NRPE allows you to remotely execute Nagios plugins on other Linux/Unix machines. This allows you to monitor remote machine metrics (disk usage, CPU load, etc.). NRPE can also communicate with some of the Windows agent addons, so you can execute scripts and check metrics on remote Windows machines as well.
Same steps as above. First create the right folders:
mkdir -p /usr/local/src/nrpe
cd /usr/local/src/nrpe
Download the files and extract:
wget
http://kent.dl.sourceforge.net/project/nagios/nrpe-2.x/nrpe-2.15/nrpe-2.15.tar.gz
tar -xf nrpe-2.15.tar.gz
cd nrpe-2.15
Because of [an issue with the openssl library folder][5] we need to use another
path than `/usr/lib`:
./configure --with-ssl=/usr/bin/openssl --with-ssl-lib=/usr/lib/x86_64-linux-gnu
(If you run a 32 bit installation of Ubuntu you can find the right path using
(this command: `apt-file search libssl | grep libssl-dev`. You might need to
(install `apt-file`.)
Now make and make install:
make all
checkinstall
Same thing as above, require `libc6, perl` in the dependencies, name it
correctly (`nrpe`) and give it the right version in checkinstall (`2.15`).
That part also finished. Continue on.
### Setup the upstart script
The current init script which comes with Nagios Core 4.2.1 does not work with
Ubuntu 12.1.24. See this stackoverflow topic:
[
http://stackoverflow.com/questions/19606049/nagios-4-cant-open-etc-
rc-d-init-d-functions][6].
The fixes in that topic and on the Nagios forum did not work for me, so I wrote
a very simple upstart script.
Place it in `/etc/init/nagios.conf`:
# nagios - monitoriong system
# by
https://raymii.org
description "nagios monitoring system"
start on virtual-filesystems
stop on runlevel [06]
respawn
respawn limit 5 30
limit nofile 65550 65550
chdir /usr/local/nagios/
setuid nagios
setgid nagios
console log
script
exec bin/nagios etc/nagios.cfg
end script
Don't forget to remove the init script:
mv /etc/init.d/nagios /var/backups/nagios.init
### Set up Apache
First we set up a user account for the new nagios user:
htpasswd -c /usr/local/nagios/etc/htpasswd.users nagiosadmin
chown nagios:nagcmd /usr/local/nagios/etc/htpasswd.users
Then we create a certificate. This is a self signed one, you can also request a
certificate at a provider such as Digicert or Verisign.
mkdir /etc/apache2/ssl
cd /etc/apache2/ssl
a2enmod ssl
openssl req -x509 -nodes -days 365 -newkey rsa:4096 -out nagios.pem -keyout nagios.key
We also create a folder for nagios under `/var/www`:
mkdir -p /var/www/nagios4/
chown www-data:www-data /var/www/nagios4
Create some symlinks:
ln -s /usr/local/src/nagios4/nagios-4.2.1/contrib/exfoliation/images/favicon.ico /var/www/favicon.ico
Set up a vhost for Nagios. The below file can be used on Ubuntu 12.04. Place it
in `/etc/apache2/sites-available/nagios.conf`:
<VirtualHost *:443>
ServerAdmin
[email protected]
ServerName nagios.example.org
DocumentRoot /var/www/nagios
<Directory />
Options FollowSymLinks
AllowOverride None
</Directory>
<Directory /var/www/nagios>
Options -Indexes FollowSymLinks MultiViews
AllowOverride All
Order allow,deny
allow from all
</Directory>
SSLEngine On
SSLCertificateFile /etc/apache2/ssl/nagios.pem
SSLCertificateKeyFile /etc/apache2/ssl/nagios.key
</VirtualHost>
On Ubuntu 14.04 the apache version was changed from 2.2 to 2.4 so we need a
different config file:
<VirtualHost *:443>
ServerAdmin
[email protected]
ServerName nagios.example.org
DocumentRoot /var/www/nagios
<Directory />
Options +FollowSymLinks
AllowOverride None
</Directory>
<Directory /var/www/nagios>
Options -Indexes +FollowSymLinks +MultiViews
AllowOverride All
Require all granted
</Directory>
SSLEngine On
SSLCertificateFile /etc/apache2/ssl/nagios.pem
SSLCertificateKeyFile /etc/apache2/ssl/nagios.key
</VirtualHost>
Remember to replace `example.org` with your domain.
On Ubuntu 14.04 we also need to enable the cgi module, otherwise Nagios will say
the process is not running, and viewing cgi files results in downloading them:
a2enmod cgi
Disable the default vhost:
a2dissite default
It might be named `000-default` instead of `default`.
Enable the vhost:
a2ensite nagios # or nagios.conf
Restart apache:
/etc/init.d/apache2 restart
Now we are finished with the installation. Read on for some tweaks I like to
make.
### Tweaks
I like to have my config files in `/etc/nagios4/conf.d`. To do that, we create a
symlink first:
ln -s /usr/local/nagios/etc/ /etc/nagios4
Then the `conf.d` folder:
mkdir /etc/nagios4/conf.d
Then add this to `/etc/nagios4/nagios.cfg`
cfg_dir=/etc/nagios4/conf.d/
I also like to separate my config in directories like so:
[lstree][7]
/etc/nagios4/conf.d
.
|-contacts
|-hostgroups
|-hosts
|-servicegroups
|-services
|-templates
|-timeperiods
Create it like this:
mkdir -p /etc/nagios4/conf.d/{hosts,services,timeperiods,templates,hostgroups,servicegroups,contacts}
Remember to restart Nagios when you are finished:
service nagios restart
And the nagios is accessible at
https://example.org/nagios, with username
`nagiosadmin` and your chosen password.
### Nagios Graph
Create a folder for the source:
mkdir -p /usr/local/src/nagiosgraph/
cd /usr/local/src/nagiosgraph/
Download the latest version:
wget
http://downloads.sourceforge.net/project/nagiosgraph/nagiosgraph/1.5.2/nagiosgraph-1.5.2.tar.gz
Extract it:
tar -xf nagiosgraph-1.5.2.tar.gz
Move in to the folder:
cd nagiosgraph-1.5.2
Check that we have all the dependencies installed:
./install.pl --check-prereq
Example output:
checking required PERL modules
Carp...1.29
CGI...3.64
Data::Dumper...2.145
Digest::MD5...2.52
File::Basename...2.84
File::Find...1.23
MIME::Base64...3.13
POSIX...1.32
RRDs...1.4007
Time::HiRes...1.9725
checking optional PERL modules
GD...2.46
checking nagios installation
found nagios exectuable at /usr/local/nagios/bin/nagios
checking web server installation
found apache executable at /usr/sbin/apache2
found apache init script at /etc/init.d/apache2
Start the installation:
./install.pl --layout standalone --prefix /usr/local/nagiosgraph
Give the default answer to all the questions except the below one:
Modify the Nagios configuration? [n] y
Path of Nagios commands file? /usr/local/nagios/etc/objects/commands.cfg
Modify the Apache configuration? [n] y
If you are on Ubuntu 14.04, change the Apache configuration because the default
is for Apache 2.2:
Edit the following file:
vim /usr/local/nagiosgraph/etc/nagiosgraph-apache.conf
Change it to:
# enable nagiosgraph CGI scripts
ScriptAlias /nagiosgraph/cgi-bin "/usr/local/nagiosgraph/cgi"
<Directory "/usr/local/nagiosgraph/cgi">
Options ExecCGI
AllowOverride None
Require all granted
</Directory>
# enable nagiosgraph CSS and JavaScript
Alias /nagiosgraph "/usr/local/nagiosgraph/share"
<Directory "/usr/local/nagiosgraph/share">
Options None
AllowOverride None
Require all granted
</Directory>
Restart Nagios and Apache:
service nagios restart
service apache2 restart
You can now view the graphs at `
https://example.org/nagiosgraph/cgi-
bin/show.cgi`.
We can integrate these graphs into Nagios with a little hack. Nagios supports
`notes_url` and `action_url`. These can be put per host/service in the Nagios
config and allow for a link to a internal knowledge base article or a procedure
page or whatever for that host.
We can also place a javascript url to the graphs there. Place this inside a
service check:
action_url /nagiosgraph/cgi-bin/show.cgi?host=$HOSTNAME$&service=$SERVICEDESC$&geom=1000x200' onMouseOver='showGraphPopup(this)' onMouseOut='hideGraphPopup()' rel='/nagiosgraph/cgi-bin/showgraph.cgi?host=$HOSTNAME$&service=$SERVICEDESC$
For example, the Load of the system:
define service {
use local-service
host_name localhost
service_description Load
check_command check_local_load!5.0,4.0,3.0!10.0,6.0,4.0
action_url /nagiosgraph/cgi-bin/show.cgi?host=$HOSTNAME$&service=$SERVICEDESC$&geom=1000x200' onMouseOver='showGraphPopup(this)' onMouseOut='hideGraphPopup()' rel='/nagiosgraph/cgi-bin/showgraph.cgi?host=$HOSTNAME$&service=$SERVICEDESC$
}
For the ping check you can show both RTA and packet loss:
define service {
use local-service
host_name localhost
service_description PING
check_command check_ping!100.0,20%!500.0,60%
action_url /nagiosgraph/cgi-bin/show.cgi?host=$HOSTNAME$&service=$SERVICEDESC$&db=pl,data&db=pl,warn&db=pl,crit&geom=1000x200' onMouseOver='showGraphPopup(this)' onMouseOut='hideGraphPopup()' rel='/nagiosgraph/cgi-bin/showgraph.cgi?host=$HOSTNAME$&service=$SERVICEDESC$&db=pl,data&db=pl,warn&db=pl,crit
notes_url /nagiosgraph/cgi-bin/show.cgi?host=$HOSTNAME$&service=$SERVICEDESC$&db=rta,data&db=rta,warn&db=rta,crit&geom=1000x200' onMouseOver='showGraphPopup(this)' onMouseOut='hideGraphPopup()' rel='/nagiosgraph/cgi-bin/showgraph.cgi?host=$HOSTNAME$&service=$SERVICEDESC$&db=rta,data&db=rta,warn&db=rta,crit
}
We need to include the Nagios Graph Javascript in Nagios to make sure the
mouseover works. Edit or create the following file:
vim /usr/local/nagios/share/ssi/common-header.ssi
Place the following in there:
script type="text/javascript" src="/nagiosgraph/nagiosgraph.js"></script
Now save and reload Nagios:
service nagios restart
We are going to add a link to here to the menu, but first we'll configure MRTG.
### MRTG
We are going to use MRTG to create some information about how Nagios is running.
It shows you stats about how many check run and how long they take. This gives
you insight in your monitoring system.
Copy the included configuration from Nagios:
cp /usr/local/src/nagios4/nagios-4.2.1/sample-config/mrtg.cfg /usr/local/nagios/etc/
Create a folder for the graphs and files:
mkdir -p /usr/local/nagios/share/stats
Configure MRTG to use this folder:
vim /usr/local/nagios/etc/mrtg.cfg
Add the following at the top of the file:
WorkDir: /usr/local/nagios/share/stats
Do the initial run:
env LANG=C /usr/bin/mrtg /usr/local/nagios/etc/mrtg.cfg
Create the HTML pages:
/usr/bin/indexmaker /usr/local/nagios/etc/mrtg.cfg --output=/usr/local/nagios/share/stats/index.html
Finally create a cron job to run MRTG every 5 minutes:
vim /etc/cron.d/mrtg-nagios
Add the following:
*/5 * * * * root env LANG=C /usr/bin/mrtg /usr/local/nagios/etc/mrtg.cfg
You can now navigate to `
https://example.org/nagios/stats/` to see the graphs.
### Menu
Last but not least we'll add two links to the Nagios menu to these new tools.
Edit the sidebar file:
vim /usr/local/nagios/share/side.php
And add the following somewhere in the menu:
<div class="navsection">
<div class="navsectiontitle">Extra Tools</div>
<div class="navsectionlinks">
<ul class="navsectionlinks">
<li><a href="/nagios/stats" target="<?php echo $link_target;?>">MRTG stats</a></li>
<li><a href="/nagiosgraph/cgi-bin/show.cgi" target="<?php echo $link_target;?>">Nagios Graph</a></li>
</ul>
</div>
</div>
</div>
Save and reload Nagios. You can now start to configure the clients and enjoy
your awesome Nagios.
[1]:
https://raymii.org/s/inc/img/nagios4.0.8.png
[2]:
https://www.digitalocean.com/?refcode=7435ae6b8212
[3]:
http://www.nagios.org/projects/nagioscore
[4]:
http://nagios.sourceforge.n%0Aet/docs/nagioscore/4/en/whatsnew.html
[5]:
http://askubuntu.com/questions/133184/nagios-nrpe-installation-errorconfigure-error-cannot-find-ssl-libraries
[6]:
http://stackoverflow.com/questions/19606049/nagios-4%0A-cant-open-etc-rc-d-init-d-functions
[7]:
http://gnuworldorder.info/shownotes/lstree.txt
---
License:
All the text on this website is free as in freedom unless stated otherwise.
This means you can use it in any way you want, you can copy it, change it
the way you like and republish it, as long as you release the (modified)
content under the same license to give others the same freedoms you've got
and place my name and a link to this site with the article as source.
This site uses Google Analytics for statistics and Google Adwords for
advertisements. You are tracked and Google knows everything about you.
Use an adblocker like ublock-origin if you don't want it.
All the code on this website is licensed under the GNU GPL v3 license
unless already licensed under a license which does not allows this form
of licensing or if another license is stated on that page / in that software:
This program is free software: you can redistribute it and/or modify
it under the terms of the GNU General Public License as published by
the Free Software Foundation, either version 3 of the License, or
(at your option) any later version.
This program is distributed in the hope that it will be useful,
but WITHOUT ANY WARRANTY; without even the implied warranty of
MERCHANTABILITY or FITNESS FOR A PARTICULAR PURPOSE. See the
GNU General Public License for more details.
You should have received a copy of the GNU General Public License
along with this program. If not, see <
http://www.gnu.org/licenses/>.
Just to be clear, the information on this website is for meant for educational
purposes and you use it at your own risk. I do not take responsibility if you
screw something up. Use common sense, do not 'rm -rf /' as root for example.
If you have any questions then do not hesitate to contact me.
See
https://raymii.org/s/static/About.html for details.