This is a text-only version of the following page on
https://raymii.org:
---
Title : Build a FreeBSD 11.0-release Openstack Image with bsd-cloudinit
Author : Remy van Elst
Date : 14-11-2016
URL :
https://raymii.org/s/tutorials/FreeBSD_11.0-release_Openstack_Image.html
Format : Markdown/HTML
---
We are going to prepare a FreeBSD image for Openstack deployment. We do this by
creating a FreeBSD 11.0-RELEASE instance, installing it and converting it using
[bsd-cloudinit][1]. We'll use the [CloudVPS][2] public Openstack cloud for this.
Create an account there and install the Openstack command line tools, like
`nova`, `cinder` and `glance`.
A FreeBSD image with Cloud Init will automatically resize the disk to the size
of the flavor and it will add your SSH key right at boot. You can use [Cloud
Config][3] to execute [a script at first boot][4], for example, to bootstrap
your system into Puppet or Ansible. If you [use Ansible][5] to manage OpenStack
instances you can integrate it without manually logging in or doing anything
manually.
You can see all my [Openstack related articles here][6]. For example, how to use
[Duplicity to create Encrypted backups to the Openstack Swift Object Store][7]
<p class="ad"> <b>Recently I removed all Google Ads from this site due to their invasive tracking, as well as Google Analytics. Please, if you found this content useful, consider a small donation using any of the options below:</b><br><br> <a href="
https://leafnode.nl">I'm developing an open source monitoring app called Leaf Node Monitoring, for windows, linux & android. Go check it out!</a><br><br> <a href="
https://github.com/sponsors/RaymiiOrg/">Consider sponsoring me on Github. It means the world to me if you show your appreciation and you'll help pay the server costs.</a><br><br> <a href="
https://www.digitalocean.com/?refcode=7435ae6b8212">You can also sponsor me by getting a Digital Ocean VPS. With this referral link you'll get $100 credit for 60 days. </a><br><br> </p>
This tutorial is available for:
* [FreeBSD 10.0-RELEASE.][9]
* [FreeBSD 10.1-RELEASE.][10]
* [FreeBSD 10.3-RELEASE.][11]
* [FreeBSD 11.0-RELEASE.][12]
### Command Line tools
Make sure you have the Openstack command line tools installed. Follow the
official openstack guide [here][13]. If you have `pip` installed you can use
that to install the tools:
pip install python-novaclient
pip install python-cinderclient
pip install python-glanceclient
pip install python-keystoneclient
pip install python-neutronclient
pip install python-swiftclient
Save yourself some time and create a file named `computerc` with the below
contents:
export OS_AUTH_URL="
https://identity.stack.cloudvps.com/v2.0"
export OS_TENANT_NAME="<tenant name>"
export OS_USERNAME="<username>"
export OS_PASSWORD="<password>"
export OS_TENANT_ID="<tenant id>"
When you are going to do stuff with the Openstack command line clients, load
this file:
source computerc
That way, your authentication data are loaded and you don't have to give
parameters like `-os-username` and such.
### Openstack Overview
Openstack is a datacenter virtualization plaform consisting out of many
different tools and services. For this tutorial it is important to know the
following ones.
#### Compute (Nova)
This is the virtualization service. It works with a hypervisor to create and
manage virtual machines. You can create a VM based on a specific "Flavour",
which is just a definition of specs like disk, cpu and ram.
#### Block Storage (Cinder)
This is the service which makes block devices (volumes) available to services. A
flavour can not be changed, just resized. If you want extra storage you need to
create a volume, attach it to the VM and mount it there for use.
#### Images (Glance)
This is the service which holds all the images. Images can be used to boot a VM
from. Images can be prepared with tools like `cloud-init` to make them behave
better in a cloud environment, for example, setting an SSH key or password at
boot.
#### ISO Installation
Booting from an ISO with a disk attached is quite tricky in Openstack. This
FreeBSD tutorial can be used for any ISO which needs to be installed. The
process is as following:
* Boot an instance from an ISO image with an extra volume attached.
* Install the software on that volume.
* Stop the install VM.
* Start a new VM with the volume as root disk. (To test, prepare and configure the installation).
* Stop and destory that VM.
* Convert the volume to an image.
You then have an image with your own installation available to boot new vm's
from.
Lets get started.
### Upload the ISO to glance
Start by uploading the FreeBSD 11.0-RELEASE ISO to Openstack using the Glance
client:
glance image-create --name "FreeBSD-11.0-RELEASE-amd64-dvd1.iso" --disk-format iso --container-format bare --copy-from "
ftp://ftp.freebsd.org/pub/FreeBSD/releases/amd64/amd64/ISO-IMAGES/11.0/FreeBSD-11.0-RELEASE-amd64-bootonly.iso"
Note that we download the 300 MB boot only image instead of the full DVD. You
can also use that, but it will take longer to download/upload.
If your Openstack provider does not support the `--copy-from` parameter you will
have to download the ISO yourself:
wget
ftp://ftp.freebsd.org/pub/FreeBSD/releases/amd64/amd64/ISO-IMAGES/11.0/FreeBSD-11.0-RELEASE-amd64-bootonly.iso
And upload it as an image. That can take a while:
glance image-create --file Downloads/FreeBSD-11.0-RELEASE-amd64-dvd1.iso --name "FreeBSD-11.0-RELEASE-amd64-bootonlyiso" --disk-format iso --container-format bare --progress
The result of the glance command should be something like below:
+------------------+-----------------------------------------+
| Property | Value |
+------------------+-----------------------------------------+
| checksum | f0f49e5d50195ef3a70a5aa7b73a8d71 |
| container_format | bare |
| created_at | 2016-11-14T09:06:39 |
| deleted | False |
| deleted_at | None |
| disk_format | iso |
| id | a7f36877-8dc5-4ae9-bcf4-a7484552a887 |
| is_public | False |
| min_disk | 0 |
| min_ram | 0 |
| name | FreeBSD-11.0-RELEASE-amd64-bootonly.iso |
| owner | e8[...]e4 |
| protected | False |
| size | 298821632 |
| status | active |
| updated_at | 2016-11-14T09:07:09 |
| virtual_size | None |
+------------------+-----------------------------------------+
Note down the ISO ID, in our case `5b74bee7-c05e-4102-9dd2-349dec4adee2`.
### Create the volume
Create the root volume for our FreeBSD preparation install:
cinder create --display-name "FreeBSD-11.0-root" --availability-zone=NL1 16
This creates an 16 GB volume, on which we will install FreeBSD. The result of
the command is like below:
+---------------------+--------------------------------------+
| Property | Value |
+---------------------+--------------------------------------+
| attachments | [] |
| availability_zone | NL1 |
| bootable | false |
| created_at | 2016-11-14T09:10:21.570845 |
| display_description | None |
| display_name | FreeBSD-11.0-root |
| encrypted | False |
| id | fc4d6110-6d21-4fa9-80c1-e6916d1c2daf |
| metadata | {} |
| size | 16 |
| snapshot_id | None |
| source_volid | None |
| status | creating |
| volume_type | None |
+---------------------+--------------------------------------+
Again, note down the ID, in our case `f00fdea0-37ea-4a0e-9a1d-403d39ce8320`.
### Boot a VM with an ISO and extra volume
Boot a new instance from the ISO, attaching the volume we just created as well:
nova boot --image <freebsd iso image id> --poll --flavor "Standard 1" --availability-zone NL1 --nic net-id=00000000-0000-0000-0000-000000000000 --block-device-mapping "vdb=<volume freebsd-10-root id>:::0" "FreeBSD-11.0-RELEASE-install"
* `--image` is the FreeBSD ISO image ID
* `--flavor` is the Openstack VM Flavour, this can be different at another Openstack provider
* `--availability-zone` is also Openstack provider specific. It is the datacenter/logic region where the VM starts. The volume needs to be in the same availability zone.
* `--nic net-id` is the Openstack network. In this case it is the CloudVPS public network.
* `--block-device-mapping` maps the volume we created as a second disk for the VM. The `:::0` makes sure it does not get deleted when the VM is terminated.
Your output will be like below:
+--------------------------------------+--------------------------------------------------------------------------------+
| Property | Value |
+--------------------------------------+--------------------------------------------------------------------------------+
| OS-DCF:diskConfig | MANUAL |
| OS-EXT-AZ:availability_zone | NL2 |
| OS-EXT-STS:power_state | 0 |
| OS-EXT-STS:task_state | scheduling |
| OS-EXT-STS:vm_state | building |
| OS-SRV-USG:launched_at | - |
| OS-SRV-USG:terminated_at | - |
| accessIPv4 | |
| config_drive | |
| created | 2016-11-14T09:11:09Z |
| flavor | Standard 1 (111) |
| hostId | |
| id | 7f399f7b-c96e-46c8-b70d-047783f7037d |
| image | FreeBSD-11.0-RELEASE-amd64-bootonly.iso (a7f36877-8dc5-4ae9-bcf4-a7484552a887) |
| key_name | - |
| metadata | {} |
| name | FreeBSD-11-install |
| os-extended-volumes:volumes_attached | [{"id": "fc4d6110-6d21-4fa9-80c1-e6916d1c2daf"}] |
| progress | 0 |
| security_groups | default |
| status | BUILD |
| tenant_id | e8[...]e4 |
| updated | 2016-11-14T09:11:10Z |
+--------------------------------------+--------------------------------------------------------------------------------+
Note down the ID like usual, in our case: `7f399f7b-c96e-46c8-b70d-
047783f7037d`.
### Install FreeBSD 11.0
Do a standard install of FreeBSD 10. Use the Openstack console to do that.
These are my simple install settings:
* default keymap
* hostname: freebsd.public.cloudvps.com
* Just lib32 and ports, no doc, games or src (If you have the bootonly DVD you need to configure networking (dhcp) to download the other packages. Settings are a below under `Network:`.)
* Manual Partition Layout:
* vtbd0 GPT
* vtbd0p1 64KB freebsd-boot (boot)
* vtbd0p2 16GB freebsd-ufs mountpoint / (root)
* The root partition must be the last partition on the drive so that it can expand at run time to the disk size that your instance type provides. Also note that bsd-cloudinit currently has a hard-coded bug/assumption that this is the second partition. This is also the reason we do not use ZFS-on-root, sadly.
* Root password P@ssw0rd
* Network:
* adapter: vtnet0
* ipv4: dhcp
* ipv6: slaac
* search: public.cloudvps.com
* UTC: no, timezone 8 EUROPE 34 NETHERLANDS
* Services at boot:
* sshd
* ntpd
* moused
* dumpd
* local_unbound
* System Hardening:
* This is up to you, but in my case everything is turned on:
* Hide processes running as [other users | other groups]
* Disable [reading kernel message buffer | proces debugging features] for unprivileged users
* Randomize the PID of newly created processes
* Insert stack guard page ahead of the growable segments
* Clean the /tmp filesystem on system startup
* Disable opening Syslogd network socket (disables remote logging)
* Disable Sendmail service
* Note that all of the above can still be changed later on.
* Extra users: no
* Exit, open a shell.
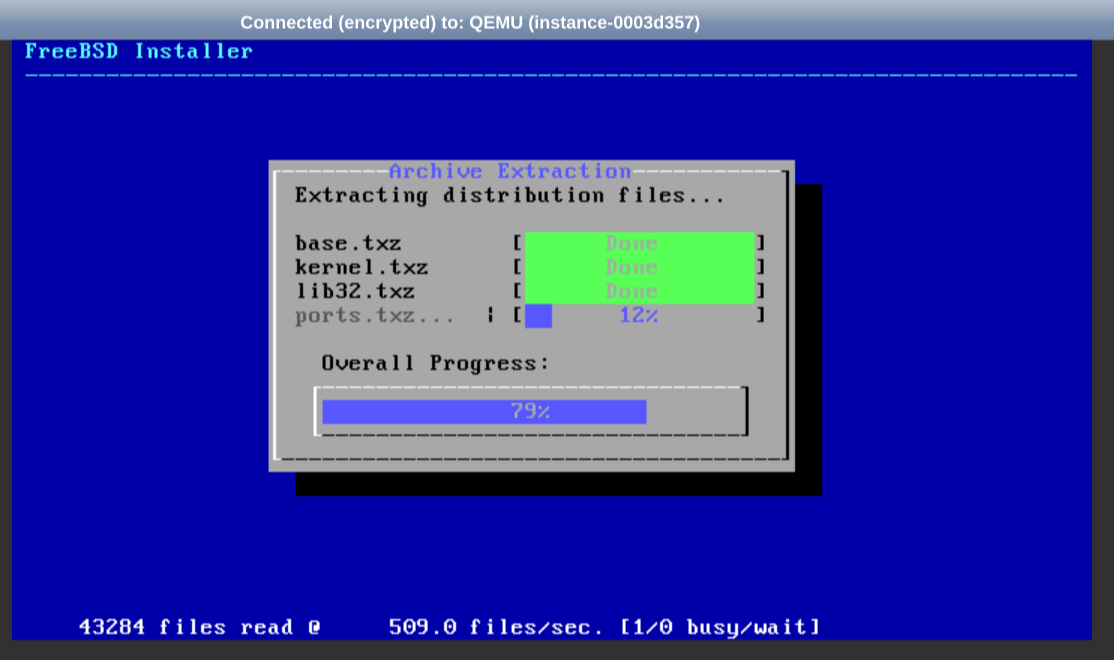
Below is a picture of the running installation:
![freebsdinstall][14]
### Stop the install VM
Shut the instance from FreeBSD using `shutdown -p now` and after that via nova:
nova stop <install vm id>
Detach the volume:
nova volume-detach <install vm id> <install root volume id>
When the volume is detached you can delete the installation VM. We don't need it
anymore:
nova delete <install vm id>
The volume will not be destroyed when the VM is deleted.
### Boot a new VM with the volume as root disk
Boot a new instance with the volume freebsd was installed on as the root disk:
nova boot --block-device source=volume,id=<root volume id>,dest=volume,shutdown=preserve,bootindex=0 --poll --flavor "Standard 1" --availability-zone NL1 --nic net-id=00000000-0000-0000-0000-000000000000 --key-name <ssh key> FreeBSD-11.0-RELEASE-configure
Here we use `--block-device` to specify that the only disk attached to the
instance should be the volume `source=volume,id=<volume id>`. This can also be
an image as source. The destination is also a volume, this can also be local.
If you have more block devices specified here you should make sure there is only
1 with the `bootindex 0`, that is the disk the VM will try to boot from.
### Prepare FreeBSD for Cloud Init
If you get a mountroot error from the bootloader, enter the following:
ufs:/dev/vtbd0p3.
Change `/etc/fstab` after the fact, change `ada0` to `vtbd0` for VirtIO support.
If you don't get an error then change nothing.
Bootstrap the packaging system (`pkg`) so we can install some stuff required for
`bsd-cloudinit`:
pkg
Enter y.
Install vim and py27-setuptools (for bsd-cloudinit):
pkg install vim-lite py27-setuptools ca_root_nss
The ca _root_ nss is required by fetch to do certificate validation.
### Login Users
By default cloudinit will create a user named `freebsd` which has sudo
privileges without password. However, if you want to enable root login directly,
you need to add your SSH key, enable root login and add some extra configuration
later on for cloud-init.
If you want root login, add your SSH key:
mkdir /root/.ssh
chmod 700 /root/.ssh
echo "ssh-rsa AAAA[...]
[email protected]" > /root/.ssh/authorized_keys
chmod 600 /root/.ssh/authorized_keys
Enable root login via ssh:
vim /etc/ssh/sshd_config
PermitRootLogin yes
### Expand root filesystem
Since [FreeBSD 10.2-RELEASE][15] there is an `rc` script which, when the file
`/firstboot` exists, expands the root filesystem to the full disk. While `bsd-
cloudinit` does this as well, if you don't need the whole `cloudinit` stack,
(when you use a static ssh key for example), you can `touch` that file to make
sure the disk is expanded at the first boot:
touch /firstboot
### bsd-cloudinit install
Install python modules for bsd-cloudinit:
rehash
easy_install eventlet
easy_install iso8601
Add the following to `/boot/loader.conf` to make sure the console works:
console="comconsole,vidconsole"
autoboot_delay="15"
This sets console output to go to the serial console, which is displayed by nova
consolelog, and the video console for sites with VNC or Spice configured.
Now do any other customizations you want to have in your image.
Do the bsd-cloudinit install:
fetch
https://raw.github.com/pellaeon/bsd-cloudinit-installer/master/installer.sh
chmod +x installer.sh
The default username will be `freebsd`, bsd-cloudinit will create it if it does
not exists. The freebsd user will also be able to `sudo` without a password by
default, `bsd-cloudinit` will handle that by default.
Before you start the installer, make sure you do any other configuration you
want. After the installer has started and you reboot, cloudinit will prepare the
vm for use.
Start the installer:
./installer.sh
Answer yes to the questions and remove the installer file afterwards:
rm installer.sh
Delete all history:
set history = 0
history -c
Zero out all the free space:
dd if=/dev/zero of=/bla
rm /bla
We do that so that the image compresses better later.
Turn the machine off:
shutdown -p now
Terminate the machine, otherwise you cannot detach the volume (`ERROR: Can't
detach root device volume (HTTP 403)`):
nova delete <id of freebsd-configure vm>
Convert the volume to an image:
cinder upload-to-image <freebsd-10-root volume id> FreeBSD-11.0-RELEASE-CloudInit
This might take a while.
Set the min-disk and min-ram requirements, plus some more properties for the
image:
glance image-update --min-disk 8 --min-ram 1024 --property architecture=x86_64 --property image_supports_keypair=true --property image_supports_password=true --property supported=false <id from the converted volume image>
If needed, make it public:
glance --name "UNSUPPORTED: FreeBSD-11.0-RELEASE" --is-public True <id from the converted volume image>
That's it. You are done and have a good workable freebsd image.
Boot a new instance from your newly created image:
nova boot --image <id from the converted volume image> --flavor "Standard 4" --availability-zone NL1 --nic net-id=00000000-0000-0000-0000-000000000000 --key-name <your ssh key> FreeBSD-11.0-RELEASE-cloudinit
When the instance has spawned you can login as the freebsd user,
freebsd@ipaddress.
### Compress the image
If your Openstack provider does not compress the images converted from volumes
you might need to do that yourself. You want to do that because storing 475 MB
costs you less qouta/money than 16 GB.
First, use glance to download the image:
glance image-download --file bsd.raw <freebsd image uuid>
Convert and compress the image to qcow2 with `qemu-img`:
qemu-img convert -c -f raw -O qcow2 bsd.raw bsd.qcow2
You will get the best compression if you've zero'd out the image as listed
above.
Upload this new smaller image to Openstack:
glance image-create --name FreeBSD-11.0 --disk-format qcow2 --container-format bare --min-disk 16 --min-ram 1024 --property architecture=x86_64 --property image_supports_keypair=true --property image_supports_password=true --property os_type=linux --property supported=false --file ./bsd.qcow2
In my case the converted volume was 16 GB and the compressed image was 475MB.
[If you like this article, consider sponsoring me by trying out a Digital Ocean
VPS. With this link you'll get a $5 VPS for 2 months free (as in, you get $10
credit). (referral link)][8]
[1]:
http://pellaeon.github.io/bsd-cloudinit/
[2]:
https://cloudvps.com
[3]:
https://www.digitalocean.com/community/tutorials/an-introduction-to-cloud-config-scripting
[4]:
https://raymii.org/s/tutorials/Automating_Openstack_with_Cloud_init_run_a_script_on_VMs_first_boot.html
[5]:
https://raymii.org/s/tutorials/Ansible_-_create_OpenStack_servers_with_os_server.html
[6]:
https://raymii.org/s/tags/openstack.html
[7]:
https://raymii.org/s/tutorials/Encrypted_Duplicity_Backups_to_Openstack_Swift_Objectstore.html
[8]:
https://www.digitalocean.com/?refcode=7435ae6b8212
[9]:
https://raymii.org/s/tutorials/FreeBSD_10.0-release_Openstack_Image.html
[10]:
https://raymii.org/s/tutorials/FreeBSD_10.1-release_Openstack_Image.html
[11]:
https://raymii.org/s/tutorials/FreeBSD_10.3-release_Openstack_Image.html
[12]:
https://raymii.org/s/tutorials/FreeBSD_11.0-release_Openstack_Image.html
[13]:
http://docs.openstack.org/user-guide/content/install_clients.html
[14]:
https://raymii.org/s/inc/img/freebsd-11-install-1.png
[15]:
https://www.freebsd.org/releases/10.2R/relnotes.html#userland-rc
---
License:
All the text on this website is free as in freedom unless stated otherwise.
This means you can use it in any way you want, you can copy it, change it
the way you like and republish it, as long as you release the (modified)
content under the same license to give others the same freedoms you've got
and place my name and a link to this site with the article as source.
This site uses Google Analytics for statistics and Google Adwords for
advertisements. You are tracked and Google knows everything about you.
Use an adblocker like ublock-origin if you don't want it.
All the code on this website is licensed under the GNU GPL v3 license
unless already licensed under a license which does not allows this form
of licensing or if another license is stated on that page / in that software:
This program is free software: you can redistribute it and/or modify
it under the terms of the GNU General Public License as published by
the Free Software Foundation, either version 3 of the License, or
(at your option) any later version.
This program is distributed in the hope that it will be useful,
but WITHOUT ANY WARRANTY; without even the implied warranty of
MERCHANTABILITY or FITNESS FOR A PARTICULAR PURPOSE. See the
GNU General Public License for more details.
You should have received a copy of the GNU General Public License
along with this program. If not, see <
http://www.gnu.org/licenses/>.
Just to be clear, the information on this website is for meant for educational
purposes and you use it at your own risk. I do not take responsibility if you
screw something up. Use common sense, do not 'rm -rf /' as root for example.
If you have any questions then do not hesitate to contact me.
See
https://raymii.org/s/static/About.html for details.