_______ ______ _______ _ _________
| ___ | | __ \ |\ /| | ____ \ | \ /| \__ __/
| | | | | | \ | | \ / | | | \/ | \ | | | |
| |___| | | | | | | | | | | |__ | \ | | | |
| ___ | | | | | | | | | | __) | |\ \| | | |
| | | | | | | | \ \_/ / | | | | \ | | |
| | | | | |__/ | \ / | |____/\ | | \ | | |
|/ \| |______/ \_/ |_______/ |/ \_) \_/
_______ _ _______ _ _ ________
| ____ ) | | ( ____ \ | | | \ /| | _____/
| |____|| | | | (____\/ | | | \ | | | ( ____
| __) | | (_____ ) | | | |\ \| | | | \_ )
| | \ \__ | | /\____) | | | | | \ | | (___) |
|/ \__/ |_| \_______) |_| |/ \ _) (_______)
______ /\ ______
/ __ // \\ __ \
| / / \ \ |
| | / /\ \ | |
| | / / \ \ | |
| | / / \ \ | |
| |/ / \ \| |
|// / \ \\|
/ / ________ \ \
/ //__________\\ \
/___\ /___\
"Learn what it means to be truly human"
---------------------------- - Advent Rising - -------------------------------
--------------------------- - FAQ/Walkthrough - ------------------------------
------------------------------------------------------------------------------
- - - - - Winner of the GameFAQs July, 2005 FAQ of the Month Contest - - - - -
------------------------------------------------------------------------------
******************************************************************************
* * * * * > This FAQ is dedicated to all the fans of Advent Rising < * * * * *
* * * * * * ------------------------------------------------------ * * * * * *
* * * * Some of the nicest and most supportive fans I have ever met. * * * *
******************************************************************************
System: Xbox
Written by: Berserker (aka. Berserker93, Kevin, or berserker_kev)
Started: May 20, 2005
Email:
[email protected]
This document (c) 2005 Kevin Hall
Advent Rising (c) 2005 Majesco Sales, Inc. All rights reserved.
-------------------
- Version History -
-------------------
Version 1.0 - (June 19, 2005) - Walkthrough is complete. I'm missing a few
objectives from the game, which will be added, hopefully, by the next update,
and I might add a bit more to the weapons and powers section. If you have any
questions, comments, or anything that you would like to add give me a
ring...er, send me an email to
[email protected]
Version 1.1 - (June 29, 2005) - Added Headcrab from Half-Life, an alternate
way to reach Mario Pipe 1, and the Little People Room to the Easter Eggs
subsection, a solution for gameplay problems under the Glitch Solution
subsection. Added "Teleport Punch" and "Roll" under the Powers subsection for
Melee and Jump respectively. Fixed a controller setup error with the driving
controls for the Scythe (thanks to the reader who emailed me ^_^;). Changed
"Seeker Warrior" to "Seeker Elite", since I finally saw the objective during
that boss fight. Also, there are a few minor grammar corrections and a few
more sites added to the Copyright section.
Version 1.2 - (July 9, 2005) - Added information about a glitch during the
boss fight at the end of chapter 5, and more elevator remedies (you know which
elevator ;)) to the walkthrough section. Also, Contest Icons section added to
the Extras section.
Version 1.3 - (July 24, 2005) - The "Morrowind Technique Revisited" was added
to the Framerate Problems subsection; this will help to rid your game of that
skippity Majesco screen at the beginning, and it has worked every time that I
have tried it. Be sure to check out my Advent Rising Game Script if you're
interested in some dialogue in the game; I added it to the list at the bottom.
The Special Thanks section was updated a bit. I have added a Contact Info
subsection in the Copyright and Special Thanks area, and a new rule that I
have been neglecting to put in the Copyright section was added. It has come
to my attention that a certain site is altering my FAQs on there site...you
know who you are, and I want it to stop. -_-
Version 1.4 - (August 22, 2005) - Added 3 pics for the location of the Week 1
Icon thanks to Yusaku along with a few minor corrections. Also added, "Switch
to Ethan as Saved Character (aka. The "Soma" bug)" to the Gameplay Problems
area under Glitch Solutions, "Crossed Lines: Scene 12" and "Pulling Strings
Scene 4" to the Cutscene Problems under Glitch Solutions, "A Way to See All
the Cutscenes" to the Cheats section.
Version 1.5 - (September 20, 2005) - Added the Advent Rising Staff Room easter
egg to the Extras section under Easter Eggs. Also, changed a few things here
and there.
Version 1.6 - (October 21, 2005) - Added a few things to the beginning of the
FAQ and the end. This is most likely the last update. I would like to give a
special thanks to all the people that emailed me!
************
- Sections -
************
Section I: Introduction
Section II: Characters
Section III: Controls
Section IV: Weapons and Powers
Section V: Walkthrough
A: Prologue - First Contact
B: Chapter 1 - Hostile Negotiation
C: Chapter 2 - Surface Tension
D: Chapter 3 - Extinction Agenda
E: Chapter 4 - The Awakening
F: Chapter 5 - Crossed Lines
G: Chapter 6 - Turning Tides
H: Epilogue - Pulling Strings
Section VI: Extras
A: Cheats
B: Contest Icons
C: Easter Eggs
D: Choices
E: Glitch Solutions
i: Framerate Problems
ii: Cutscene Problems
iii: Camera Problems
iv: Gameplay Problems
Section VII: Copyright and Special Thanks
A: Contact Info
------------------------------------------------------------------------------
SECTION I
______ /\ ______
/ __ // \\ __ \
| / / \ \ |
| | / /\ \ | |
| | / / \ \ | |
| | / / \ \ | |
| |/INTRODUCTION\| |
|// / \ \\|
/ / ________ \ \
/ //__________\\ \
/___\ /___\
Wow! It has been one heck of a ride for Advent Rising fans, especially the
more hardcore fans. The game has been in development for two years. It first
appeared at E3 2004 with a lackluster performance. The game was then delayed
another year to improve it based on the results. With all the numerous
delays, teaspoon previews, choppy video trailers and gameplay snippets, and a
total lack of information Advent Rising is finally upon us, and what a great
game it has turned out to be, despite some technical issues which will be
addressed later in this walkthrough.
This is my fifth walkthrough that I have done, and as before, I cannot
guarantee that it is 100% spoiler free (although I do try to avoid them) so
use it as a last resort. Please contact me if you have any questions,
comments, advice, or suggestions. My email address is
[email protected].
==================
- Brief Overview -
==================
(taken from www.adventtrilogy.com)
At the dawn of interstellar reasoning, as the first intelligent races took to
the stars and began to interact with each other, they discovered a common
thread - the legend of an ancient race that would one day "deliver" the
universe. This race was known as the Humans.
The Seekers alone held the key to the secret of the humans. Humanity did in
fact exist, and the Seekers were doing all that they could to eradicate them.
Under the guise of "benevolent explores" they spread methodically through out
the galaxy destroying all human life they came in contact with.
Consequently, the Seekers did in fact discover many new races and helped
introduce them into the galactic arena. This served the Seekers two fold. It
allowed them to constantly spread their influence and strengthen their
military and civic control of the galaxy, and it allowed them to retain and
magnify their image of philanthropic nobility.
The Aurelian culture was rich with tales of humanity. When they were
discovered by the Seekers many of their legends rekindled long dormant ideals
within the galactic senate.
With the added insight, knowledge, and technology that interstellar society
offered the Aurelian's, it was not long before the Seekers duplicity was
discovered. Enraged, the government formed a small covert faction within the
Aurelian military to gather as much information about Seeker operations as
possible. It was because of this group that Edumea, a small world inhabited by
humans, was first discovered and a rescue organized.
With the introduction into the galactic senate close at hand, and the promise
of power and wealth looming overhead, many governing Aurelian officials began
to doubt the plan to help the humans. They argued that if discovered they
would be completely destroyed by the Seekers. It was their opinion that in
order to save themselves and insure their place in the senate, their policy on
humanity should be to simply look the other way.
With growing dissention within the government it was feared that the Seekers
would discover the Aurelian's plans, and consequently discover the planet of
Edumea. Knowing this, the Aurelian head sent a small diplomatic force to
Edumea. The humans were to be warned of their plight and aided in any way
possible.
As initial steps are being taken toward healing the scars that warfare has
left on the battered Edumean civilization, the Aurelians arrive. A diplomatic
entourage is quickly formed by the newly established coalition government—a
dozen representatives of humanity to make this pivotal first contact with an
alien race. Ethan Wyeth, a world-renowned fighter pilot and war hero is the
obvious choice to pilot this vital assembly to first contact. Using his fame
and influence, he has his younger brother, Gideon (the player), assigned as
co-pilot for the mission. From earliest childhood, Ethan has often relied on
his brother's level-headedness and clear thinking to support him in
unpredictable situations, and this will be no exception.
------------------------------------------------------------------------------
SECTION II
______ /\ ______
/ __ // \\ __ \
| / / \ \ |
| | / /\ \ | |
| | / / \ \ | |
| | / / \ \ | |
| |/ CHARACTERS \| |
|// / \ \\|
/ / ________ \ \
/ //__________\\ \
/___\ /___\
(profiles taken from www.adventtrilogy.com)
**********
- HUMANS -
**********
Their myth can be found in every known civilization. A powerful, highly
intelligent race that will one day deliver the universe. They are known simply
as...Human.
----------------
- Gideon Wyeth -
----------------
Coming from a long line of fighting men, Gideon Wyeth was pressured to attend
Military Academy in his teens. There he proved himself second to none in
flight combat. His graduation was accelerated and he was able to fight in the
last year of the Independence war. His strategic brilliance helped him to rise
quickly in rank, and he found himself high up in intelligence circles when the
war ended. Under governmental pay he now assists the reestablishment of
antebellum prosperity to war-torn areas of the world.
---------------
- Ethan Wyeth -
---------------
Ethan Wyeth is recognized as the sole reason for the Federation's victory over
the allied nations. He is Edumea's most celebrated hero. In the years since
the war, his popularity has continued to increase and with extensive product
endorsements, books and movie deals he has turned his fame into a veritable
gold mine.
-----------------
- Olivia Morgan -
-----------------
Olivia, Gideon's fiancée, is strong willed, ambitious and uncommonly
intelligent. She is driven by the study of advanced theoretical physics. After
completing her graduate studies early at the age of 19 she was hired by the
Federation as part of an elite team of renowned physicists to begin
development on a new form of energy in an attempt to stabilize the devastated
lands where the war was fought. The project has recently begun a 6-month
testing phase on Luriam where she is currently stationed.
---------------
- Marin Steel -
---------------
Marin Steel is a smart, independent woman who has an insatiable thirst for
adventure. After becoming one of the most decorated pilots during the
Independence wars, she was hired as an executive pilot for a leading
contractor of the Federation military. This gives her the opportunity to fly,
test and use cutting edge military technology.
*************
- AURELIANS -
*************
Evolved from the sea, religion is at the heart of most every action for this
noble race of aquatic creatures. The Aurelians believe in the transcendence of
their race via the ancient teachers/protectors called Humans.
----------
- Kelehm -
----------
Kelehm is a ninth tier Aurelian Garghon, with enough experience and backing to
become the High Senator when Aurelia is admitted into the Galactic Senate.
Kelehm is the epitome of nobility, full of wisdom, strength and pride. He has
spent much of his life studying the mythology of humans, and has secretly
trained himself in human telekinetic arts.
----------
- Enorym -
----------
Enorym commands the elite Felidic Warriors, and is beloved of his troops and
known throughout the Aurelian Military not only for his bravery and strength
but also for his wisdom and integrity. Under the wings of Kelehm this popular
hero is fast becoming a force to be reckoned with in political circles as
well. Enorym's loyalty to Kelehm is only rivaled by his devotion to Aurelia.
***********
- SEEKERS -
***********
The Seekers see themselves as the zenith of evolution in the galaxy. Their
presumed superiority fuels an imperialistic nature. Under the guise of
benevolence, the Seekers "occupy" newly found alien races for a thousand years
ostensibly to advance them so they are fit to join the Galactic Senate.
However, their true purpose is to seek out and destroy humans.
---------------------
- Seeker Commanders -
---------------------
Seeker Commanders are highly trained and extremely smart military leaders.
They are all brilliant strategists and love the challenge of war. They loathe
humans and their seemingly pitiful weaknesses.
----------------
- Seeker Elite -
----------------
Elite Seeker Troops are the silent warriors whose mere presence has subdued
insurgence on countless worlds. They move unbelievably fast and are almost
perfectly accurate. The Elite are relentless hunters and are rightfully
feared.
-----------------------
- Seeker Shock Troops -
-----------------------
Seeker Heavy Shock Troops are some of the most formidable foes in the
universe. These extremely armored troops move slowly (for a Seeker), but what
they lack in speed they more than make up for in sheer firepower. Their
armament essentially turns them into a small tank. These troops are generally
used for support in human operations and serve as heavy hitting forward units
in larger military campaigns.
-------------------
- Seeker Scanners -
-------------------
Not much is known about the role of the Seeker Scanners. They are obviously
looking for something...
------------------------------------------------------------------------------
SECTION III
______ /\ ______
/ __ // \\ __ \
| / / \ \ |
| | / /\ \ | |
| | / / \ \ | |
| | / / \ \ | |
| |/ CONTROLS \| |
|// / \ \\|
/ / ________ \ \
/ //__________\\ \
/___\ /___\
(default setup)
===================
- Gideon Controls -
===================
------------------------------------------------------------
|Left analog |Move |
------------------------------------------------------------
|D-pad up |Power/Weapon Select Menu |
------------------------------------------------------------
|D-pad down |Power/Weapon Select Menu |
------------------------------------------------------------
|D-pad left |Power/Weapon Select Menu |
------------------------------------------------------------
|D-pad right |Power/Weapon Select Menu |
------------------------------------------------------------
|Right analog |Camera/Flick Targeting |
------------------------------------------------------------
|Start |Displays pause menu/Pauses Cutscene |
------------------------------------------------------------
|Back |First Person View |
------------------------------------------------------------
|L |Power/Fire Weapon (left hand) |
------------------------------------------------------------
|R |Power/Fire Weapon (right hand) |
------------------------------------------------------------
|Y |Reload/Pick up Weapon (right hand) |
------------------------------------------------------------
|A |Jump |
------------------------------------------------------------
|X |Activate/Dodge/Pick up Weapon (left hand) |
------------------------------------------------------------
|B |Melee Attack |
------------------------------------------------------------
|Black + L |Alternate Mode for Weapon or Power |
------------------------------------------------------------
|Black + R |Alternate Mode for Weapon or Power |
------------------------------------------------------------
|White |Grenade |
------------------------------------------------------------
|L3 |Crouch/Stealth Move |
------------------------------------------------------------
|R3 |Center Camera |
------------------------------------------------------------
|X + A |Charge Jump (hold for longer jump) |
------------------------------------------------------------
-------------------
- Flick targeting -
-------------------
With the flick targeting system, the right analog stick is tapped in the
direction of an enemy and that enemy will be auto-targeted. While targeted,
flick the right analog toward another enemy to change targets. Cancel Flick
targeting by pressing in on the right analog stick. Use the options in the
option menu to adjust the sensitivity of the flick targeting.
--------------------------------------------
- Assigning Powers or Weapons to each hand -
--------------------------------------------
Tap a direction on the d-pad to bring up the weapons/powers menu. Select a
power or weapon and press X for the left hand and Y for the right hand. By
default the game will slow down to a bullet time speed while selecting a power
or weapon.
Weapons can be immediately assigned to either the left or right hand in the
field (actual gameplay) by holding X or Y while standing over a weapon.
===================
- Scythe Controls -
===================
---------------------------------------------------
|Left analog |Move |
---------------------------------------------------
|Right analog |Turn |
---------------------------------------------------
|L |Brake |
---------------------------------------------------
|R |Turbo |
---------------------------------------------------
|X |Enter/Exit the vehicle/turret |
---------------------------------------------------
|A |Jump |
---------------------------------------------------
(Enter on the right side to control the Scythe, enter on the left side to
control the Scythe turret)
=================================
- Turret/Scythe Turret Controls -
=================================
---------------------------------------------------
|Right analog |Rotate Turret/Aim |
---------------------------------------------------
|R |Fire |
---------------------------------------------------
|X |Enter/Exit Turret |
---------------------------------------------------
===========================
- Ships/Shuttles Controls -
===========================
---------------------------------------------------
|Left analog |Move |
---------------------------------------------------
|Right analog |Turn |
---------------------------------------------------
|R |Fire weapon (Seeker Ship only) |
| |Boost (Shuttle only) |
---------------------------------------------------
------------------------------------------------------------------------------
SECTION IV
______ /\ ______
/ __ // \\ __ \
| / / \ \ |
| | / /\ \ | |
| | / / \ \ | |
| | / WEAPONS \ | |
| |/ / & \ \| |
|// / POWERS \ \\|
/ / ________ \ \
/ //__________\\ \
/___\ /___\
===========
- WEAPONS -
===========
Weapons can be equipped in the left hand and/or the right hand (See CONTROLS)
>>>>>>>>>>>>>>>>>>>>
- H.A.Z.E. Blaster -
>>>>>>>>>>>>>>>>>>>>
1 - Base Human Blaster
2 - Increases Damage + Accuracy
3 - Enables Grenade Alt Fire Mode
4 - Increases Grenade Explosive Power
5 - Increases Damage for Both Modes.
A prototype fusion weapon that fires a plasma-coated kernel of radioactive
matter, which can fuse explosively upon contact.
<<<<<<<<<<<<<<<<<<<<<<<<<<<<<<<<<<<<<<<<<<<<<
- Grenade (Alternate H.A.Z.E. Blaster Fire) -
<<<<<<<<<<<<<<<<<<<<<<<<<<<<<<<<<<<<<<<<<<<<<
Explosive rounds.
>>>>>>>>>>>>>>
- Faust C-41 -
>>>>>>>>>>>>>>
1 - Base Human Pistol
2 - Increases Damage + Accuracy
3 - Enables Burst Alt Fire Mode
4 - Increases Burst Damage + Accuracy
5 - Increases Damage For Both Modes
Standard military issue .90 caliber concussion pistol.
<<<<<<<<<<<<<<<<<<<<<<<<<<<<<<<<<<<<<
- Burst (Alternate Faust C-41 Fire) -
<<<<<<<<<<<<<<<<<<<<<<<<<<<<<<<<<<<<<
The Faust fires burst rounds.
>>>>>>>>>>>>>>>>>>>>>>
- Rockwell Young XJ9 -
>>>>>>>>>>>>>>>>>>>>>>
1 - Base Human Assault Rifle
2 - Increases Damage + Accuracy
3 - Enables Grenade Launcher
4 - Increases Grenade Damage
5 - Increases Damage for Both Modes
Assault Rifle with ceramic piston release shaft.
<<<<<<<<<<<<<<<<<<<<<<<<<<<<<<<<<<<<<<<<<<<<<<<<<<<<<<<<
- Grenade Launcher (Alternate Rockwell Young XJ9 Fire) -
<<<<<<<<<<<<<<<<<<<<<<<<<<<<<<<<<<<<<<<<<<<<<<<<<<<<<<<<
Submounted grenade launcher is used to fire grenades.
>>>>>>>>>>>>>>>>>
- Talmage 50.08 -
>>>>>>>>>>>>>>>>>
1 - Base Human Rocket Launcher
2 - Increases Damage + Accuracy
3 - Rocket Tracks to Original Target
4 - Increases Damage + Accuracy
5 - Increases Damage + Enables Guidance
Delivers 3 MoliPack self-propelled rockets, which can be fired along a
straight vector.
<<<<<<<<<<<<<<<<<<<<<<<<<<<<<<<<<<<<<<<<<<<<<<<<<<
- Rocket Tracking (Alternate Talmage 50.08 Fire) -
<<<<<<<<<<<<<<<<<<<<<<<<<<<<<<<<<<<<<<<<<<<<<<<<<<
Rockets can be guided along a sonic pathway.
>>>>>>>>>>>>>>>
- D'nex Talon -
>>>>>>>>>>>>>>>
1 - Base Seeker Pistol
2 - Increases Damage + Accuracy
3 - Unlocks Ricochet Alt Fire Mode
4 - Increases Ricochet Damage + 1 Bounce
5 - Increases All Damage + 1 Bounce
Fires a sphere of volatile colloid transmetals, which unravel explosively upon
contact.
<<<<<<<<<<<<<<<<<<<<<<<<<<<<<<<<<<<<<<<<<
- Ricochet (Alternate D'nex Talon Fire) -
<<<<<<<<<<<<<<<<<<<<<<<<<<<<<<<<<<<<<<<<<
Weapon fire is spun into an inertial sponge, releasing the gathered ricochet
energy upon contact with organic tissue.
>>>>>>>>>>>>>>>>>
- G'Kol Acolyte -
>>>>>>>>>>>>>>>>>
1 - Base Seeker Pulse Rifle
2 - Increases Damage + Accuracy
3 - Enables the Energy Ball Alt Fire Mode
4 - Increases Damage for Energy Ball
5 - Increases Damage for both modes
Standard issue seeker pulse rifle. Delivers a barrage of superheated
particles kinetically bonded to an unstoppable silicon projectile.
<<<<<<<<<<<<<<<<<<<<<<<<<<<<<<<<<<<<<<<<<<<<<
- Energy Ball (Alternate G'Kol Acolyte Fire)-
<<<<<<<<<<<<<<<<<<<<<<<<<<<<<<<<<<<<<<<<<<<<<
The particles are loaded with a simple quark mind-drive to track enemy life
signs and explode on contact.
>>>>>>>>>>>>
- Darkfire -
>>>>>>>>>>>>
1 - Base Seeker Assault Rifle
2 - Increases Damage + Accuracy
3 - Enables Grenade Launcher
4 - Increases Grenade Damage
5 - Increases Damage for Both Modes
The grav-shielded singularity core embedded in each clip generates muon
fragments of dark-matter and then accelerates them along a threaded high
gravity bore.
<<<<<<<<<<<<<<<<<<<<<<<<<<<<<<<<<<<<<<<<<<<<<<
- Grenade Launcher (Alternate Darkfire Fire) -
<<<<<<<<<<<<<<<<<<<<<<<<<<<<<<<<<<<<<<<<<<<<<<
The entire core is unshielded and released as a short-range explosive.
>>>>>>>>>>>
- Discord -
>>>>>>>>>>>
1 - Base Discord
2 - Increases Damage + Range
3 - Unlocks Full-Radius Alt Fire Mode
4 - Increases Radius Damage + Range
5 - Increases Damage + Range for Both
Resonant inertial friction modulator causes quantum level vibrations in the
molecules, electrons, even light-waves in a limited area.
<<<<<<<<<<<<<<<<<<<<<<<<<<<<<<<<<<<<<<<<
- Full-Radius (Alternate Discord Fire) -
<<<<<<<<<<<<<<<<<<<<<<<<<<<<<<<<<<<<<<<<
Generates immense heat for short periods of time, even in a defensive
(although moderately dangerous) radius around the weapon.
>>>>>>>>>>>>>>>>>>>
- Kaull Firelance -
>>>>>>>>>>>>>>>>>>>
1 - Base Seeker Assault Rifle
2 - Increases Damage + Accuracy
3 - Unlocks Energy-Burst Alt Fire mode
4 - Increases Burst Damage + Accuracy
5 - Increases Damage for Both Modes
Charge-stripped ions literally tear through spacetime, gathering entropic
energy weaves before impacting on their target.
<<<<<<<<<<<<<<<<<<<<<<<<<<<<<<<<<<<<<<<<<<<<<<<<<
- Energy-Burst (Alternate Kaull Firelance Fire) -
<<<<<<<<<<<<<<<<<<<<<<<<<<<<<<<<<<<<<<<<<<<<<<<<<
The ions are layered back upon themselves to build a massive rip in local
space and unleash unpredictably multi-directional forces.
>>>>>>>>>>>>>>>>>>
- Gnashbone Fury -
>>>>>>>>>>>>>>>>>>
1 - Base Seeker
2 - Increases Damage + Accuracy
3 - Enables Rocket Tracking
4 - Increases Damage + Accuracy
5 - Increases Damage + Enables Guidance
A multi-tiered intelligent projectile platform capable of guiding multiple
implosion rockets towards several targets simultaneously.
<<<<<<<<<<<<<<<<<<<<<<<<<<<<<<<<<<<<<<<<<<<<<<<<<<<
- Rocket Tracking (Alternate Gnashbone Fury Fire) -
<<<<<<<<<<<<<<<<<<<<<<<<<<<<<<<<<<<<<<<<<<<<<<<<<<<
Rocket tracking.
>>>>>>>>>>>>>>>>>
- Shadowstalker -
>>>>>>>>>>>>>>>>>
1 - Basic Sniper Rifle With 10% Zoom
2 - Increases Damage
3 - Zoom Upgraded to 20%
4 - Zoom Upgraded to 30%
5 - Increases Damage
Polarized supermolecules are fired along null conductor channels at sub light
speeds, causing micro fission blasts upon contact.
<<<<<<<<<<<<<<<<<<<<<<<<<<<<<<<<<<<<<<<<<<
- Zooming (Alternate Shadowstalker Fire) -
<<<<<<<<<<<<<<<<<<<<<<<<<<<<<<<<<<<<<<<<<<
Comes equipped with a poly-rez genscope able to accurately analyze distance,
atmospheric interference, and DNA maps of the target. (aka. sniper zoom)
>>>>>>>>>>>>>>>>>>
- Human Grenades -
>>>>>>>>>>>>>>>>>>
Manual trajectory explosives with timed/contact simple triggers and contained
quantum-pack molecular payloads.
<<<<<<<<<<<<<<<<<<<<<<<<<<<<<<<<<<<<
- Seeker Grenades (Alternate Fire) -
<<<<<<<<<<<<<<<<<<<<<<<<<<<<<<<<<<<<
(To select the grenade alternate, hold white until the grenade symbol changes)
Similar to the human delivery system, but with a biological bonding agent,
which is corrosive.
==========
- POWERS -
==========
The powers menu will appear on the pause menu in the bottom right hand corner
after lift has been obtained in Chapter 4. Like weapons, powers can be
equipped in the left hand and/or the right hand (See CONTROLS)
-----------------
Power Level Chart
-----------------
Level 1 - 10% increase per move
Level 2 - 5% increase per move
Level 3 - 5% increase per every 6 moves
Level 4 - 5% increase per every 7 moves
Level 5 - 5% increase per every 7 moves
>>>>>>>>>
- Melee -
>>>>>>>>>
1 - Base Melee + Punching (B)
2 - Power Up + Kicking
3 - Power Up + Punch Fatalities
4 - Power Up + Kick Fatalities
5 - Seismic Pound + Stealth Fatality
Punching or Kicking Combos - Tap B. It's random whether it will be a punch
combo or a kick combo.
Punch Fatalities - Target the enemy and Punch them when they are nearly dead
(the target should be red).
Kick Fatalities - Target the enemy and Kick them when they are nearly dead
(the target should be red).
Stealth Fatality - Target and sneak up behind an unsuspecting enemy. Press
the B Button to perform the stealth fatality. I believe it is random.
Seismic Pound - Do a charge jump and press B anytime when Gideon is airborne.
Teleport Punch - Dodge and press the attack button.
>>>>>>>>
- Jump -
>>>>>>>>
1 - Base Jumping
2 - Unlocks Slowmo Dodging + Charge Jump (X + A, can be charged)
3 - Unlocks Cartwheel Dodging Dodging
4 - Unlocks Ledge Dodging
5 - Unlocks Flip Dodging
Roll - While ducking press any direction and the dodge button.
Slowmo Dodging - Target the enemy, then press a direction with the left analog
and press X.
Charge Jump - Press X + A. The buttons can be held down for a higher jump.
Ledge Dodging - Press X while hanging from a ledge.
>>>>>>>>
- Lift -
>>>>>>>>
1 - Base Power
2 - Less Energy Drain
3 - Unlocks Multi-Lift Mode
4 - Multi-Lift Increase
5 - Maximum Damage + Lift
Using this power Gideon can lift an enemy or object into the air with his
telekinetic abilities and toss or hit it with the power or weapon in the other
hand. An enemy or object must be targeted to unleash the lift power. Hold
down the assigned button and use the right analog to move the lifted object.
To drop an object simply release the assigned button. Push a direction with
the right analog and release the assigned button to throw the object in the
corresponding direction. Lift cannot be used in first person view.
<<<<<<<<<<<<<<<<<<<<<<<<<<<<<<<<<<<<<
- Multi-Lift (Alternate Lift Power) -
<<<<<<<<<<<<<<<<<<<<<<<<<<<<<<<<<<<<<
Gideon can lift more than one enemy or object. Same controls for normal lift
still apply.
>>>>>>>>>
- Surge -
<<<<<<<<<
1 - Base Power
2 - Increases Damage + Radius
3 - Unlocks Weapon Steal
4 - Increases Damage + Radius
5 - Maximum Damage + Radius
Gideon charges and sends a wave of telekinetic energy toward the enemy pushing
them back and knocking them off balance. An extremely valuable feature to
remember about Surge is that it has the ability to reflect rockets as well as
other types of enemy fire. Surge may also be charged to unleash a bigger wave
of energy.
<<<<<<<<<<<<<<<<<<<<<<<<<<<<<<<<<<<<<<<<
- Weapon Steal (Alternate Surge Power) -
<<<<<<<<<<<<<<<<<<<<<<<<<<<<<<<<<<<<<<<<
Gideon uses his powers to steal the enemies' weapon directly out of their
hands and into his own.
>>>>>>>>>>
- Negate -
>>>>>>>>>>
1 - Places 1 Shield
2 - Places 2 Shields
3 - Places 3 Shields + Unlocks Sphere
4 - Less Energy Drain
5 - Places 4 Shields + Sustained Sphere
Allows Gideon to form an energy shield out of thin air to hide behind. As his
mastery level increases, Gideon will be able to set out more energy shields.
<<<<<<<<<<<<<<<<<<<<<<<<<<<<<<<<<<<<
- Sphere (Alternate Negate Power) -
<<<<<<<<<<<<<<<<<<<<<<<<<<<<<<<<<<<<
Gideon surrounds himself with a force field that repels enemy fire and
attacks. Hold the assigned button to prolong the force field.
>>>>>>>>>>>>>>
- Aeon Pulse -
>>>>>>>>>>>>>>
1 - Base Power
2 - Increases Damage
3 - Unlocks Radial Flare Mode
4 - Increases Flare Damage + Radius
5 - Maximum Damage + Radius
Gideon unleashes a lethal pulse blast upon his enemies. Like Surge, this
power can also be charged.
<<<<<<<<<<<<<<<<<<<<<<<<<<<<<<<<<<<<<<<<<<<<<
- Radial Flare (Alternate Aeon Pulse Power) -
<<<<<<<<<<<<<<<<<<<<<<<<<<<<<<<<<<<<<<<<<<<<<
Gideon floats in the air and release a circular flare ring that destroys
everything in its path. Hold the assigned button to increase pulse output.
>>>>>>>>>>>>>
- TimeShift -
>>>>>>>>>>>>>
1 - Base Power
2 - Less Energy Drain
3 - Unlocks Time-Damp Mode
4 - Less Energy Drain
5 - Sustained Time-Damp
With this power Gideon moves through time and space with such force that he
bashes into objects when shifting into the position they occupy.
<<<<<<<<<<<<<<<<<<<<<<<<<<<<<<<<<<<<<<<<<
- Time-Damp (Alternate Timeshift Power) -
<<<<<<<<<<<<<<<<<<<<<<<<<<<<<<<<<<<<<<<<<
Allows Gideon to move so fast that time and the motion of all other beings
slows to a crawl.
>>>>>>>>>>>
- Shatter -
>>>>>>>>>>>
1 - Base Power
2 - Increase Damage
3 - Unlocks Freeze Mode
4 - Increases All Damage + Freeze Radius
5 - Maximum Damage + Radius
Gideon unleashes absolute-zero ice shards upon his enemies.
<<<<<<<<<<<<<<<<<<<<<<<<<<<<<<<<<<<<
- Freeze (Alternate Shatter Power) -
<<<<<<<<<<<<<<<<<<<<<<<<<<<<<<<<<<<<
Gideon hits the enemy with a shot of ice so cold that it freezes the enemy
allowing Gideon a chance to shatter his opponent.
------------------------------------------------------------------------------
SECTION V
______ /\ ______
/ __ // \\ __ \
| / / \ \ |
| | / /\ \ | |
| | / / \ \ | |
| | / / \ \ | |
| |/ WALKTHROUGH\| |
|// / \ \\|
/ / ________ \ \
/ //__________\\ \
/___\ /___\
This walkthrough is written with the idea that you are playing in normal mode.
I do not go into too much detail regarding the disposal of enemies, since
there are so many options; that is best left up to you. Also, as said in the
introduction I try to avoid spoilers, but certain boss names and decisions
that I mention can spoil the experience for you, so tread carefully. With
that said, I hope you find this guide helpful, and now onto the walkthrough...
******************************************************************************
PLEASE READ!
Oh wait, one more thing, and this is VERY important. If for any reason the
game will not let you go through a certain door that I describe, go down a
certain lift that I describe, or activate a certain switch that I describe
then please restart the checkpoint (choose "load checkpoint" from the pause
menu). The game has tons of glitches and bugs that can happen randomly or may
not happen at all. Sometimes the next objective does not come up on the
screen and the game will not allow you to proceed. This is mentioned in the
Glitch Solution section under Gameplay Problems also.
If the Majesco screen is skipping on you, the game freezes frequently, or the
framerate is horribly slow during gameplay upon loading up the game then visit
the Framerate Problems subsection under the Extras section for some
information that may help.
Ok, now onto the walkthrough for real this time...
******************************************************************************
==========================
Prologue - First Contact -
==========================
------------------------
First Contact - Part A -
------------------------
INTRO CUTSCENE
Fly toward the space colony up ahead to the right. Once the walls are reached
you should notice a trail of blue blinking lights in the middle of the space
colony. Fly toward them.
CUTSCENE
------------------------
First Contact - Part B -
------------------------
New Objective: Meet Ethan in Hotel Lounge
(Note: If you are experiencing any major framerate issues during this first
area then visit the Glitch Solutions part of this guide.)
Go through either of the doors to the left. Keep going straight and enter the
auditorium. Walk across the auditorium and enter the room at the far end.
Ethan is waiting by the door.
CUTSCENE
------------------------
First Contact - Part C -
------------------------
New Objective: Knock out angry Marines
Flick the right analog in the direction of an opponent and attack with the "B"
button. There is no real strategy for this part, just try not to take on two
at a time, and be sure to watch the health bar.
CUTSCENE
------------------------
First Contact - Part D -
------------------------
New Objective: Complete training
Go down the hall to the left and through the door. The guard down the stairs
will point you to the right, so go through the door on the right side. Go
straight through the training area and down the stairs of the next room. The
guard near the door at the bottom of the stairs will open the door up for you,
as will the guard in the next room. Go down the stairs and into the training
room.
CUTSCENE
Target each green light as it comes on. Press in the direction of the green
light with the right analog. For the second exercise, pay attention to the
color of the light overhead and target and shoot the corresponding enemy of
that color. After the training, get on the elevator. Press "X" at the
controls to activate it.
Medical Station
Go into the weapon training room and listen to the instructor. Go through on
either side and pick up a weapon for each hand. "X" is the left hand (L to
fire); "Y" is the right hand (R to fire). Go into the simulator and your
opponents should arrive shortly. As you enter, make sure to keep in the mind
the location of the Medical Stations (press and hold "X" to use) in the middle
of the room. Assault Rifles are on the right and left walls so stock up.
Rocket Launchers are up the stairs in the back of the room. A Medical Station
is to the right of the Rocket Launchers, and another Medical Station is on the
bottom floor. Press the gravity panels on the side to disable the gravity in
the room and make it to where Gideon can jump much higher and aim down at the
sims. Target each sim and unload. The first set is extremely easy. The
later sets will have you rushing to the Medical Stations very quickly.
New Objective: When ready, proceed back to instructor
If you want you can go back to the front room now and end the fighting,
however I would suggest taking this chance to level up Gideon's skill with the
guns first. You can stay in the simulator as long you want. Knock yourself
out! :D The instructor is kind of funny to listen to if you stay in the
simulator for quite a while.
CUTSCENE
New Objective: Stun all Marines
Grab some stunners off to the side as you go back into the simulator. Stun
all four Marines in the simulator.
CUTSCENE
New Objective: Defeat Bud!
Grab the Stunner on the ground. The way in which you take out Bud will have a
minor effect on the rest of the game. Make sure the last hit is with the
Stunner to knock him unconscious; if the last hit is with the Pistol then he
will be killed. Make some trips to the Medical Stations during this battle if
needed.
New Objective: Follow Ethan to hangar and enter ship
Activate the elevator. Follow Ethan to the ship.
CUTSCENE
=================================
Chapter 1 - Hostile Negotiation -
=================================
------------------------------
Hostile Negotiation - Part A -
------------------------------
While carrying Ethan you can only use your right hand for shooting. Go
through the door up ahead and into the next room.
CUTSCENE
New Objective: Proceed to Luriam Military Sector
Go through the door and into the auditorium. The floor is blown out so go
down the rubble. Go straight ahead and through the door on the left side.
Pick up one of the pistols in the next room and exit through the door at the
end.
New Objective: Evade Seekers and get Ethan to escape pod
Let Ethan do the blasting for you as you go down the stairs. Go through the
next couple of doors. Seekers will burst through the walls of the next room.
Keep moving to the door. Go down the hall and turn right.
CUTSCENE
------------------------------
Hostile Negotiation - Part B -
------------------------------
Get an Assault Rifle off the wall to the right. Go through the doors in the
back. Help the marines blast the Seekers...if they actually help you
(depending on your decision from earlier). Pick up some Seeker weapons and
Grenades. After enough of them have been blasted the Marine should open the
door at the end of the area for you. Use the Medical Station on the way to
the next room if needed and stock up on ammo.
New Objective: Defend Marines until they open door
Seekers will come through the back wall and the right side wall. Blast them
until they stop coming. Get next to the door on the left and the Marine will
open it...well sort of.
New Objective: Find a way into Luriam Science Sector
Blast the Seeker and go down the hall with the screaming people below you and
the escape pods to the side. Use the Medical Station at the end if needed.
Go through the door and help out the Marines. Go into the auditorium after
taking out the Seekers. Run along the sides of the auditorium and go through
the open doorway at the end.
CUTSCENE
------------------------------
Hostile Negotiation - Part C -
------------------------------
Help the Marines finish off the remainder of the Seekers and go straight. Go
through the door at the end and into the Lecture Room. The next door is on
the right. Fight off the Seekers. Turn off the gravity on the side for some
high-flying action. Go up the ramp and through the door at the top. Fight
off the Seekers and run through the open doorway. There is a hole on the left
wall. Go through the hole and help the scientist in the room ahead.
New Objective: Defend elite soldiers while they open door
Help the Marines fight off the Seeker ambush.
New Objective: Find Olivia
A scientist will open the door that leads to the elevator. Activate the
elevator, go through the door, and start blasting. The Seekers just keep
coming nonstop, so go up either ramp on the left side and make your way toward
the table in the back.
CUTSCENE
Blast the Seekers and head back to the door. There is a Medical Station under
the area where you found Olivia if you need a recharge.
CUTSCENE
BOSS FIGHT
==============================================================================
******************
- Seeker General -
******************
New Objective: Defeat Seeker General
This boss can be taken out mighty quickly if you have some Grenades. It only
takes about two or three. If you don't have any then blast, blast, blast.
Try to stay away from him as much as possible. He will eventually raise up
his shield to block the oncoming weapon fire. That's the cue to throw a
grenade. Whenever he leaps toward you, dodge to the left or right
immediately. He may jump off the wall toward you a few times; just dodge this
as well.
==============================================================================
New Objective: Escort Olivia back to escape pod
Refill at the Medical Station if needed and go toward the elevator.
CUTSCENE
------------------------------
Hostile Negotiation - Part D -
------------------------------
Olivia is immortal while following Gideon; so don't worry about hitting her.
Don't believe me? Then try blasting her with your weapons. Simply
astonishing!
Take Olivia down the elevator. Help the Marines blast the Seekers in the room
at the bottom and go through the broken door up ahead followed by the next
broken door. Seekers will bust through the wall ahead. Go around the corner
and down the ramp.
New Objective: Find a way out of Luriam Science Sector
Go through the door at the bottom. Turn left at the third doorway (has a red
light above it). Fight off the Seekers and go down the ramp on the right. Go
through either doorway and turn right, there is a door at the far right end
that leads to an elevator. At the bottom of the elevator fight off the group
of Seekers and follow the winding corridors to a door at the end.
CUTSCENE
------------------------------
Hostile Negotiation - Part E -
------------------------------
New Objective: Escort Olivia to hangar lift
Go through the door and help the sims fight off the remaining Seekers in the
area. Turn left and go through the doorway. Help the Marines fight off the
Seekers and go down below. Run up the ramp at the other end and activate the
lift.
New Objective: Escort Olivia back to escape pod
Get up the ramp on the left side and go through the door. This will lead to
the escape pods and plenty of Seekers.
CUTSCENE
The choice you make here will affect quite a few of the cutscenes throughout
the rest of the game. Walk up to either Ethan or Olivia and Gideon will prop
him/her onto his shoulder. He should automatically grab him/her without the
need of you pressing the "X" button.
New Objective: Carry __?__ to escape pod
Walk over to the escape pod on the left. Don't try to fight off the Seekers.
It's basically useless at this point.
CUTSCENE
=============================
Chapter 2 – Surface Tension -
=============================
--------------------------
Surface Tension - Part A -
--------------------------
New Objective: Acquire Transportation
Go straight ahead and to the left a little and there will be a building with a
Scythe vehicle inside. There are plenty of Seekers around the area also. The
best thing to do is to sneak in from the left side behind the building. If
you sneak along the edge, you will actually wind up on top of the building.
Fall through an opening in the roof and get in the Scythe.
New Objective: Drive Scythe back to __?__
Plow through the group of Seekers on your way back to pick up your companion.
New Objective: Drive Scythe to Tunnel Entrance
Drive back the way you came and go through the wide tunnel next to the
building where the Scythe was. The door to the tunnel should open up.
CUTSCENE
--------------------------
Surface Tension - Part B -
--------------------------
New Objective: Drive Scythe through Western Canyon
Once on the other side, the big ship will fire lasers at the Scythe. Your
partner will tell you to make a left; don't do so just yet, keep going
straight and turn left once you see the remains of a broken bridge hanging in
the air off to the side. Follow this path until your partner tells you to
turn left once again.
New Objective: Make your way towards Bahr Han City
Keep going straight and plow through the Seekers. Turn right when prompted by
your partner. You have to make a mighty big jump here. Bash through the
Seekers and press the turbo button as soon as you reach the edge of the cliff.
Turn left when prompted by your companion. Just like with the last jump,
press the turbo button as soon as the Scythe reaches the end of the cliff to
jump over it. Follow the path ahead. Ignore the Seekers or run over them.
Your partner will eventually speak of a big jump ahead, it's right next to two
big rocks. Keep the Scythe in the middle of the path as you come upon the
jump and everything should be fine.
New Objective: Enter Bahr Han
Turn left when prompted by your partner and head toward the tunnel, which will
eventually be to the right.
CUTSCENE
--------------------------
Surface Tension - Part C -
--------------------------
New Objective: Enter Bahr Han City
Head down the tunnel and fall off the edge.
New Objective: Find a way out of the canal
Take the left path down the canal followed by a right. Don't worry about the
rubble from the bridges as it caves in, the Scythe will go right over it
without any problems. Turn left when the path splits. Go up the small ramp,
and jump the gap (use turbo at the edge). Go through the opening ahead to
reach the sewers and turn right.
New Objective: Find a way out of the sewers
Fall off the path at the end into the water and turn right. Part of the wall
to the left will blow open. Get out of the Scythe and go into the hole in the
wall. The Marine in the Scythe will cover you as best he can, but still look
out for the Seekers. Go up the lift.
CUTSCENE
--------------------------
Surface Tension - Part D -
--------------------------
New Objective: Proceed to the platform lift
Go through either door and get outside. For this part, go all out with any
weapons or grenades you have. Run if you have to, because the Seekers
regenerate a bunch at this part. Go down the street blasting Seekers along
the way. There is a rocket launcher on the structure to the right as the path
splits. Grab it! Now, go back down the left path. Get over the broken
street and go right. Help out the Marine ahead. Keep going straight and
blast through the Seekers. Turn right and go down the street. Blast the
Seekers and go up the ramp. Fall down to the other side.
New Objective: Defend the area until the elevator arrives
This part can be simple or hard, depending on how you go about doing it. The
Seekers will come at you in full force while the elevator in the background is
coming up. You can either stay and fight them until the elevator door opens,
or forget about the Seekers and make a break for the elevator door. Running
toward the elevator door is much easier and less frustrating. If you choose
to fight off the Seekers you will probably use up all of your ammo and quite a
few grenades.
New Objective: Continue to platform lift
Go straight ahead to the open doors if you haven't already and get on the
lift.
CUTSCENE
===============================
Chapter 3 - Extinction Agenda -
===============================
----------------------------
Extinction Agenda - Part A -
----------------------------
New Objective: Defend area until help arrives
Rush over to the turret on the left or right and start blasting enemies. Take
out the enemy ships first. There should be four of them total. Be sure to
shoot the rockets that they shoot out. There is a Medical Station below each
turret and some rocket launchers below the right turret. When all the enemies
are gone, go down below and walk up to the Scythe.
CUTSCENE
New Objective: Drive Scythe to Command Center
Go down the tunnel and plow through the Seekers. Exit the tunnel at the end
and turn right followed by another right once the end of the ramp is reached.
Go along the sides until you come upon the exit at the end. Drive straight
ahead.
CUTSCENE
----------------------------
Extinction Agenda - Part B -
----------------------------
New Objective: Defend area until Marine unlocks door
Get in the either turret on the side and take down the Seeker ships first.
There should be three. Now, focus on the Seekers. It might be best to exit
the turret when fighting the Seekers since you're basically a sitting duck to
their weapon fire while inside. Once the new objective flashes across the
screen, the door in the back is open.
New Objective: Find a way to upper launch deck
Go through the door the Marine opened, charge up at the Medical Station, and
activate the lift. Exit through the door at the bottom and go straight. It
is not necessary, to take out any of the enemies in this area unless you want
to. Go through the door on left at the end, activate the lift, and exit. Use
the Medical Station if necessary.
New Objective: Defeat Seeker Shock Troops
If you have a rocket launcher, Shock Troopers are easy as cake, if not they
still shouldn't be too hard. Blast the Seekers and the 2 Shock Troopers.
There are some rocket launchers and Medical Station behind the door on the
left and the middle door.
New Objective: Proceed to launch deck
The door on the right should now be open. Blast the Seekers down the hall and
activate the elevator at the end.
CUTSCENE
----------------------------
Extinction Agenda - Part C -
----------------------------
New Objective: Proceed to Western Lift
Start blasting as soon as the elevator stops. There are some turrets on the
side (call them up with the control panels) that you can use to take out the
Seekers ships but the bigger ship will eat you alive if you stay in the
turret. Take down whatever you can, and head to the back right. Use some of
the Medical Stations to the side and blast everything in your path while going
straight ahead. Turn left and go down the ramp or around the side past the
crashed ship.
New Objective: Take lift to control tower.
This part can be very unfriendly if your not prepared. Throw a grenade on the
lift as it reaches the bottom to take care of the Seekers and stun the Shock
Trooper. Take the Shock Trooper out FAST! He has rocket launchers that can
kill you within seconds. Use grenades or any hard-hitting weapons. The
Seekers come nearly non-stop while fighting the Shock Trooper. There are some
Medical Stations off to the right behind some columns, which should come in
handy. After the Shock Trooper is gone, activate the lift.
CUTSCENE
----------------------------
Extinction Agenda - Part D -
----------------------------
New Objective: Defend Control Tower
Go down the ramp and get in the turret. Blast the Seekers and the Seeker
Ship. If the Seekers start to jump on the turret, then it is best to get off
and fight them. There are some rocket launchers on each of the columns next
to the lift in the back. Get on the lift eventually. Go through the door at
the top while blasting plenty of Seekers along the way.
New Objective: Proceed across bridge to command center
Turn left and go across the bridge...well kind of.
CUTSCENE (notice Gideon's longer hair...foreshadowing perhaps...? Nah, it's a
screw up that I find rather funny. :p)
----------------------------
Extinction Agenda - Part E -
----------------------------
New Objective: Find way into Command Center
Go straight ahead and activate the elevator. Get off and go to the left and
help the Marines. The Seekers do not stop coming so go into the Command
Center to the left.
New Objective: Find Admiral Torn
Go up the lift in the back room.
CUTSCENE
New Objective: Find transportation
Go back out of the Command Center and get into the Scythe.
New Objective: Proceed to northern medical platform
Drive straight ahead up the ramp, and go across the bridge on the left. Go
down the ramp ahead.
CUTSCENE
----------------------------
Extinction Agenda - Part E -
----------------------------
Drive straight ahead and make a right. Get up the ramp and make another
right. Don't run over the humans you psycho! Take either path ahead and
follow it. You'll wind up at the same place either way. Turn towards the
middle area once you reach the top.
CUTSCENE
New Objective: Rush to civilian launch deck
Drive straight ahead; go up the ramp and across the bridge. Turn right then
make a left to get on the next bridge. When the bridge starts falling apart
turbo boost at the very end and this will cause the Scythe to fly off the
newly made ramp. Turn left and drive down the tunnel ahead. Keep going
straight and turn right or left at the end and get outside. Drive down into
the middle area and go down the ramp in the back. Go down either of the ramps
below, and drive up to the ship.
CUTSCENE (a very awesome group of cutscenes too, I might add)
===========================
Chapter 4 - The Awakening -
===========================
------------------------
The Awakening - Part A -
------------------------
New Objective: Proceed to dojo to complete your training
Go through the watery door ahead, and down the hall to the left. Make a right
and go through the first door and make another right to arrive at the dojo.
Walk up to the Aurelian.
New Objective: Use Lift power to levitate column
LIFT POWER RECEIVED
Like the onscreen message says, press the D-pad and assign Lift to either
hand. Target and pick up a column with Lift.
New Objective: School Aurelians
Haha...nice objective. Anyway, pick up the Aurelian and toss him around with
Lift. Throw a column at him to take him out quickly. Do the same with the
other Aurelians.
From this point onward, all of your powers can be leveled up by using them
including jump and melee. Try to max out jump as soon as you can. Duck, push
the left analog in any direction, and press the dodge button to max it out
very quickly.
New Objective: Report to Enorym on bridge
Now that you have "schooled" the Aurelians, go back out the door and turn
right, followed by a left. Go through the second door on the right.
CUTSCENE
------------------------
The Awakening - Part B -
------------------------
New Objective: Proceed across Seeker destroyer surface
Get up the lift ahead and go through the doorway and grab a gun on the gun
rack. Take care of the Seekers up ahead and ride up the next lift at the end.
More Seekers will storm down the path ahead. Lift makes short work of them on
this ship, just lift them up in the air and toss them off the side. Go past
the guns and blast through the Seekers up ahead. There is a turret off to the
side, but it does little to help. Go up the ramp and more Seekers will ambush
you. Go to the tunnel that leads to the door all the way at the back, but do
not go inside the tunnel. Instead, look to the left below the glass railing.
There is a platform that you can jump to. Go ahead and jump (or fall) on it
and go to the end. Look up, and you will see another platform. The normal
jump can get you over to it, but I suggest using a charge jump (X+A). Follow
the path around the side of the ship. Toss off any Seekers in your path.
Activate the console at the very end to form a bridge. Get across the bridge
and through the door on the left side up ahead.
CUTSCENE
------------------------
The Awakening - Part C -
------------------------
New Objective: Find a way into Seeker destroyer
Once you're through the door some Seekers will come through the doors on the
side. Look out for the one up above. Turn left and jump on top of the gun in
your path to get to the other side. Get on the lift to the right around the
corner. Dispose of the Seekers in the tunnels and activate the elevator they
are guarding. Wreak some havoc up above and activate the console on the right
wall to make a bridge fold out. The console is built right into the wall so
it can be a little hard to see.
The door ahead is a dead end with Seekers hiding behind it, so go up the lift
to the left side. Seekers, Seekers oh my! Jump to the entrance up above and
follow it to the end or go around the left side. Either way get to the lift
on the other end. Activate the console at the top and go across the bridge.
Use the lift on the left and make your way around the corner.
CUTSCENE
------------------------
The Awakening - Part D -
------------------------
SURGE POWER RECEIVED
BOSS FIGHT
==============================================================================
****************
- Seeker Elite -
****************
New Objective: Defeat Seeker Elite
Surge will be given to you at the beginning of this battle. Equip it because
it's the best method of disposing of the Seeker Elites. If you try to hit him
head on, he will just reflect your attacks with his staff. Target him and let
him come to you. When he jumps at you dodge to the right or left. If he
dashes into you or does any sort of ground attack dodge to the right or left
and hit him with a Surge wave. The Surge will only hit him if he tries to
dash into you; he still has time to block the attack after a jump. It only
takes about 3 hits to finish him off.
==============================================================================
New Objective: Stave off initial Seeker assault
Marin, Kelehm, and your partner from mission 2 will come to your aid. Help
them fight off the Seekers. Don't worry, all three of them are immortal (at
this point), so toss grenades and Surge to your heart's content. If the
Seekers start to overwhelm the area when your life is short, then Multi-Lift
them until your life recharges.
New Objective: Proceed to destroyer bridge
Go through the middle door on the right. Keep going through the doors with
green lights at the top and bash through all the Seekers along the way. Go to
the right when the path splits and get on the elevator. Get into the hall at
the top and destroy the Seeker hordes.
New Objective: Find a way back to Enorym
Take the elevator back down. Tag the Seekers and make a left through the
middle door. Turn right and keep going through the doors ahead.
CUTSCENE (and a rather choppy one too...)
------------------------
The Awakening - Part E -
------------------------
New Objective: Find and aid Enorym
Get into the next room for some more Seeker action. Keep blasting Seekers and
going through doors until you reach some Shock Troopers. Toss grenades and
Surge them followed by some weapon blast. Hide behind the columns when trying
to recharge your health. There are some rocket launchers on two of the
columns. After they are destroyed, look out for the Shock Troopers with
rockets in the back. Be sure to use rockets for these guys.
Go through the doorway in the back and make your way around the corner. Two
Seeker Elites are blocking the door. Target and take them on separately,
since you have to avoid their attacks in order to hit them. Go through the
door and into the hall ahead. You will reach an area with lasers. Use Lift
or Surge to push the Seekers into the lasers. Go through the doorways along
the side and maneuver through the Seekers. Go through all the rooms up ahead
until you reach one with a dead Aurelian. Open the door to meet up with
Enorym.
CUTSCENE
------------------------
The Awakening - Part F -
------------------------
Holy crap! Get out of that room now, those Seekers are nuts! Now Gideon
must...Holy Christmas! What the hell happened to his hair!? It seems shorter
for some reason...ok? Oh yeah, it seems the developers made a few mistakes
when it came to Gideon's character models in some areas of the game. I'll be
sure to point them out for you throughout this guide. ;p
Anyway, the door will seal off, so the suction will not claim your life. Rush
through the door on the right and the one after that. When you reach the
outside portion the wind will try to knock you off, be sure to keep your
footing as you go through the door ahead. This is one portion where it will
really pay to have your jump level high. As the object from above smashes
against the ground in front you do a dive with the dodge button to make it
across the gap. Go through the door and VERY quickly turn left and go through
the next door (the floor drops out from underneath you). Rush across the room
to the next door because this room goes to hell quickly.
------------------------
The Awakening - Part G -
------------------------
New Objective: Find survivors in sinking wreckage
Equip a power and grab the gun ahead. Go straight ahead and fall. Turn
around and go down the path in the back until you run into a Seeker. After
you have decimated him, go through the upside-down doorway up ahead. Push the
Seeker behind the door off the edge, and make your way down. It's really best
just to fall down and take a little damage from the fall. If you go down
along the side there is debris that falls on the platforms that will instantly
kill you. Fight off the Seekers at the bottom and jump on top of the platform
in the back. Go up the wreckage and to the door in the background.
(random fun: As you make it to the door, send out a Surge wave to knock your
friends off balance)
CUTSCENE (notice Gideon's hair, oh yes, once again)
------------------------
The Awakening - Part H -
------------------------
New Objective: Proceed through canyon towards Arnyss
NEGATE POWER RECEIVED
Negate really doesn't help right here so use either Lift or Surge to get rid
of the Seekers. It is a good idea to get Negate to at least level 2 right
here though. Lead your group straight ahead and through the lake. Get rid of
the Seekers and get into the Seeker Tank. Go straight ahead and turn right,
taking out any enemy tanks in your path. Drive up the hill at the end, exit
the Seeker Tank, and go across the strip of land that leads to a cave at the
top. Take out the Seekers and make a left, which should lead you out of the
cave. Push the Seekers off the edge and jump down.
New Objective: Survive until help arrives
Set up a few Negate shields and wait for help to arrive...simple as that.
CUTSCENE
===========================
Chapter 5 - Crossed Lines -
===========================
------------------------
Crossed Lines - Part A -
------------------------
AEON PULSE POWER RECEIVED
Ignore the Seekers for now, and try to get up on the sides of the chamber to
make things easier. Use Surge or Lift to keep the Seekers away from you.
After all the Seekers have been taken care of Kchell will retreat through the
door in the back. Follow him.
New Objective: Pursue and capture Kchell
For this hallway, Surge and Lift will work wonders once again, however things
can get ugly, so Negate might come in handy near the end. The Seekers in the
back, near Kchell have rocket launchers so have Surge or Negate handy. Try to
push or throw the Seekers out the windows on the left. A ship will eventually
appear outside the windows and will shoot rockets down at you. Shield
yourself with Surge or Negate, and blast the ship with Aeon Pulse or a weapon.
Once Kchell flees through the door you can follow him; there is no need to
dispose of everything in this hall.
Follow Kchell outside and...
CUTSCENE
BOSS FIGHT
==============================================================================
******************
- Barrakka Bahma -
******************
New Objective: Defeat Barrakka Bahma
The first of the really good boss fights...
Immediately equip Negate and Surge. Lay out an energy shield with Negate or
use the Negate energy shield bubble to make your way up to where the boss is.
Once you're on the circular platform, set up energy shields to stop the boss'
fire. He will eventually crouch on the ground, and then jump into the air
sending a shockwave of fire over the circular platform. To avoid this you
will need to jump, or better yet, charge jump a few seconds after he crouches.
When you land and he lands, use Surge to knock him off the platform. He will
eventually come back up, only this time he will be on his spacecraft...yipe!
Now turn around and run all the way back to the door. He will rain down fire
from his spacecraft onto the circular platform and the walkway as you run back
to the door. To make the battle look more epic, move the camera angle to
where Gideon is running toward the screen when you're running away from
Barrakka's fire.
Now he has an entirely different pattern. Equip Negate and Aeon Pulse. He
will come up from the bottom on either the right or left side. As he rises,
target one of the sides of the spacecraft, duck, then set up an energy shield.
His first attack is a machine gun blast. Stay behind the energy shield until
he stops. Now, rush out and fire Aeon Pulse blasts until you totally run out.
You might have the time to slightly charge and get one more out before he
starts his next attack. He eventually shoots rockets down at you. Hide
behind the energy shield and you will be fine. Rinse and repeat this method
until one of the sides of his spacecraft has been destroyed. Now he will
retreat back to the circular platform and the battle will start from square
one. Equip Negate and Surge once again, go to the platform, dodge the
shockwave, wait for him to land, then knock him off with Surge. Once again,
run back toward the door.
Destroy the other side of his spacecraft, knock him off the ledge one more
time afterwards, and then target him while he's on the spacecraft. He keeps
the same patterns throughout the entire battle.
==============================================================================
CUTSCENE
------------------------
Crossed Lines - Part B -
------------------------
After the cutscene, go the way Gideon is facing, across the river and toward
the waterfall in the background. Seekers will ambush your party. To the left
of the waterfall is a path that leads up to a cave. Go inside.
New Objective: Proceed through tunnels
Go through the cave and exit the other side. Immediately after exiting the
cave, go down the path to the right. Seekers will attack shortly. Keep going
straight.
CUTSCENE
New Objective: Proceed to temple entrance
Fight the Seekers off and run up the path to the left. Once in front of the
temple, Seekers will ambush you once again. Grenades are recommended here.
Go toward the temple doors.
CUTSCENE
------------------------
Crossed Lines - Part C -
------------------------
Follow your team down the temple halls. You will eventually reach an area
where you must jump to another ledge. Make sure to take out the Seekers in
the area before doing this. There are some rocks to the right side that can
be hopped over instead of jumping the gap; use the charge jump. Seekers will
be waiting down the hall on the other side. Go down the hall and out onto the
ledge about halfway down on the right. The camera angle will change. Make
your way down by going along the sides to avoid taking damage from the fall.
Seekers will attack, possibly, before you get all the way down.
Go down the hall with the light at the end. The camera angle will change
revealing a staircase up ahead. Go down the staircase. A few Seekers will
pop up. Go towards the bridge ahead.
CUTSCENE
Jump over the bridge and go toward the doors. Fight off the Seekers until you
get an "Objective Complete" message. Go through the doors and into the next
room with the large statue.
CUTSCENE
TIMESHIFT POWER RECEIVED
New Objective: Find entrance to Seeker stronghold
Equip your new power and get rid of the Seekers that invade the room. After
you have decimated your foes go down the path to the right or left in the back
of the room. Fight through the Seekers and turn left again. Three of the
bigger Seekers will break through the wall on the right eventually. Go down
the path up ahead.
CUTSCENE
------------------------
Crossed Lines - Part D -
------------------------
Fall down below and activate the middle console on the left. Surge and
Timeshift work well to keep the Seekers away.
New Objective: Proceed with Aurelians across upper hangar
Go up the elevator in the back to get back to where you were. Go through the
door with the green light on top. Surge or Aeon Pulse the Seekers in the
background and follow the platform around. Destroy the ship along the way and
enter the door at the end. Go down the hallway (while fighting off Seekers of
course) and get on the elevator.
Ride it to the top, exit, and then go around the side. More Seekers and a
ship will be waiting. Use the rocket launchers on the side mixed with Surge
to dispose of the ship.
New Objective: Use cargo lift to access lower hangar
Go to the center area, and use the console that the Shock Trooper and Seekers
are guarding to activate the cargo lift.
CUTSCENE
------------------------
Crossed Lines - Part E -
------------------------
New Objective: Defend Aurelians while they open door
Take out all the Seekers in the area until they stop coming and go through the
door at the bottom level in the back of the room.
New Objective: Proceed across hangar
Go into the hangar on the other side and board the Seeker Tank. Blast
everything in site...Shock Troopers, Seekers, Seeker ships, tanks, and
turrets. Take the tank up the ramp at the far corner and blast the big
Seekers near the doorway. Once things die down, get out of the tank and go
through the door at the top of the ramp.
New Objective: Proceed to orbital relay generator
Head past the hall with glass windows and activate the elevator a few rooms
ahead.
CUTSCENE
------------------------
Crossed Lines - Part F -
------------------------
In this room you must activate four switches in no certain order. After the
Seekers on the bottom floor have been taken care of, go up either side and
start activating the switches. There is one on the right, two in the center,
and one on the left. As the switches are activated, more Seekers will pop up
so be ready.
New Objective: Proceed to Orbital Control Center
Go through the center door at the top. Take care of the shock trooper on the
right first, then go after the turrets. If you stand right below the turrets
and use surge they cannot hit you. After the first one is destroyed the top
will take damage from the explosion leaving it extremely weak.
Go through either door and into the hall up ahead. Break through the Seekers
and head outside. There will be a Seeker on the right and left corner as the
door opens.
New Objective: Use console to focus beam relay
Get inside the tower. Watch out for the Seekers outside and overhead. Go up
the lift on the right side...it's a little hard to notice. Activate either
console at the top.
New Objective: Survive until the fleet arrives
Destroy the Seekers and the ship outside the tower. Take cover in the shelter
if things get ugly. Actually, you can just hide inside the tower the whole
time and wait for help to arrive.
CUTSCENE
------------------------
Crossed Lines - Part G -
------------------------
It really seems as if there is a cutscene missing here but...Sweet Mother of
Pearl! Those treacherous Auralian's must have cut Gideon's hair! Nah, it's
just the wrong choice of Gideon character models once again...silly
developers.
Anyway, use your powers to take care of the traitor Aurelians and go toward
the watery set of doors.
New Objective: Proceed into Senate Halls
Go through the doors and into the hall ahead. More treacherous Aurelians will
ambush you, and be sure to kill them all until you get the next objective
before going through the doors or you will activate a nasty glitch (See boss
fight below for details).
New Objective: Proceed into Senate Chamber
Go through the next set of watery doors.
CUTSCENE
SHATTER POWER RECEIVED
BOSS FIGHT
==============================================================================
**********
- Banath -
**********
New Objective: Kill the traitor Banath
Kind of like the first two boss battles, he's not really that tough of a boss;
in fact, with the powers you now possess this battle seems unfair. Just about
any power works well for this battle with the exception of Negate. Banath
will jump around the Senate Chamber and try to punch you as he lands. If you
don't have some means to push him off, he will stay right next to you.
Aurelians will come at you nonstop during this whole battle. Multi-Lift makes
the battle incredibly easy, since all you have to do is keep lifting and
tossing Banath and the other Aurelians off the side. You can also stand back
and shoot them with Aeon Pulse or Shatter from a distance. I personally use
Surge and Shatter. The battle can be taken into the Council Sitting room if
you so desire.
GLITCH ALERT
If Banath DOES NOT appear read this...
"When you proceed into the senate hall, the checkpoint trigger is to defeat
all the rebel Aurelians. The developers, however, inconveniently left the door
at the end of the hall that leads to the senate chamber unlocked. So each time
I went through the hall, I used the timeshift to slow everyone around me and
run straight through to the senate chamber without triggering the "proceed to
senate chamber" objective. Once in the chamber, the doorway back to the hall
is locked, and since the "kill the traitor Banath" objective has not been
triggered, he does not spawn and the doors do not open. I guess the lesson is
to stick to the objectives religiously and always kill everyone to be safe."
If you happen to activate this glitch choose "Restart Level" on the pause menu
and it will take you back to beginning of "Crossed Lines Part G".
In other words, if you go into the Senate Chamber before the "Proceed into
Senate Chamber" objective appears, then you will be glitched every time.
(thanks to spartan air on the Majesco forums)
==============================================================================
New Objective: Survive until help arrives
Fight off the Aurelians in the hall. Enorym will actually help you out quite
a bit in this fight if you let him. Aurelians will keep pouring into the hall
until a good bit has been killed. Help will arrive eventually. Exit the
hallway when you can.
CUTSCENE
===========================
Chapter 6 - Turning Tides -
===========================
------------------------
Turning Tides - Part A -
------------------------
Have Negate handy for this part. Find the nearest rock and take cover behind
it or use a Negate energy shield. The closer you get to the structure ahead,
the heavier the enemy firepower will get. Be sure to stop every now and then
to regain your health bar. Veer off to the side when the building is within
site and stay against the side of the building to avoid anymore enemy fire.
New Objective: Use elevator to enter defensive rampart
Go to the center and take care of the three Seekers guarding the lift. Go up
the lift and into the building.
New Objective: Use console to unlock rampart gates
Seekers will be all over you inside. Turn left and activate the console on
the right.
New Objective: Proceed through rampart gates
Go back outside and take the lift down. Turn right and get rid of the Shock
Troopers. Negate works well here too. Take another right eventually and go
straight.
CUTSCENE
------------------------
Turning Tides - Part B -
------------------------
Go straight ahead and through the gates. Fight through the Seekers up ahead
and follow the path. I cannot recommend Negate enough for this part, and
remember, Surge will reflect turret fire. Set up a Negate shield as the
turret starts to fire. When it stops, rush toward the area underneath it and
deal with the Seekers. Target the turret and peak out every now and then to
fire at it until it is destroyed. Go toward the structure with the double
doors to the left.
New Objective: Breach forward Seeker defenses
Hide behind the walls to avoid the turrets. Make a dash for the double doors,
and the turrets will stop firing. They can both be destroyed from behind
without any problem. Take either the right or left path...it doesn't matter.
Destroy the turrets, Seekers and shock trooper. Try to take cover behind a
column or underneath a turret to make this part much easier. Go to the path
in the center or the small cave to the left...again, it doesn't matter. Hide
behind a Negate energy shield to avoid the turrets fire while fighting off the
Seekers. Try to get behind the turrets and destroy them. Go through the
doors, they should open automatically.
CUTSCENE
------------------------
Turning Tides - Part C -
------------------------
Follow the Aurelians. Go across the bridge to the left and use Surge to move
the Seekers out of the way. They will be all over you once you reach the
other side. Go down the ramp up ahead and through the triangular door at the
bottom. Go straight and watch out for the lava in the next room; it's instant
death. Take care of the Seekers and ride up the elevator to the right. Take
the left path. Jump across the gap and take care of the Seekers. It's a
little hard to avoid the Aurelians when they storm out in the way of Gideon's
godly powers. Look out for the turret up ahead; if you move from side to side
to the turret fire is easily avoidable. Follow the broken bridge down. There
is a path to the left that will lead you down the side of the mountain. An
Aurelian will be waiting at the end. Go through the door on the left.
Get inside the hangar and help out the Aurelians. After everything calms
down, use the elevator in the back on the left. Help the Aurelians above
fight off the three Shock Troopers. Negate will come in handy here. Go
outside once the fighting is finished. A Seeker ship will be waiting, and
this is one of those heavy-duty Seeker droppers, so be careful.
Go to the left and activate the console. This will make a bridge fold out to
the left. After going across the bridge a few Seekers will ambush you. There
is a turret on a platform to the right that can be used, jump to get to it.
Go up the ramps and get across the platform while fighting off Seekers. Go up
another set of ramps and some Aurelians will meet up with you. Go the way
they came from. Fall off the platform at the end and do down the ramp up
ahead and veer off the right to take out some more Seekers. The Aurelians
will "cover" you from above, or most likely, get shot bits trying. Make
another left eventually and go inside the hangar. Fight off the Seekers and
go toward the door on the right.
CUTSCENE (notice Gideon's hair is short again)
------------------------
Turning Tides - Part D -
------------------------
Blast the Seekers and go to the left. Now, this part can be very unfriendly.
First of all, have Negate handy for the Seeker ships, and Surge is good to
have for the Seekers that will pour all over Gideon. Set up some energy
shields and take cover behind them when the ship starts to rain rockets down
upon you. Keep the Seekers at bay with Surge and blast the ship with Surge or
switch to Shatter.
After everything is peaceful again, go to the right. Follow the path around
the mountain, and turn right again. There is a Seeker building up ahead.
Veer off to the right and there is a small path that can be used to get the
drop on one of them. Jump over the gap get on the bridge overhead, or you can
go back the way you came and go down the other path. Either way, defeat the
shock trooper and the Seekers and get inside the building.
CUTSCENE (yep, once again :D)
------------------------
Turning Tides - Part E -
------------------------
Turn to the left and...woah! Don't go in that room just yet, this is way too
convenient. Use Shatter or Surge to take out all the Seekers before entering.
Afterwards, hop into one of the Seeker tanks, and jet out through the tunnel.
Take out the Shock Troopers first, and then focus on the Seekers. Be sure to
destroy their ships for spite. Go through the next tunnel ahead.
New Objective: Make your way across volcano valley
The side of the mountain will collapse on the left side, so go down the path
to the right. Whatever you do for this portion, DO NOT RUSH! Take out the
Shock Troopers and Seeker tanks from a safe distance with cover. If you do
rush, they will make mincemeat out of you in no time. If your tank starts to
burn, go back into the hangar and get the other Seeker tank.
Three Shock Troopers and one Seeker off to the right will be the first set of
enemies. Make a left and more Seekers and an enemy Seeker tank will be
waiting. Make another left and try to take out the Seeker tank and army of
Seekers from a safe distance. You may have to play a game of cat and mouse
with the enemy tank since it will try to take cover behind the stone
structure. Keep going straight and make another left. Move your target over
the area ahead until it turns red and start firing at the tank and Seekers in
the distance. Destroy the blockades, go straight then turn right. A cave-in
will occur behind your ship eventually and Seekers will jump at your tank from
behind. Some Shock Troopers will be off to the left next to the building. Be
on the lookout for the Seeker tank inside the building, he just sort of pops
up from nowhere. Exit the tank and go inside the building. Run toward the
doors.
CUTSCENE
------------------------
Turning Tides - Part F -
------------------------
Go through the doors and take out the Seekers at the consoles. Go through the
door to the right and the next one after that. There is a Seeker ahead in the
glass tunnel so...woah! Didn't see that coming. Anyway, go up the newly
formed ramp to the door. Inside take out the Seekers around the elevator.
Now, this part can be a little tricky because of an elevator glitch. Walk up
to the elevator console and press the X button ONE TIME. It will not register
immediately, but DO NOT, move around in a frenzy while mashing the X button
violently, that is what causes people to screw up at this part. I know...I've
done it before. Anyway, the elevator will carry you down eventually (I
promise) if you tap it one time. If you still have problems with this part
then try out some of the solutions below...
******************************************************************************
More tips for that damned elevator...
1. Walk slowly onto the elevator platform until the "press X to activate"
message appeared (you'll be just barely on it) and push X.
2. Make sure all of the Seekers in the room are dead. Surge around the room
if you have to, because they sometimes get stuck behind walls.
3. Make sure there are no bodies on the elevator. Surge them off if you have
to.
4. Stand in the center of the elevator and press the X button one time, and
wait for about 30 seconds. If the elevator does not respond, move a bit and
press X again.
5. Stand directly in front of the console and press and hold X.
6. Turn the game off and on and try again.
7. Restart the checkpoint or restart the level.
8. If all else fails, go to the following url...
http://i15.photobucket.com/albums/a355/berserker_kev/adventelevatorofdoom.jpg
flip off or curse at the screencap, and start from step 1 again.
(thanks to Chikn n a Bskit, subordinater, Siz_Brizz, spartan air, and Barnolde
from the Majesco boards. thanks to Epyon for the screencap)
******************************************************************************
A few Seekers and a Seeker Elite will greet Gideon at the bottom. Target the
Seeker Elite, since he has to be beat with dodge attacks. Go through the door
and waste the Seekers off to the left. Lift and Surge work especially well in
this room for destructive purposes. Further ahead Seekers will be waiting
overhead mixed with some on the current level. Negate or Lift may come in
handy for this part. Ride up the lift off to the left. There is another lift
on the other end at the top. Wait for the lift if it is not there. At the
very top, fight off the Seekers and go through the door. Keep going straight
until you enter a lava area.
New objective: Proceed across volcano core
Dispose of the single Seeker and go across the bridge ahead. Use the console
if the bridge doesn't fold out. Seekers, Shock Troopers, and Seeker Elites
will be on the other side. Surge and Negate work well here. Try to lure the
Seeker Elites away from the Shock Troopers since they have to be beaten
carefully.
New Objective: Navigate (across) fallen rocks to cell block entrance
To the left of the big Seeker ship, are some rocks that you will need to jump
across. Seekers will come across them eventually. Make sure to use the
camera to judge the distance while jumping. Once on the other side, go
straight ahead and to the right. Seekers will hop across or shoot you from
the bridge ahead. Take them out and jump across the lava. They don't seem to
have an end to their spawning, so you will have to take them out quickly and
then make the jump. Go toward the doors in the back.
CUTSCENE
------------------------
Turning Tides - Part G -
------------------------
Go through either door ahead. A whole horde of Seekers will be waiting to
ambush you in this room. Surge is highly recommended to keep them off.
Seismic Waves are good to use too if you have leveled up Gideon's Melee attack
enough. After they've been taken care of, go up either ramp and through the
doors on the right. Surge your way through the Seekers down the hall and try
not to get knocked off. Go through the door at the end of the hall as soon as
possible (even if it is full of Seekers) to avoid getting knocked off into the
lava. Go through the next door into the room with the consoles. Go through
either door on the side of this room and down the hall.
New Objective: Defeat cell guards
Fire down at the Seekers below and go straight.
CUTSCENE
New Objective: Pursue Skinwalker
Follow the Skinwalker through the wall. Free the Aurelian off to the left
side also to make Enorym happy.
BOSS FIGHT
==============================================================================
**************
- Skinwalker -
**************
New Objective: Defeat Skinwalker
This boss is pretty easy, once you know how to beat him. Equip Surge and/or
Lift during this battle. Lock onto to the Skinwalker with flick targeting,
and dodge his rams and punches with the dodge button or jump button. Jump
whenever he hits the ground, because it will knock you off balance. Wait
until you see him lift his hand in the air before jumping. Keep dodging his
attacks and remain patient. Stay away from him while your energy recharges if
you get hit. Eventually he will hit the ground and a bunch of rocks will rain
down followed by a big boulder. He will pick up the boulder and try to toss
it at you. While he has it above his head, charge up Surge and release to
stun him or target the boulder with Lift and wait for him throw it, then
quickly Lift it. Both have the same effect of stunning the Skinwalker. Pound
on the Skinwalker with whichever power of your choosing while he is stunned.
He will get back up and angrily pound the ground. Be sure to jump. Wait for
him to pound the ground again and rinse and repeat the above method. It only
takes about three times to kill him. Be sure to avoid his ground pound after
he gets up.
An Aurelian and Marin (in the back) will try to help you out during this
entire battle...not that they actually do, but it's interesting to watch them.
==============================================================================
------------------------
Turning Tides - Part H -
------------------------
Now it's time to leave. Go across the broken bridge and defeat the Shock
Trooper and Seekers on the other side. There is a Seeker Tank off to the left
that you need to use to escape.
New Objective: Escape from Volcano
Get in the Seeker tank and ride it down the lava path directly behind you.
Just like in the previous tank area, do not rush, or the enemy tanks will take
you down quickly. Turn left after disposing of the first enemy tank. Watch
out for the turret on the right and the one in the back on the left.
New Objective: Proceed to sub-station generators
Turn left and go straight. Plenty of Seeker tanks, a few turrets and some
Shock Troopers are up ahead. Blast them and continue going straight. The
cave-ins are nothing to worry about; you're not timed through this. Make a
right up ahead and keep going straight ahead. Exit the tank when you get to
the door in the back and go through.
This hangar has a Seeker, 2 Shock Troopers, and a Seeker Elite in it. Take
care of the Seeker and the Shock Troopers from a distance, and then deal with
the Seeker Elites. Go through the door on the other side.
New Objective: Find transportation
This part can be evil. There are about 5 Seeker Snipers in this area. 2 of
them are up above and the rest are on the ground. One hit from their sniper
will nearly kill you. Take them out carefully and quickly. There is a sniper
rifle on a crate to the side as you enter that will help. A powered up Surge
blast helps a lot also. Go up the lift to the side and down the next lift on
the other side.
Get in the Seeker Tank and go down the path ahead. Blast the turret and turn
left. Take out the enemy tank and Shock Trooper from a distance and go up the
hill. Go into the lava area at the top. You might want to switch tanks here
if the current tank is damaged. Take out the Seekers and the enemy tank up
ahead with your current tank and hop in the new one.
Go straight then turn right. Watch out for the double dose of enemy tank
action and the turrets in the back. Keep going straight, and take the right
path ahead. Turn left and blast the turrets and the enemy tank in the back.
Make another right eventually and blast the tanks and turrets along the way.
Make a left and blast anything that moves up ahead. Keep going straight and
go up the ramp at the end. The enemies just keep coming in this room so don't
worry about trying to get rid of all of them. Rush over to the right side of
the room, exit the tank, and go through the collapsed structure ahead. Keep
moving ahead and blasting Seekers until a cutscene starts.
CUTSCENE
END CREDITS
Woah, woah, woah! Don't leave just yet my friend. Sit back down exalted one,
flyboy, or dad...whatever you choose to be called, for your story is not over
yet!
============================
Epilogue - Pulling Strings -
============================
--------------------------
Pulling Strings - Part A -
--------------------------
BOSS FIGHT
==============================================================================
**********
- Koroem -
**********
This boss will differ in appearance depending on the person you chose to
rescue in Chapter 1.
This boss is not that hard, if you know its attacks. Quickly equip Negate and
set two energy shields towards the wall against the far right column and the
far left column. It helps to set a third energy shield in the middle area in
front of you to hide behind. Whenever one side of the room flashes, quickly
get behind the energy shield on the side of the flashing and no damage will be
taken from the blast. If the boss ever starts to glow a reddish color, then
get behind a column, piece of a column, or the middle energy shield
immediately. The column that Marin is behind will not break. The boss has
two attacks involving rocks. For one, it will lift a rock with its powers and
hurl it at you. Dodge, Surge, or Lift the rock to avoid it. For the other
attack the boss will cause rocks to fall from the ceiling. Stay on the
extreme right or left side to avoid this attack. Now for the main annoyance,
Seekers will be rushing out of the side doors and attacking nonstop throughout
this whole battle. Equip Surge to quickly push them out of the way. Do not
try to get in the area near the boss; it will push you back with quite a
force.
To hit the boss, target it, and wait until it hurls a black energy ball toward
you. Hit the energy ball with a Surge wave to knock it back. The boss will
catch it and knock the ball back, surge it back its way. Once again the
energy will be knocked back at Gideon, surge it back one more time and the
boss will be stunned and yellow rocks will fall around it. Target and pick up
one or all of the rocks with Lift or Multi-Lift and toss them at the boss.
Rinse and repeat this method until the boss is taken out.
CUTSCENE
Now walk up toward the boss. Walk, don't run (you look cooler and more
almighty while walking), and press the R button.
==============================================================================
CUTSCENE
--------------------------
Pulling Strings - Part B -
--------------------------
Now, the goal for this portion is to, well, do nothing and nearly die. A
cutscene should start once you're down to about 20% health.
CUTSCENE
Congratulations! You just beat the game!
------------------------------------------------------------------------------
SECTION VI
______ /\ ______
/ __ // \\ __ \
| / / \ \ |
| | / /\ \ | |
| | / / \ \ | |
| | / / \ \ | |
| |/ /EXTRAS\ \| |
|// / \ \\|
/ / ________ \ \
/ //__________\\ \
/___\ /___\
==========
- Cheats -
==========
--------------
- Cheat Menu -
--------------
At any time during gameplay, pause the game and enter the following...
*************************************************************
Up, Up, Down, Down, Left, Right, Left, Right, White, Black, X
*************************************************************
This will bring up a cheat menu where you can enable the following cheats...
-------------------------------------------------------------
|Blizzow |All powers with level 5 mastery. |
-------------------------------------------------------------
|Unlimited Ammo |Unlimited ammo for weapons and unlimited |
| |uses for powers. |
-------------------------------------------------------------
|God Mode |Invincibility |
-------------------------------------------------------------
|Uber Mode |All enemies die with one hit from anything. |
-------------------------------------------------------------
(thanks to ProtoType9X)
-----------------------------------
- Unlock All Levels and Cutscenes -
-----------------------------------
When the game loads up, click play game. Select the slot you wish to play. On
the screen that follows enter the following code...
*****************************
Black, White, Black, White, X
*****************************
(thanks to derek_korus)
----------------------------------
- A Way to See All the Cutscenes -
----------------------------------
(please note that the default cutscene saved character is always Ethan if you
play the cutscenes from the cutscene viewer)
If you want to see the cutscenes from both sides of the story very quickly
then do this...
1. Start a new game then go to Chapter 1 Part E through the level select and
rescue whoever you didn't rescue before, you only have to play to the end of
this part. Really you should only save Olivia, since the default character is
Ethan, there is no use in saving him since his cutscenes are already viewable
beforehand.
2. Make sure the game saves on Chapter 2 after the cutscene when you land.
Quit the game. Go to the pause menu and choose "Exit" and "Yes".
3. Enter the code for all cutscenes and level select for that file that you
just quit. You do not have to do this if you have previously beaten the game,
but even if you have beaten it, it will not give you the final few cutscenes
unless you enter the cheat.
4. Now go to the cutscenes and they should play from the viewpoint of the
person that you just saved. Epilogue Scene 4 is always opposite for some
reason though.
===============
- Easter Eggs -
===============
--------------------
- Mario Pipe Set 1 -
--------------------
In order to activate this easter egg go to Chapter 1 Part B. Through this
level there is a series of six buttons, which much be activated in this
order...
Button 1 - Hit the locker in the first room a bunch, and it will disappear
revealing a button.
Button 2 - Look behind the pillars in the first room to the left of where you
start.
Button 3 - Go out of the first room the way you came in from the previous
level. Press the button near the door with the fire in front of it.
Button 4 - Behind the left locker in the second escape pod room (looks like
the first room in the first level)
Button 5 - Check behind the pillar in the second escape pod room much like
Button 1.
Button 6 - On a doorframe on the first section of walkway overlooking the
civic center towards the end of the level.
(thanks to marsfire (Eric Berger), the actual creator of this easter egg)
Alternate (and faster) way to reach the pipe:
Use the "All Powers" cheat code and equip Timeshift. Once inside the civic
center turn to the left and jump over the wall. Go to the end of the platform
and jump and Timeshift to the small walkway against the side of the wall.
Follow the walkway to the end then jump and Timeshift once again to reach the
area with the first Mario Pipe. Once inside the pipe there will be no music
present...possibly because the pipe was not gotten to correctly. ;p
(thanks to stormshadowzero)
--------------------
- Mario Pipe Set 2 -
--------------------
In order to activate this easter egg go to Chapter 4 Part B. Through this
level there is a series of six buttons, which much be activated in this
order...
Button 1 - From your starting point there is a black object on the wall in
front of you. If you blow it up, the first button will be revealed.
Button 2 - Continuing through the level, you pass under a large gun, and then
walk into an open area with 3 more black objects. Blow up the one in the
corner opposite the area's entrance, and the second button is revealed.
Button 3 - From the location of the second button, go up the small ramp and
wait for 2 bridges to appear. Each bridge is on one side of another large gun.
Do a charged jump from the bridge to a platform above the gun. There is a
hidden room here which houses the 3rd button and an enemy.
Button 4 - If you continue through the level, you will come across an area
where enemies spawn from 3 doors: 2 small ones on your right and a large door
in the distance. The large door leads to a tunnel (for a reference point, the
door is under a turret), which contains the 4th switch.
Buttons 5 & 6 - Continue through the level until you reach a point where you
must hit a switch to create a bridge. Make the bridge and begin walking down
it. While walking across the bridge, look to your right, and you will see an
alcove with 2 more large explosive objects in it. Blow both of these up to
reveal the final 2 buttons. Hit the button closer to the beginning of the
bridge first, as they must be hit in order through the level.
A previously locked door is now open at the end of the bridge, and the pipe is
now accessible.
(thanks to Estabon1)
----------------------------
- Advent Rising Staff Room -
----------------------------
This secret is located in Chapter 4 - The Awakening - Part E. Through this
level there is a series of three buttons, which much be activated in this
order...
Button 1 - In the room with the three shock troopers the first button, as you
enter the room, is on the back of the right top portion of the area that holds
rocket launchers in about the middle. You may have to tilt the camera upward
to see this area. Destroy the black object to reveal the first button.
Button 2 - In the room after you fight the two Seeker Elites, go to the locked
door and do a charge jump to the area above the door. There is a button on the
ground all the way at the end of this area. Destroy the black object first.
Button 3 - Right before you meet up with Enorym in the room with the dead
Aurelian. Jump to the bottom, below the platform, and go to the furthest
column in the back to find a button behind it.
Backtrack to the previous room, and a new door is unlocked. Go inside to find
the Advent Rising staff room complete with pictures of the AR staff by each
console. Activate the consoles inside the room in this order to get an image
of a ninja wailing on a guitar in the middle of the room...
Console 1 - guy with the white guitar
Console 2 - guy with the black-rimmed glasses
Console 3 - guy with the wooded background
Console 4 - person with the long black hair
Console 5 - guy with mustache and beard
Console 6 - guy holding up the "Utah County Sheriff" sign
Console 7 - guy with spiky hair and glasses (Donald Mustard)
---------------------------
- Headcrab from Half-Life -
---------------------------
At the beginning of Chapter 1 Part E, as you're getting off the elevator, go
into the room with the marines and Seekers and look to the left. The second
door on the left has debris lying in front of it, but there is a slight
opening underneath it. Walk into the opening and look to the left. The
scientist leaning against the wall has a headcrab on his face. Use first-
person view to get a better look.
----------------------
- Little People Room -
----------------------
("All Powers" code must be activated to find this room)
In the Prologue Part D, go through the level to the first Tactical Combat
Training room scene with the holograms. After defeating the first set and
getting the "When ready, proceed back to instructor" objective go back toward
the room with the instructor. Activate the all powers cheat and move to the
door at the end of the hall just near the area where the special forces
instructor and Ethan appear but DO NOT go through the door. Position Gideon
so that he is facing directly at the entrance to the opposite door across from
him. Equip the Timeshift power and shift to the opposite door. If you did
this correctly then Gideon will barely make through the door before they
close. Move forward and to the door the marines come out of in the middle of
the hall. Wait for the door to open and go through and walla...little
men...but no rainbows. :(
Once you are inside the room, you will need to restart the checkpoint in order
to get out. If anyone can figure out a way to get to this room without the
use of cheat codes, then please contact me!
(thanks to Ngreder and Majesco forum members)
=================
- Contest Icons -
=================
(You must have Xbox LIVE and you must have downloaded each icon)
For each of these I will list the clues first that were given on the Advent
Contest website first followed by the actual location. I suggest looking at
the clue first and seeing if you can find it to try to make it a bit fun.
---------------
- Week 1 Icon -
---------------
Week #1 Clue:
Clue: Gideon says, "Alright, at least she is still alive. Now we've just got
to make it back in one piece..."
Level range: Located somewhere within the Epilogue or Chapter One...
Actual Location:
At the beginning of Chapter 1 Part E, as you're getting off the elevator, go
into the room with the marines and Seekers and look to the left. The second
door on the left has debris lying in front of it, but there is a slight
opening underneath it. Walk into the opening and the Week 1 Advent icon will
be in the back of this room. This is the same room with the scientist and the
headcrab.
Pics:
http://i15.photobucket.com/albums/a355/berserker_kev/ar_icon1a.jpg
http://i15.photobucket.com/albums/a355/berserker_kev/ar_icon1b.jpg
http://i15.photobucket.com/albums/a355/berserker_kev/ar_icon1c.jpg
(thanks to Yusaku for the pics and the location)
---------------
- Week 2 Icon -
---------------
Week #2 Clue:
Clue: Gideon says, "I don't deserve to be alive… it should have been me out
there!"
Level range: located somewhere within Chapters 1 through 3...
Actual Location:
Go to Chapter 2 Part A (the first level with the Scythe) and go get the
Scythe. The icon is on the bridge that leads into the structure with the
tunnel that you drive into. At the very end to the right of it, you'll see a
green glowing thing. That's the icon! To get up there, drive the Scythe to the
big bump/hill that's closest to the icon (there are two Seekers up here) and
rocket up there with the Scythe's boosters. Drive up to the rock that is
pointing toward the piece of bridge where the icon is and boost off of it.
You can't rapid-fire the boosters! Use well-timed boosts, and when you're in
the air, if you use the well-timed boosts, you'll actually keep going up
higher.
Pics:
http://i15.photobucket.com/albums/a355/berserker_kev/advent_icon_week21.jpg
http://i15.photobucket.com/albums/a355/berserker_kev/advent_icon_week22.jpg
(thanks to Yusaku for the pics and the location)
===========
- Choices -
===========
-------
- Bud -
-------
In Part D of the Prologue, you will be given the choice of whether to stop Bud
(the marine) by stunning him or by killing him. If you decide to kill him
then the Marines throughout Chapter 1 will lend little support during the
Seeker battle, however if you stun him they will help you blast the Seekers.
-------------------
- Ethan or Olivia -
-------------------
In the final part of Chapter 1 Part E, you're given the choice of who to take
with you to the escape pod. This choice will affect quite a few cutscenes
throughout the rest of the game and will affect the appearance of the final
boss in the Epilogue.
====================
- Glitch Solutions -
====================
======================
- Framerate Problems -
======================
---------------------------
- The Morrowind Technique -
---------------------------
(taken directly from aminojaku's thread on GameFAQs)
"I've had the game crash on me a few times, and I've had the framerate
problems now and then that others are complaining about. It was frustrating to
say the least. But yesterday I realized I remember another game with issues
very much like Advent.. Morrowind. So when it crashed for the second time in
20 minutes last night I decided to try the fix that was used for Morrowind..
and it worked. I continued playing Advent for 4 hours, all the way to the end.
^_^
So here you go.. for those who may not remember..
What we are going to do is clear out Advent's cache on the HDD. The HDD keeps
a data cache of the last 3 games played on the HDD in order to cut down on
initial load times a little. But with Morrowind, once in a while that cache
gets corrupted and causes the game to keep crashing. The more you play after
it crashes the first time, the more often it crashes. Very much like Advent.
And like Morrowind, the fix is simple. Take 3 games that you haven't played in
a while.. 3 that are not the last 3 games you played. And put them in your
Xbox and start them up. All 3, one at a time. You don't need to play them or
save a game.. just load them. So now when you play Advent again, it reloads
the cache from scratch, eliminating the bad data that was a cause of some of
the issues.
Give this a try if you are having a lot of problems with Advent (crash,
lockups and really bad framerate issues)."
(Thanks to aminojaku)
-------------------------------------
- The Morrowind Technique Revisited -
-------------------------------------
This is a guaranteed way to stop the Majesco screen from stuttering upon
startup of Advent Rising.
Just like in the Morrowind Technique you have to swap out games, but you only
have to use one of them for this. Start up any game from your collection, it
doesn't matter if you just got through with it or if you haven't played it in
a while just start up any game besides Advent Rising. Take out the game after
it has loaded up on the Xbox. Now put in Advent Rising and the Majesco screen
should not skip. You have to do this every time that the Xbox console is
turned off, but you only have to load up one game when you start it up again.
I have noticed that the framerate works about 5 - 10% better it seems after
this is done, but it might just be me.
---------------------
- Project: Clean Up -
---------------------
If your Xbox hardrive is loaded with saves or especially soundtracks, delete
some of the files that you may no longer use in the future. Soundtracks
usually take up the most room, so delete them first and see if this helps.
-------------------------
- Frequent Playthroughs -
-------------------------
Strangely enough, for some people, playing through it many times has resulted
in the game running smoother on their Xbox.
=====================
- Cutscene Problems -
=====================
------------------
- Sneaky Loading -
------------------
If you're having problems with cutscenes try pausing the game right when a
cutscene starts. Notice the "Loading" phrase in the bottom right corner of
the menu. The game loads the next scene during some of the cutscenes so this
sometimes causes them to glitch. Leave the game paused until the "Loading"
phrase disappears and unpause the game or press "Y" to replay the cutscene.
---------------------------
- Crossed Lines: Scene 12 -
---------------------------
The audio in this cutscene is ahead of ahead of the actual actions of the
characters. It is not your sound setup or Xbox; it is a bug. There is no
solution to this. It will do the same thing even if you view it through the
cutscene viewer.
----------------------------
- Pulling Strings: Scene 4 -
----------------------------
For some reason, when viewing this cutscene under the cutscene viewer, it is
always the opposite of whomever you left behind in the final part of Chapter
1. Like the above, there is no solution just pointing this out.
===================
- Camera Problems -
===================
---------------------------------------
- The Other Use for First Person View -
---------------------------------------
Sometimes the camera gets locked-on to an object or enemy that is no longer
there and stays locked-on to it. If the camera starts to have a mind of its
own during gameplay (this generally happens around the last few stages), then
go into first person view with the "Back" button and exit back out by pressing
"Back" again. This should fix the camera to where you can control it once
again.
=====================
- Gameplay Problems -
=====================
---------------------
- Reload Checkpoint -
---------------------
This game has tons of random bugs and glitches during gameplay that happen
randomly usually caused from the objective not appearing on the screen or
maybe Gideon getting stuck in wall or during a move or, possibly, a door not
opening when it should. Also, sometimes the next objective refuses to flash
across the screen and the game will not let you proceed. The only way to fix
these is to restart the checkpoint. Choose "Load Checkpoint" from the main
pause menu.
(thanks to the people that emailed me about adding this)
------------------------------------------------------------
- Switch to Ethan as Saved Character (aka. The "Soma" bug) -
------------------------------------------------------------
In other words, you rescued Olivia during the first chapter yet you load your
game later from a save point only to find out that Ethan is with you now. For
some reason, the game will randomly replace Olivia with Ethan at times.
The only way you can get Olivia back is to start a new game and select the
final portion of Chapter 1 through the level select feature, and save Olivia
once again. Other than that, if this bug happens, you will remain with Ethan
as your saved character.
If however, you used the level select code to skip some levels past the final
part of Chapter 1, your default saved character will automatically be Ethan.
------------------------------------------------------------------------------
SECTION VII
______ /\ ______
/ __ // \\ __ \
| / / \ \ |
| | / /\ \ | |
| | / / \ \ | |
| | / COPYRIGHT\ | |
| |/ / & \ \| |
|//SPECIAL THANKS\\|
/ / ________ \ \
/ //__________\\ \
/___\ /___\
*************
- COPYRIGHT -
*************
This document (c) 2005 Kevin Hall (Berserker)
Advent Rising (c) 2005 Majesco Sales, Inc. All rights reserved.
This document is for private and personal use only!
Do not try to sell this document for profit! This is a free document and
should remain free.
Do not try to reproduce this document in any way, shape, or form.
Do not alter this FAQ in any way!
If you want to use this document on your site then contact me at
[email protected] and ask for permission. Do NOT post this FAQ up on
your website without permission. If you do, I will find you...and I will rip
your tendons out of your legs, and smite you with them over and over while
reciting my email address continuously as I land each blow.
^^^^^^^^^^^^^^^^^^^^^^^^^^^^^^^^^^^^^^^^^^^^^^^^^^^^^^^^^^^^^^^^^^^^^^^^^^^^^^
This FAQ can be found on the following sites:
GameFAQs (www.gamefaqs.com)
Neoseeker (www.neoseeker.com)
IGN FAQs (
http://faqs.ign.com)
The Advent Trilogy Blogspot (
http://advent-trilogy.blogspot.com)
Cheat Happens (www.cheathappens.com)
Cheat Code Central (www.cheatcc.com)
Super Cheats (www.supercheats.com)
GamePlayWorld (www.gameplayworld.com)
SOPS Lancer Site (www.lancer.shadow-clan.org.uk)
Gamerhelp.com (www.gamerhelp.com)
If you see this document on any site not listed above, then please contact me!
(
[email protected])
^^^^^^^^^^^^^^^^^^^^^^^^^^^^^^^^^^^^^^^^^^^^^^^^^^^^^^^^^^^^^^^^^^^^^^^^^^^^^^
******************
- SPECIAL THANKS -
******************
- my parents.
- all the sites that posted this walkthrough.
- you for reading.
- Donald Mustard, Geremy Mustard, the Glyph X team, and Majesco (such an
awesome job guys!).
- Tommy Tallarico for the amazing soundtrack!
- Rooney at
http://advent-trilogy.blogspot.com for providing me with up-to-
date info on the game. Visit his site if you haven't! :)
- Advent Rising Majesco boards (you guys are awesome) and GameFAQs boards.
- aminojaku for the glitch solution; stormshadowzero for the first Mario Pipe
location; marsfire (Eric Berger) for the button locations for the first set of
Mario Pipes; Estabon1 for the button locations for the second set of Mario
Pipes; Ngreder, the Majesco forum members, and of course, rainbows for the
location of the Little People Room; the readers that emailed me about loading
the checkpoint to stomp those gameplay bugs; Yusuka for the location of the
both contest icons and the pics; all the Majesco board members that
contributed to the elevator bug; spartan air for the glitch solution for a
particular boss fight on Chapter 5.
- Gideon's hair, I don't know, I guess it could be considered a flaw, but I
just found it amusing how it goes from long to short so instantly at times...
- Icefall and the users on the Arctic Nightfall message boards, one place
where I always feel at home on the net when I'm in the mood to discuss
video games or anime.
==============================================================================
****************
- CONTACT INFO -
****************
I can be reached at my email address, which is >
[email protected] <, so
please contact me if you have any questions, comments, etc. I don't mind
receiving emails at all. All I ask is for you to try to make the email
decent. I realize that some people do not speak perfect English or cannot
type that well, so that doesn't really matter to me, but all that I ask is
that you try to make it readable.
I would prefer you not too add me to your messenger, but if you do, at least
tell me a bit about yourself and why, or if I know you, tell me who you are.
One of my pet peeves is when people just add me to their messenger without
saying anything. I usually just deny their request.
Last but not least, do not send me any viruses or spam mail please.
Want to learn a bit more about me? See my FAQ Writer of the Month interview
at IGN...
http://faqs.ign.com/articles/637/637797p1.html
==============================================================================
~~~~~~~~~~~~~~~~~~~~~~~~~~~~~~~~~~~~~~~~~~~~~~~~~~~~~~~~~~~~~~~~~~~~~~~~~~~~~~
My other walkthroughs:
Advent Rising Game Script (Xbox)
Eve of Extinction [EOE] (PS2)
Hulk (PS2, Xbox, GC)
The Incredible Hulk: Ultimate Destruction (Xbox)
Legend of Kay (PS2) (IGN)
Metal Gear Solid 3 Secrets/Easter Eggs FAQ (PS2)
Psi-Ops (Xbox)
Resident Evil 4 Treasure/Money Guide (GC)
~~~~~~~~~~~~~~~~~~~~~~~~~~~~~~~~~~~~~~~~~~~~~~~~~~~~~~~~~~~~~~~~~~~~~~~~~~~~~~
--- ---
_____ _ _ _ _
|_ _| |__ ___ / \ __| |_ _____ _ __ | |_
| | | '_ \ / _ \ / _ \ / _` \ \ / / _ \ '_ \| __|
| | | | | | __/ / ___ \ (_| |\ V / __/ | | | |_
|_| |_| |_|\___| /_/ \_\__,_| \_/ \___|_| |_|\__|
_____ _ _
|_ _| __(_) | ___ __ _ _ _
| || '__| | |/ _ \ / _` | | | |
| || | | | | (_) | (_| | |_| |
|_||_| |_|_|\___/ \__, |\__, |
|___/ |___/
____ _ _
| __ )| | ___ __ _ ___ _ __ ___ | |_
| _ \| |/ _ \ / _` / __| '_ \ / _ \| __|
| |_) | | (_) | (_| \__ \ |_) | (_) | |_
|____/|_|\___/ \__, |___/ .__/ \___/ \__|
|___/ |_|
>>
http://advent-trilogy.blogspot.com <<
******************************************************************************
For all the latest news on all things Advent (the comic or the games), come
visit the Advent Trilogy Blogspot.
******************************************************************************
Also, be sure to pick up...
_______ ______ _______ _ _________
| ___ | | __ \ |\ /| | ____ \ | \ /| \__ __/
| | | | | | \ | | \ / | | | \/ | \ | | | |
| |___| | | | | | | | | | | |__ | \ | | | |
| ___ | | | | | | | | | | __) | |\ \| | | |
| | | | | | | | \ \_/ / | | | | \ | | |
| | | | | |__/ | \ / | |____/\ | | \ | | |
|/ \| |______/ \_/ |_______/ |/ \_) \_/
_______ _ _______ _ _ ________
| ____ ) | | ( ____ \ | | | \ /| | _____/
| |____|| | | | (____\/ | | | \ | | | ( ____
| __) | | (_____ ) | | | |\ \| | | | \_ )
| | \ \__ | | /\____) | | | | | \ | | (___) |
|/ \__/ |_| \_______) |_| |/ \ _) (_______)
___ ___ ___ _ __ _____ _ _ ___ ___ _ _ _ _ ___ _____
| _ \/ _ \ / __| |/ / |_ _| || | __| | _ \ | /_\ | \| | __|_ _|
| / (_) | (__| ' < | | | __ | _| | _/ |__ / _ \| .` | _| | |
|_|_\\___/ \___|_|\_\ |_| |_||_|___| |_| |____/_/ \_\_|\_|___| |_|
______ /\ ______
/ __ // \\ __ \
| / / \ \ |
| | / /\ \ | |
| | / / \ \ | |
| | / / \ \ | |
| |/ / \ \| |
|// / \ \\|
/ / ________ \ \
/ //__________\\ \
/___\ /___\
Pick up the comic at your local comic book store. Visit Rob Worley's blog for
more info...
http://www.thanator.com/index.php?cat=29&skin=advent
------------------------------------------------------------------------------
_________________
/ \ / \
| | \ / | |
| | \ / | |
| | (.\_/.) | |
| ---- ---- |
| _______________ |
| \ | | | | | / |
| \_|_|_|_|_|_/ |
\_________________/
------------------------------- > BERSERKER < --------------------------------
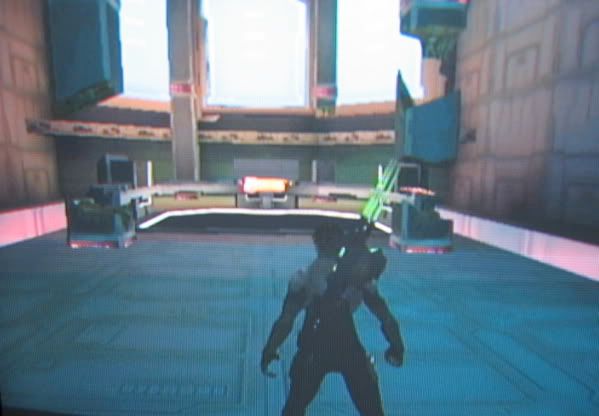
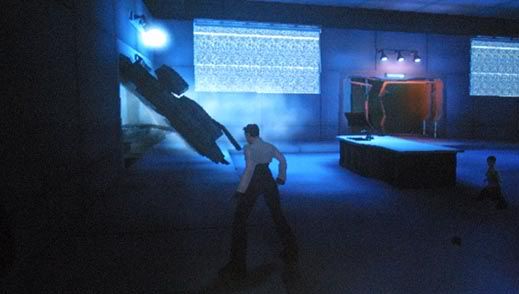
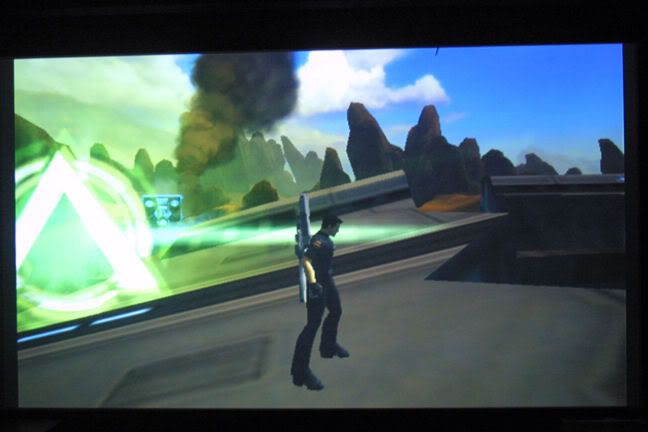