===============================================================================
===============================================================================
_____ _ _ _____ _ _ ____ ______ _____ _ _____ _ _
| __ \ | | | | / ____|| | | | | _ \ | ____|| __ \ | | |_ _|| \ | |
| |__) || | | || (___ | |__| | | |_) || |__ | |__) || | | | | \| |
| _ / | | | | \___ \ | __ |FOR| _ < | __| | _ / | | | | | |
| | \ \ | |__| | ____) || | | | | |_) || |____ | | \ \ | |___ _| |_ | |\ |
|_| \_\ \____/ |_____/ |_| |_| |____/ |______||_| \_\|_____||_____||_| \_|
===============================================================================
===============================================================================
Copyright 2006-2014 - Staley, Deuce ex Defcon. Any site that wishes to host
any of my guides is free to do so, provided you don't edit the content in any
way, shape, or form, and provided you contact me prior to posting the guide(s),
as I like to know where they're being used.
I cannot guarantee any site other than GameFAQs will always have the most
current form of my guides, so if there's ever any doubt, always check GameFAQs.
Because they have previously taken copies of my guides and replaced the name of
the site they were written for with the name of their own site, CheatCC.com
specifically does NOT have permission to host or link to any of my work - past,
present, or future.
If you have questions, comments, or so forth concerning this guide, please
email me at
[email protected] or post on my message boards,
http://thebrink.us/boards
-----------------------------------------------------------------------------
| ========================= |
| | CONTENTS | |
| ========================= |
-----------------------------------------------------------------------------
0.00) Foreward (a personal message to the creators of the game)
0.10) General Notes
0.20) Important Controls
0.30) Medals
1.00) Walkthrough
1.10) Russian Campaign
1.11) Lifeline
1.12) How Steel Was Tempered
1.13) Crossfire
1.14) The Sword of Bagration
1.15) The Boys of Belgrade
1.16) Crimson Tide
1.17) The Fall of Berlin
1.20) Western Allies Campaign
1.21) New Year's Eve
1.22) The Big Push
1.23) The Breach
1.24) Devils' Due
1.25) Azgard Fortress
1.26) Sudden Chance2
1.27) White Star Rising
1.30) German Campaign
1.31) Schwarzer Freitag
1.32) Morgengraun
1.33) Edelweiss
1.34) Walpurgisnacht
1.35) Adlerschrei
1.36) Wirbelwind
1.37) Oderbruch
1.40) French Campaign
1.41) The Battle of Glieres
1.42) Beggars' War
1.43) Lances at Dawn
1.44) Liberation of Paris
2.00) Units
2.10) French Units
2.11) French Infantry
2.20) German Units
2.21) German Infantry
2.22) German Vehicles
2.30) Russian Units
2.31) Russian Infantry
2.32) Russian Vehicles
2.40) Western Allies Units
2.41) Western Allies Infantry
2.42) Western Allies Vehicles
3.00) Cheats
4.00) Easter Eggs
5.00) End
5.01) Version History
5.02) Closing
=============================================================================
| 0.00) Foreward (a personal message to the creators of the game) |
=============================================================================
I've written guides for dozens of games over the years, but this is the first
time I've ever really felt compelled to include a section like this in any of
them.
To everyone involved in the creation of Rush for Berlin and Rush for the Bomb:
Thank you for all of the time and energy you put into this project. There have
been endless streams of World War II video games over the years, especially RTS
games. As a WWII history buff, I've played altogether too many of them. Some
were good, some were awful, and some were so bland and generic that they were
simply... forgetable.
When a genre has been done and redone to death, both in gameplay and subject
matter, there are only so many factors that can really separate the good, the
bad, and the forgotten. Sometimes it's hard to describe, but you always know
it when you see it. But with Rush for Berlin, I can easily describe it.
From the way the music fits the game perfectly, to the hidden fads and inside
jokes, to the monk chant at the end of the tunnel in Crossfire, to the
different numbers painted on the side of every tank that comes out of a
factory, to the narration, to the unit callouts, to the title art... every
inch of this game tells me that the people involved in its creation genuinely
cared about its quality, its subject matter, and its players.
It's easy to tell that a lot more love went into this game than some other
titles with far larger budgets, and I want you all to know that there are some
of us out there that truly appreciate it.
In 2006 I left this guide partially finished, and now, eight years later, new
players continue to find the game for the first time on Steam and are searching
the Internet for information. As more and more of them contact me about this
partially completed guide, I can no longer tolerate leaving it out there,
taunting players. This game deserves better - it doesn't deserve to be
forgotten. I promise you, I will finish this guide in 2014 even if it's the
last thing I ever write.
- Deuce ex Defcon
=============================================================================
| ----------------------------------------- |
| | 0.10) General Notes | |
| ----------------------------------------- |
=============================================================================
In this section, I will list some notes about various things you should keep in
mind while playing, in no particular order:
I) Always make sure the compass is pointing due north.
- The camera sometimes starts pointing in a stupid direction, so to keep the
walkthrough instructions as simple as possible, you should always turn your
compass so it's facing due north at the start of every mission. If, for any
reason, I tell you to rotate the map so it faces any other direction, I will
include some reference points to make sure you have it facing the right way.
(The map can rotate by holding down the two mouse buttons and rotating it.)
II) You can adjust the camera zoom.
- By rolling the wheel in the middle of your mouse, you can make the camera
zoom in or zoom out. I tend to keep it zoomed all the way out, since you can
see more of the map on your screen at once.
III) Resource regeneration rates stack.
- Or at least I'm fairly sure they do... Meaning more factories will decrease
the time it takes to regenerate funds. More on this after I play more of the
game. One thing I can tell you for sure is that anything you control that's
capable of generating resources will only generate resources while it's not in
use. So if you're building stuff in your factory, your factory's resource
regeneration percentage will drop to zero until it's done building stuff.
IV) "What to bring"
- Prior to each mission, you'll note that I've included a section that lists
units to bring along with you from your core. These are only my personal
suggestions - you might not even have all of the units I list, depending on how
many casualties you've had throughout the missions. Feel free to follow my
suggestions exactly, modify them, ignore them, or whatever floats your boat.
If there happens to be a certain unit I feel you should definitely bring along,
I'll specifically mention it (as well as specifically mention why you should
bring it). My suggestions will also assume that you don't want to bring so
many units that it puts you in the "red" for time.
Note that you will always have to bring at least one core unit along on each
mission, or the game won't let you start the mission. Oddly though, there's
no mechanism in place to prevent you from bringing only a vehicle that requires
a crew, so for example, if you attempt to start the Azgard Fortress mission
with only your Pershing tank, you'll start the mission with literally zero
units under your command. You won't lose instantly, but you won't be able to
do anything. Kind of an odd oversight on the part of the developers.
V) Ending with a high score (a rating of "excellent").
- Those of you that're playing the game as it was intended to be played will
be interested in ending every mission with an "excellent" rating. See the
little bar at the top of the screen? The slider on that bar is positioned on
the bar to show how well you're doing - green (to the right) is good, and red
(to the left) is bad. Destroying more enemy units will move the marker to the
right, but you shouldn't panic if you're close to finishing a mission while
you're not in the green yet. Completing objectives gives you a score boost, so
you'll always get a decent jump at the end of the mission.
Note that your score slowly drops the longer you let the mission go on, too.
If you hover over the slider, you'll notice that it displays your current
score, and that it's slowly ticking down about one point per second. How many
units you bring at the start of each mission will also affect your score. You
can read some more details about that in the next section. Keep in mind that
the longer you let a mission drag on, the rate that the score drops will
increase by an enormous amount too.
VI) The number of units you bring at the start of each mission will affect the
mission's starting time.
- When you're choosing what core units to bring along at the start of each
mission, keep in mind that each unit you bring lowers the time value displayed
in the center of the screen. This will affect the game clock when the mission
starts. For example, let's examine the fourth Russian mission, The Sword of
Bagration. When picking units, you start with 10 minutes on the clock. You
have 10 green slots and 5 red slots.
You're required to bring at least one core unit, so if you do just bring one,
the mission will start with 9 green minutes on the clock, which will count down
until it reaches 0. Why do you care? Well, score for one thing. Remember
that you lose points the longer the mission lasts. Any green minutes on your
timer will add to your score, and any red minutes will subract from it. This
can have a massive impact on your starting score.
On that fourth Russian mission, if you only take one unit with you, your
starting score will be 20,400. If you take all fifteen units with you, your
starting score will be 12,000. That means that each unit you bring with you at
the start of a mission will cost you 600 score right off the bat. That's ten
times the score that you lose for letting a minute just tick off the clock, so
keep that in mind. Of course you can easily get an Excellent rating on every
mission even if you completely disregard the cost of bringing extra units. But
if you're at all interested in setting a high score, you'll need to pay
attention to this.
With that in mind, I'm about to share a really douchebag tactic that you can
use to exploit this mechanic. I don't advocate that you use it, but hey, part
of writing guides is that you share as much information as you can:
When you're in a mission and you use the Restart Mission option from the menu,
the mission will always start the game clock at 0:00 regardless of how many
units you brought with you. So for example, if you brought a full 15 units on
that fourth Russian mission, you'd normally start the game at 5:00 minutes in.
But if you start the mission and then immediately hit the Escape key and pick
the Restart Mission option, you'll still have all 15 of your units, and the
clock will be back down to 0:00. That's a really cheap way to save 3000 score.
VII) Beware of satchel dogs.
- While quite effective against enemy vehicles, the satchel dogs that your
Russian Shock Infantry have are not the smartest things in the world. They
tend to automatically attack abandoned vehicles, even your own. If you're not
careful, they can destroy your core vehicles right at the start of a mission
before you even get your crews to man them. This is also a problem when you're
trying to capture an enemy vehicle intact. If you're planning to have Shock
Infantry go anywhere near an abandoned vehicle, be certain that you have the
unit set to Passive mode first.
VIII) Physician, heal thyself.
- While medics are capable of healing each other, they won't be able to heal
themselves. This presents a problem when you only have one medic, and he gets
injured. Remember that while he can't directly heal himself, he can use his
First Aid Station ability to deploy a stationary healing area, which will be
able to heal him. This is a critical ability to remember during a lot of
missions where infantry tactics are required, especially since dropping a first
aid station and then retreating past it is a great way to allow your units to
still be healed while the medics are moving.
IX) Infantry experience.
- As your units level up, they gain hit points and damage. It looks like
levels 2 and 3 add 20% to the unit's base hit points and damage rating, and
level 4 will add an additional 10% to the unit's base hit points and damage
rating. This can make a huge difference, especially when you have big piles of
leveled infantry going up against infantry that doesn't have that level boost.
This boost also takes effect for the damage you deal when that unit is in a
vehicle. It's also added after any other bonuses are applied, so for example
if you have a German Tank Ace that's already giving you a 25% firepower bonus
in some tanks, that bonus is applied before the experience bonus is applied.
=============================================================================
| ---------------------------------- |
| | 0.20) Important Controls | |
| ---------------------------------- |
=============================================================================
The default control scheme is fairly standard if you've played many other RTS
games (especially Codename: Panzers, since those games were by the same
people), but if you're used to more main-stream games, you might find this
scheme a little confusing at first. The following is a list of some of the
most important shortcut keys and so forth.
(NOTE: I'm not listing all of them, just the ones I find the most useful.)
S:
- Stops the highlighted units. Very useful if you just accidentally sent a
group of your units somewhere incredibly stupid and want them to stop before
they get themselves annihilated.
A:
- Makes the highlighted units attack a target. very useful for destroying
unmanned vehicles and buildings that haven't been identified as a threat.
Changing the direction a unit is facing without actually moving:
- If you select a unit, then right click and hold it down, you will have an
arrow that you can use to manually turn a unit without actually moving it.
This is great for making sure your units are facing the enemy when they are
lined up for defensive positions. Similarly, you can also use this feature
when you're telling a unit to move. For example, if you're moving a unit due
south, but you'd like it to be facing due north when it stops, you can right
click on the destination, then hold it down and rotate the arrow until it's
pointing in the desired direction before you let go. When the unit reaches
its destination, it will automatically turn itself in the specified direction.
Pause:
- Pressing your space bar will pause the game. This is very beneficial when
you're worried about time. You can easily form teams without wasting time or
fighting, or you can pause the game and give your units a lot of orders all at
once, and they'll carry out those orders as soon as you unpause the game.
Making Groups:
- Holding the Control key while you have something selected and then pressing
a number key will form a group. Groups are invaluable for effective
fast-passed combat. Once you've made a group, pressing the corresponding
number key without having the group selected will select the group for you.
Pressing the number while the group is already selected will center the screen
on that group.
Adding units to pre-existing groups:
- If a group already exists and you want to add another unit to it without
having to reform the entire group, simply select the group with the
corresponding number key, then hold the Shift key and left click on the unit to
add it to your selection. (Remember to hit Control+the group's number key
after that to actually tag that unit into the group.)
Selecting every unit of a certain type:
- If you double-click on a unit, all units of that type will be selected.
This is great for sorting out your forces and quickly making groups.
=============================================================================
| ---------------------------------- |
| | 0.30) Medals | |
| ---------------------------------- |
=============================================================================
Depending on how well you do during a particular mission, which objectives you
complete, how many units you lose, whether you kill all of the enemy targets on
the map, et cetera, you can earn several types of medals at the end of the
mission. These medals fit into five categories, which are described below
along with the various types of each medal that you can earn in each category.
Unfortunately, the extent of the information I can give you about each medal
and the exact mechanics behind earning them is very limited, primarily because
there's not exactly a whole lot of information out there about them. The
following is the entirety of the game manual's description of them:
"After extraordinary battlefield performance, the player can earn medals.
These are connected to well-defined statistics and the player is always aware
of the goals he must reach to be awarded one."
This is true to some extent - each of the five types of medals are pretty
clearly titled in a way that properly indicates the basics of what you need to
do to earn them. Unfortunately, specifics of what you need to do for each
medal in each category is never explained anywhere. They don't even provide a
list of all the possible types, so I might even be missing some rare ones that
I never encountered.
If anyone out there has any official information about this stuff, especially
if you can link me to a source, that would be great. I know some of the guys
involved in the development of these games used to send me stuff about them
years ago when they first came out, so if any of you happen to read this update
and feel like sharing some first-hand knowledge of the game, that would be
awesome.
-------------------
Objectives Finished
-------------------
All main, optional, and secret objectives completed:
France: US Good Conduct Medal
Germany: Iron Cross with Oak Leaves and Swords
Russia: Order of Glory
Western Allies: US Good Conduct Medal
All main and optional objectives completed:
France: US Silver Star
Germany: Iron Cross with Oak Leaves
Russia: Medal of Valor
Western Allies: US Silver Star
All main and secret objectives completed:
France: US Bronze Star
Germany: Iron Cross
Russia: Medal of Glory
Western Allies: US Bronze Star
The game will also sometimes give you a medal when two or more of a particular
type of objective are complete (for example, you might still get an Iron Cross
for completing two out of three secret objectives).
Keep in mind that if a map doesn't have any objectives of a particular type,
that will count as you completing them all. So for example, you can still get
the high end medal on a map even if it has no optional objectives.
--------------
Low Casualties
--------------
Just like it sounds, you're awarded this type of medal based on how many units
you lost during the mission. Keep in mind that there's an annoying quirk to
what counts as a casualty - if you occupy a vehicle of any kind during a
mission, whether it was an allied vehicle, enemy vehicle, or one that was
already abandoned right from the start, it will count as a casualty for you if
you don't end the mission with it manned. Keep that in mind before you capture
any random vehicles.
Even though I can't imagine this would ever really come up, I feel like sharing
this bit of information too. If you bring a core vehicle along on a mission
that requires an infantry squad to man it, but then you NEVER occupy that
vehicle at all during the mission, it won't count as a loss, and it won't be
removed from your core at the end of the mission either. But if you occupy a
core vehicle at any point during a mission, even if you occupy it with non-core
units, it MUST be manned at the end of the mission (by a core or non-core unit)
to avoid having it count as a casualty and be lost from your core.
Note that allied units don't count as casualties. Only core and non-core units
that are actually under your command count.
I've tried to see if there are exact percentages or anything that I can rely on
for what earns each type of medal, but I can't, and it's not a static number of
losses either. The best I can tell you is that in general, even a single
casualty will ruin your chances at the high end medal, although sometimes it's
possible to take one without missing it. Generally it only takes a few to ruin
your chances at the low end medal too, even if you have a hundred units on the
map.
High end:
France: UK Mention in Despatches 3
Germany: Close Combat Badge 3
Russia: Guards Badge Gold
Western Allies: UK Mention in Despatches 3
Low End:
France: UK Mention in Despatches 2
Germany: Close Combat Badge 2
Russia: Guards Badge Silver
Western Allies: UK Mention in Despatches 2
------------------
Kill Enemy Officer
------------------
You earn these medals by killing enemy officer units. Since this will be
mandatory for earning the Clear Level medals, I won't generally bother listing
specific information about this type of medal in the walkthrough for each
mission unless there's a particular officer somewhere that's hard to find or
something.
Some medals may or may not be possible for all campaigns depending on how many
officers are present on each mission (for example, none of the Russian missions
have more than 3 officers, so I have that medal marked as "Unknown").
Kill four or more enemy officers on the map:
France: UK Distinguished Service Order
Germany: Golden Service Clasp
Russia: Unknown
Western Allies: UK Distinguished Service Order
Kill three enemy officers on the map:
France: UK Military Cross
Germany: Silver Service Clasp
Russia: Excellent Soldier
Western Allies: UK Military Cross
Kill one or two enemy officers on the map:
France: US Marksman
Germany: Bronze Service Clasp
Russia: Excellent Marskman
Western Allies: US Marksman
-----------
Clear Level
-----------
Just like it sounds, you'll earn this medal for annihilating all enemy units on
the map. Since this is a pretty straight-forward thing to do and there's only
one type of medal for it, I won't generally bother mentioning anything specific
about it in the walkthrough for each mission unless there's a particular unit
that's really well hidden or something.
NOTE: If you're wondering, hostile wildlife doesn't count. For example, you
can ignore the wolves in the first Russian mission and still earn this
medal.
Annihilate all enemy forces on the map:
France: UK George Cross
Germany: Death's Head Badge
Russia: Medal For Valor
Western Allies: UK George Cross
--------------
Core Unit Gain
--------------
To me it would seem like the obvious intent of this medal was to track whether
the player collected all of the new core units that are available during a
particular mission by completing optional/secret objectives and so forth, but
that doesn't appear to be how it works in the game at all.
How it ACTUALLY works is that you just have to occupy a core vehicle that
wasn't occupied at the beginning of the mission (and make sure you're still
occupying it at the end of the mission). For example, in the second Russian
mission, all you need to do is bring one of your T34s along. It will be empty,
and the simple act of putting one of your infantry units in it and keeping them
there at the end of the mission will give you credit for the medal.
A special note, though - if you receive a new core vehicle that already has a
crew during a mission (like when you complete the optional objective in the
first Russian mission), you'll need to eject the crew and reoccupy the vehicle
in order to get credit. Bizarre, I know.
France: UK Military Cross
Germany: War Merit Cross
Russia: Order of Kutusov
Western Allies: UK Military Cross
=============================================================================
::::::::::::::::::::::::::::::::
1.00) Walkthrough
::::::::::::::::::::::::::::::::
1.10) Russian Campaign
::::::::::::::::::::::::::::::::
=============================================================================
| |
| 1.11) Lifeline |
| |
=============================================================================
-------
History January 1944
-------
"Following their hard-earned victory at Kursk, the Russians take the initiative
and commit their forces to offensive action all along the Eastern Front.
In the Baltic, their first priority is to break the siege of Leningrad, the
heroic city cut off by the Germans since September 1941. With millions of
civilian lives at stake, there is no turning back... and no more time to
waste."
----------------
Unit Information
----------------
Received units for the mission:
3 Standard Infantry
Core Units:
1 Green Officer Slot
1 Green Infantry Slot
1 Red Infantry Slot
(Starting Core:)
1 Political Officer
1 Medic
1 Standard Infantry
Additionally, a maximum of two T34-76 tanks can be added to your core if you
complete the optional objective.
What to Bring:
Your choices are a tad limited for this mission. Time shouldn't be much of
a factor, so I suggest you bring all three of your units along.
----------------------
Production Information
----------------------
Starting Resources: 4000
Called-In Officers: 0
You don't start with any facilities and won't be able to capture any on this
mission, nor can you call in any additional officers, so it's kind of pointless
that you have 4000 resources.
---------------
Main Objectives
---------------
1) Neutralize the German howitzers that are keeping our supply train from
reaching Leningrad.
- The howitzers are in the north-west corner, slightly above the train depot.
Get your men and/or tanks close enough, and they'll be able to kill the crews
manning the guns.
-------------------
Optional Objectives
-------------------
1) Lead at least one tank through the marshland by setting the wood piles on
fire.
Russian tank commander: "Lead us through the marshland, Comrades!"
- If you visit the village in the south-west corner first, you'll be shown the
correct path to take through the marshland. Follow this path, lighting the
wood piles along the way, and the two T34-76 tanks will follow you. Get them
to the last wood pile in the north-east corner, and they'll be added to your
core. If you accidentally lead them into part of the marsh by lighting the
fires out of order or lighting an incorrect pile, you'll fail this optional
objective. (You'll also fail it if both of the T34s are destroyed prior to
being added to your core.)
NOTE: To maximize the likelihood of both T34s making it through the marshes
properly, make absolutely sure both of them have made it all the way
onto the map and have stopped moving before you light the first wood
pile. Otherwise if you light the pile too early and the second T34 is
too far behind the first one, the pathing will break, and the second one
will almost certainly be doomed to drive into the marsh no matter how
carefully you light the wood piles. Also try to keep your infantry out
of their way, or they may adjust their paths to avoid them, which can
cause the same annoying deviations in their scripted paths.
-----------------
Secret Objectives
-----------------
1) Forester found.
Forester: "I made wood piles to mark a safe path through the marshland.
Mind you, I had to place some fake ones as well to confuse the
Fascists. Just be sure to avoid the trapped Panzers!"
- This is the gentleman responsible for the wood piles. You'll find him
standing around in the small group of buildings in the south-west corner of the
map. Get a unit close to him, and markers will appear on your mini-map to mark
the correct wood piles you'll want to light.
2) You destroyed all immobilized German tanks in the marshland.
Russian soldier: "Splendid, Comrades! Keep up the good work - let's send
all those Panzers to Hell!"
- There are four German tanks stuck in the marshland. If you follow the path
of wood piles, you'll find the first one to the north-west as the path starts
to head east. As you move east, there'll be another one south of the path,
then two close to each other on the north side of the path farther to the east.
Destroy all four of them to complete this secret objective. (Be careful not to
get your T34s destroyed by them in the process.)
-----------
Walkthrough
-----------
Begin by waiting patiently for the T34-76 tanks to appear to the east, and be
sure to make sure they both stop moving before you light the first wood pile.
Otherwise if you light the wood pile too early while the tanks are too far
apart, the second one will almost certainly get stuck in the marsh later.
Move west along the road, killing any Germans or wolves you happen to encounter
along the way. Continue lighting the wood piles you see along the road, but
when you reach the western side of the path, send a unit to the group of
buildings in the south-west. The gentleman responsible for placing the wood
piles is standing there. When you get a unit close enough to him, your
mini-map will display the locations of the correct wood piles to use in order
to lead the T34s through the marshland.
Follow these markers north into the marshland and continue lighting the wood
piles, but be careful when the path begins to move east. There's a German tank
stuck in the marsh north-west of the turn in the path, and it'll fire at you as
you move past. Destroy it with your infantry units, then continue to the east
and light more wood piles. In the middle of the map, you'll encounter another
German tank stuck in the marsh on the south side of the path. Destroy it, then
destroy the two on the north side of the path farther to the east.
Once you've destroyed those four tanks, the second secret objective will be
complete. Continue lighting wood piles as you follow the path on your map, and
when you reach the last pile in the north-east corner, the T34s will be added
to your core units (assuming they're still intact).
Move west along the road now, stopping to kill anything that threatens you.
Make sure you take out the infantry in the guard tower when you reach the
fenced area, then enter the fenced area through the east side. Move west along
the northern edge of the map, and you'll find the two howitzers and some
infantry units. Slaughter the infantry units first to avoid taking any
unnecessary losses, then use your infantry and tanks to kill the crews that're
manning the howitzers to finish the mission.
NOTE: If you want credit for the Core Unit Gain medal, you'll need to dump the
crew out of your T34s and put them back in. For some reason the game
doesn't register them correctly if you don't.
NOTE: There are 3 officers on this map (two near the artillery units and one
east of the main train building) that you'll need to kill to get the
Excellent Soldier medal and the Clear Level medal. There's also a unit
of infantry prone by some sand bags in the far north-eastern corner of
the map that's easy to miss. You don't need to hunt down the hostile
wolves for the Clear Level medal though.
=============================================================================
| |
| 1.12) How Steel Was Tempered |
| |
=============================================================================
-------
History March 1944
-------
"Invigorated by their success in the Baltic, the Russians push forward
across the Ukraine to liberate its people and reclaim its vast natural
resources for the Motherland.
At Krivoy Rog, their vanguard is to catch up with the retreating Germans and
crush them - or witness the wholesale destruction of the strategic mining and
ore refining facility."
----------------
Unit Information
----------------
Received units for the mission:
1 Standard Infantry
Core Units:
1 Green Officer Slot
2 Green Infantry Slots
1 Green Vehicle Slot
1 Red Infantry Slot
Additionally, Partisan Infantry and a Medic can be added to your core if you
complete the first secret objective.
What To Bring:
Due to the nature of this mission, tanks won't really be very useful to you,
so the only reason to bother bringing one of your T34s along is if you care
about the Core Unit Gain medal. If you do, all you need to do is put a unit
of infantry into the T34 and make sure you still have it occupied at the end
of the mission. The mechanics behind those medals are a bit odd.
Other than that, just bring your Political Officer and some Standard
Infantry. You don't even really need the medic very much since you're going
to be given several of them during the mission.
----------------------
Production Information
----------------------
Starting Resources: 4000
Called-In Officers: 0
You don't start with any facilities and won't be able to capture any on this
mission, nor can you call in any additional officers, so it's kind of pointless
that you have 4000 resources.
---------------
Main Objectives
---------------
1) Contact the leader of the Ukrainian Partisans.
Partisan Elder: "Well met, Comrades! The Germans are going to evacuate
this sector soon and take a shipment of Uranium ore with
them. We can't let this happen - their train must be
stopped at all costs!"
- You'll find him and a group of Partisans near a building if you head south
down the road. Get close enough to him, and the Partisans will become under
your command. The leader will run off to disable the German alarms. Note that
you HAVE to meet the partisan leader before you attempt the second and third
primary objectives. Otherwise the alarms are still active, and you'll fail the
mission if you approach the German base.
2) Prevent the German Supply Train from getting away with the Uranium.
Russian Officer: "The train is getting underway! Hurry and reset the
switchbox before the train gets there and the Germans
escape!"
- When the mission clock hits ten minutes or you get inside the furnace base
area (which ever comes first), you'll be told that the German train is going to
escape soon (in three and a half minutes). You need to reach the front of the
train before the counter reaches zero to complete this objective.
NOTE: If you destroy the train before getting to the trigger spot where the
tracks split, the train will magically reappear. If you destroy it
again before it reaches the bottom of the tracks though, you'll glitch
this mission to the point where you can no longer complete it.
3) Save at least two Blast Furnaces from destruction.
Russian Private: "The Germans are planning to demolish the Blast Furnaces,
Comrade commander!"
- Once the train's been stopped, engineers and German infantry squads will
periodically enter the map from the east and south sides to try to blow up the
blast furnaces. Place some troops on the south side of the southern furnace
and place some others near the south-east corner of the middle furnace, and you
should be able to stop all of the Germans before they get near any of the
furnaces. If a group slips past you, don't worry about it - you'll have plenty
of time to chase them down, even if they reach a furnace.
-------------------
Optional Objectives
-------------------
1) Capture the artillery piece before the Germans deploy it.
- In the hills on the west side of the road to the south of the Partisan
Leader's building, you'll find a tunnel with a miner standing next to it. Send
your troops through the tunnel, and they'll pop out the other end in the north
east corner of the map. Take the path that leads north up a hill, and you'll
find a German crew near a gun emplacement. Kill the crew, then take control of
the gun to complete this objective. If the crew makes it to the gun, you'll
fail this objective. Also note that if you want to get credit for the high end
casualties medal, you need to leave one of your units in the artillery piece,
or it will count as a casualty for some reason.
-----------------
Secret Objectives
-----------------
1) Partisan update on German battle plan acquired.
Partisan: "At last you're here! We've been observing the patrols for a
while now. If we can get into those mine cars, we may slip by
them unnoticed."
- At the start of the mission, send your troops through the path in the hills
to the east. In a small alcove to the north, you'll find some partisans
crouched on the ground. Get close to them, and a Medic and a unit of Partisan
Infantry will be added to your core.
2) All three Blast Furnaces saved from destruction.
- After stopping the train, the Germans will attempt to detonate the three
furnaces. Guard the southern entrance where the train tracks lead off of the
map and the eastern entrance between the two lower furnaces, and you should be
able to pick off all of the Germans before they can do anything. If some make
it to a furnace though, don't panic - you'll have over a minute to stop them
before they detonate anything.
-----------
Walkthrough
-----------
As I mentioned in one of the intro sections of this guide, rotating your map so
that the red North indicator is always pointing up will make my notes seem a
lot more sensical. This is definitely true for this mission, since all of the
directions will be reversed if you fail to rotate the map.
With your map correctly rotated, start moving south down the road. You'll
notice a small path leading into the hills to the east, where a small German
patrol will fire at you. Eliminate them, then head into the hills and move to
the small alcove at the northern edge of the map (shortly after you're told
that it looks like someone's passed through the area recently). Some Partisans
are crouched near some trees here, and if you get close enough to them, a unit
of Partisan Infantry and a Medic will be added to your core.
Add them to your group and return to the road to the west, then continue moving
south towards the building where the Partisan Leader is waiting. He'll give
you some more troops (precious, precious medics), then scurry away to handle
the German alarm. Take your new troops and move all the way south until you
see a small alcove to the south-west. A miner is standing here with a light,
marking the entrance to a tunnel. Watch out for the tank and guard tower in
the area as you move all of your forces through the tunnel.
You'll appear in the north-east corner of the map. Take the thin path heading
north up a hill to find some Germans near a gun emplacement. Slaughter them,
then take control of the gun to complete the optional objective.
NOTE: If you want to get credit for the high end casualties medal, you'll need
to leave one of your units in the artillery piece. Otherwise,
abandoning it counts as a casualty for some reason.
There are three options for attacking the furnace area. The first and simplest
option is to walk directly down the paths in the hills from the artillery unit.
Alternatively, you could move across the nothern edge of the map and capture
the mine cart building, then use it to shuttle your men down into the furnace
area. The third option would be to assault the furnace area from the main
entrance back on the other side of the map, but that's a pretty time consuming
and generally pointless alternative.
My suggestion is to go with the first choice if you're not interested in the
Clear Level medal. If you are trying to get the Clear Level medal though, you
might as well send at least some of your men to the mine carts, since there are
German soldiers and bunkers up there that will have to be destroyed.
Regardless of which approach you choose to use, go ahead and assault the area
near the water tower, where the train tracks split. As soon as you reach the
compound or the mission clock hits 10 minutes (whichever comes first), you'll
be give three and a half minutes to divert the tracks before the train escapes.
This is simple - just get at least one soldier to the flashing objective symbol
where the tracks split.
NOTE: If you destroy the train before getting to the trigger spot where the
tracks split, the train will magically reappear. If you destroy it
again before it reaches the bottom of the tracks though, you'll glitch
this mission to the point where you can no longer complete it.
Once the train moves, move your men east towards the German supply pile.
Slaughter the men here, then send half of your men slightly north-east to the
edge of the screen (between the two closest factories) and send the other half
south to the edge of the map (where the train tracks leave the screen). German
troops and engineers will periodically appear and try to detonate the furnaces,
but your troops will pick most of them off if you position them in the correct
spots.
Don't worry if some Germans manage to get past you - you'll have more than a
full minute to eliminate the engineer after it reaches a furnace before it'll
be able to detonate it. Wipe out all of the engineers without letting any of
the factories get destroyed, and you'll complete the third main objective as
well as the second secret objective.
NOTE: If you want the Clear Level medal, you'll have to wipe out all of the
German guard towers and bunkers around the edges of the mine. This can
be annoying and time consuming, so if you're trying to complete the
mission with a good score, utilize some of the time during the engineer
assault to take care some of the remaining bunkers while the engineers
are trying to destroy the furnaces. Don't miss the two rocket soldiers
in the bunkers at the main entrance - they're easy to overlook since
the bunkers can only fire westward. Also be aware that the mission will
end as soon as the fifth engineer is killed, so make sure you target the
unit of infantry that are guarding him before you target the engineer.
NOTE: There's only a single enemy officer in this mission, which means you can
only get the Excellent Marksman medal.
NOTE: If you want credit for the high end casualties medal, you have to leave
one of your units in control of the artillery piece that you captured in
the optional objective. Abandoning it after you've captured it will
count as a casualty for some reason.
NOTE: Like I mentioned earlier, the Core Unit Gain medals are weird. The only
way I know of to earn one on this map is by bringing one of your core
T34s and keeping an infantry unit in it at the end of the mission.
Somehow that counts for the Core Unit Gain medal regardless of whether
you complete the first secret objective or not.
=============================================================================
| |
| 1.13) Crossfire |
| |
=============================================================================
-------
History May 1944
-------
"As part of the greater effort to sweep the Crimea of the enemy, the Russians
have already taken Odessa and are preparing to return to the heroic city of
Sevastopol with a vengeance.
Barely held by a mixture of German and Rumanian troops, the historic Black Sea
port is to be secured at all costs in order to conclude the liberation of the
peninsula."
----------------
Unit Information
----------------
New Core Units Added: Core Units:
1 Sapper 2 Green Officer Slots
1 Supply Tractor 4 Green Infantry Slots
1 Artillery Officer 2 Green Vehicle Slots
2 Standard Infantry 2 Red Infantry Slots
1 Squad Leader 1 Red Vehicle Slot
Received units for the mission: What to Bring:
3 Standard Infantry 1 Squad Leader
1 T34-76E 1 Artillery Officer
1 SU-122 2 Medics
1 Supply Tractor 1 T34-76E
2 Sappers 2 Standard Infantry
1 Supply Tractor
If you don't care too much about the extra score, feel free to bring your other
T34-76E and extra infantry if you really feel like it.
Additionally, you can add an ISU-152 to your core by finding it south of the
east side of the dock. You can also add a Supply Tractor to your core by
finding it near the middle of the city inside a ring of buildings. You also
have an opportunity to convert any non-core infantry unit into a core infantry
unit, because whatever unit you use to occupy that ISU-152 is going to become
core if it isn't already a core unit (personally I chose to occupy it with a
sniper so I could add one to my core, but if you've always had a secret desire
to have a core unit of Penal Infantry, hey, now's your chance).
----------------------
Production Information
----------------------
Starting Resources: 1000
Called-In Officers: 0
Barracks (.15 Regeneration Rate)
--------------------------------------------------
Unit Type Cost Production Time
--------------------------------------------------
Standard Infantry 22 22
Medic 36 36
Sapper 27 27
Sniper 36 36
Shock Infantry 36 36
Penal Infantry 13 13
Once you've completed the first optional objective:
Factory (.15 Regeneration Rate)
--------------------------------------------------
Unit Type Cost Production Time
--------------------------------------------------
Bantam Jeep 27 27
T34-76E 40 40
T34-85 49 49
Transport 22 22
Supply Tractor 54 54
---------------
Main Objectives
---------------
1) Destroy at least 50% of the fleeing boats.
- There are fifty of them, so you'll need to destroy twenty five to complete
this objective.
2) Secure the bunkers along the waterfront.
- You actually only need three of them, not all of them. Assault them to make</pre><pre id="faqspan-2">
the German crews evacuate them, then put one of your own infantry units inside
to take control of the battery. Note that if you somehow manage to completely
destroy one of the batteries, you'll fail this objective even though you only
need to capture three of them to complete it. Go figure.
-------------------
Optional Objectives
-------------------
1) Capture the German factory.
- You'll find the factory in the north-west corner of the map. Once you've
captured it, you'll be able to build vehicles. Honestly though, you'll
probably have an easier time using infantry on this map.
2) Destroy or capture the Rumanian regimental battery atop the hill.
Russian Marine: "Those guns will tear us apart, Comrade Commissioner!"
- This should be your first priority at the start of the mission, since the
two batteries will absolutely devastate your forces if you don't destroy them.
I suggest you simply rush up the hill with your T34s and SU-122, but wait for
the first German tank to assault your starting position first.
3) Capture the Lighthouse and signal the Black Sea Fleet to begin their
barrage.
- The safest way to do this is to hug the water line on the north edge of the
map with some infantry, then carefully work your way to the lighthouse while
avoiding the hoard of German stuff guarding the entrance to the bunker area.
Then you can capture the lighthouse and start using the bombardment ability to
help weaken some of the remaining German units. The narrow path by the
lighthouse is also by far the safest route to attack the bunker area anyway, so
taking the lighthouse on your way past it is the logical choice.
-----------------
Secret Objectives
-----------------
1) Find both abandoned Russian vehicles among the ruins.
- One is in the north-east corner of the map, slightly south-west of the
lighthouse. The other is near the middle of the city, surrounded by buildings
and quite a few German units. Since it takes the boats quite a while to get
destroyed, I suggest you wait until you've got the bunkers under control, then
capture the vehicles while you're sinking boats to save time. Be careful when
rescuing the supply truck though. It will come under your control when you get
close enough to it, and the Germans will often immediately target it once it
falls under your control. Wipe them out before you go near it to be safe. If
it won't move out of the houses, it's probably because the field gun at the
entrance is in the way. Destroy it, and the supply truck should be able to get
out of there just fine.
Also note that the ISU-152 will turn whatever infantry unit you use to occupy
it into a core unit, so you should take the opportunity to capture it with a
non-core unit. Personally I use a sniper to take it so I can have one in my
core.
-----------
Walkthrough
-----------
Since you start with a barracks, I suggest you build several snipers and a few
medics. The tanks you start with should be all you really need to finish the
mission, and infantry piles are generally easier to use on this mission. A
small group of standard infantry mixed with snipers and being followed by
several medics can be ridiculously resilient.
Wait for a German tank to attack you on the west side, and once it's
destroyed, send your T34s and SU-122 west towards the hills. Move up the
winding road to find the two Rumanian batteries, then slaughter the crews in
them with your tanks. Don't bother manning them, they won't really help you.
Move your tanks back down to the city, then repair them if necessary.
Move your vehicles and infantry north along the west side of the map. Your
target is the small German-held supply depot near the middle of the map. Wipe
out the German forces near it to take control of it, then continue moving
north towards the factory. The Germans are defending the eastern side of the
factory with some heavy vehicles, so be ready to blast them with your tanks.
The German mobile artillery unit is horribly lethal to your infantry, so keep
them far away from it.
Stay near the flag on the factory long enough to capture it, but don't bother
building many tanks unless you really feel like it for some reason. Your
infantry group will be a safer way to clear out the rest of the map. The only
other thing you might need some help from the tanks for is sinking the escaping
boats, but the tanks you already have will be more than enough for that. Plus
the boats are absurdly weak, so even your snipers and infantry can help sink
them.
Anyway, move along the water and take care of any Germans you encounter, but be
careful not to shoot at any of the boats, or you'll trigger their escape before
you're prepared to stop them. Right before the lighthouse area, you should see
an abandoned Russian vehicle in the rubble. It's an ISU-152, and if you occupy
it, it'll be added to your core. So will whatever unit you use to occupy it,
even if you use a sniper. Pick a non-core unit to occupy it, then continue
moving your infantry pile towards the lighthouse.
Once you've captured it, you can eventually use the bombardment skill to help
weaken some of the remaining German units near the bunker area. Meanwhile,
take your infantry around the path by the lighthouse so you can assault the
bunkers from above, bypassing the heavily guarded entrances to the area. Start
clearing out the Germans, including the bunkers themselves. When you're sure
you're ready, go ahead and occupy three of them to complete that objective and
to start the boat retreat sequence.
The bunkers can handle most of the escaping boats by themselves, but they may
have issues with the bigger ones. Place some of your units near the bunkers
just in case they need to help out. From this point forward it's just a matter
of time before the mission ends, so take the opportunity to complete the secret
objective if you haven't already.
Slightly north-east of the supply depot that you captured earlier, there's a
chunk of buildings with some German defenders gathered inside it. There's a
damaged Russian supply truck in there that you can capture if you get close
enough to it, and if you capture it and the ISU-152 near the lighthouse, you'll
complete the secret objective. Make sure you kill all of the Germans in the
house area before you get too close to the supply truck though - otherwise if
you capture it too early, the Germans tend to immediately turn their attention
to it, and it won't survive a direct hit from anything.
If you want credit for the Clear Level medal, spend some more time dealing with
any surviving German defenders near the bunker area, especially along the
southern entrance to it. There might also be some survivors in the streets in
the middle of the map. If you need more time, tell your units to stop firing
at the escaping boats for a while.
NOTE: There're only two enemy officers in this mission, which means you can
only get the Excellent Marksman medal.
=============================================================================
| |
| 1.14) The Sword of Bagration |
| |
=============================================================================
-------
History July 1944
-------
"Three years to the day after the Fascist attack on the Soviet Union, a major
offensive is about to pit 200 Russian divisions with 2 million soldiers and
6,000 tanks against the German Army Group centre in Belarus.
Success will restore the Motherland within her 1941 borders and grant access
for the Red Army to Germany via Poland and East Prussia."
----------------
Unit Information
----------------
New Core Units Added: Core Units:
1 T34-85 1 Green Officer Slot
1 T34-76E 5 Green Infantry Slots
1 BM-13 Katyusha 4 Green Vehicle Slots
1 Artillery Officer 1 Red Officer Slot
1 Standard Infantry 3 Red Infantry Slots
1 Red Vehicle Slot
Received units for the mission: What to Bring:
2 T34-85 1 Artillery Officer
1 SU-122 1 ISU-152
3 Standard Infantry 2 Supply Tractors
1 Medic 1 BM-13 Katyusha
1 Supply Tractor 2 Standard Infantry
1 Sniper
2 Medics
This mission can be rough for new players, so don't be shy about taking extra
core units. You can still easily get an Excellent rating even if you bring all
15 units along. If you don't have a sniper because you didn't use my
suggestion in the last mission, that's fine, just bring whatever else you feel
like bringing.
Additionally, you can add three JS-2 heavy tanks to your core by occupying the
train station and waiting for reinforcements to arrive.
----------------------
Production Information
----------------------
Starting Resources: 1000 (you don't start with any facilities)
Called-In Officers: 0
Once you've completed the first main objective:
Headquarters (.15 Regeneration Rate)
--------------------------------------------------
Unit Type Cost Production Time
--------------------------------------------------
Recon Car 99 99
Bantam Jeep 27 27
T34-76E 40 40
T34-85 49 49
Supply Tractor 54 54
Standard Infantry 22 22
Sapper 27 27
Once you've captured it from the Germans near the bridge:
Headquarters (.15 Regeneration Rate) [identical to the one above]
---------------
Main Objectives
---------------
1) Capture the Field Headquarters at the crossroads.
- Use your vehicles to assault the guard towers on your side of the German
base, then take care of the tanks inside and the guard towers on the other end.
You have very little time for this, so don't mess around - you need to get to
the train station as soon as possible. If you continue to struggle to complete
this before the first train arrives, go ahead and take care of the train
station first. All it will cost you is that the Germans might build an extra
unit or two at this headquarters while you're at the train station.
2) Hold your Headquarters at all costs.
- Once you have control of it, make sure you keep at least something here to
defend it. I suggest leaving a couple tanks and one of your supply trucks.
The Germans will constantly build tanks from their second headquarters up by
the bridge, so every once in a while, one will attack your headquarters from
the road.
3) Eliminate the German defenders and capture the Bridge.
- You'll have to fight your way through the German defenses in front of the
bridge and capture both of its flags to end the mission. This wouldn't be very
hard, except there're landmines all over the place in front of the trenches and
artillery that will shred your infantry and can pulverize tanks if they're
stopped because of a landmine. I suggest you make an attack on the north side
where the marsh is. Build a recon car and carefully move it towards the trench
while you follow it with your artillery and Katyusha. As soon as it can see
things, blast whatever it sees with your units. Don't forget that you can make
excellent use of the recon car's scout planes and air strikes, too.
Before you get too close to the trench, get a sapper and crawl around in front
of it to identify the landmines in the area. Just be careful with him if you
want the high end casualties medal - the artillery in the area can be an
instant death sentence, and so can an unexpected sniper from the trenches.
Once you've breached this part of the trenches, you can slowly move your
vehicles forward in a nice careful pattern, using the recon car to scout ahead
so the artillery can destroy the German defenses and tanks from a distance.
-------------------
Optional Objectives
-------------------
1) Capture the Railway Station.
- You'll want to do this as fast as possible to prevent German reinforcements
from arriving on the train. When the mission starts, gather your vehicles and
capture the headquarters, then immediately proceed to the train station. If
you have a hard time making it there before the first train, go ahead and go
there first and take the headquarters second. The only down side is that the
Germans might build a few extra units at the headquarters while you're at the
train station, but you'll get three IS-2s from the train to even the odds.
Also note that if you only bring a few units and start the mission with some
"green" minutes on the clock, that appears to add to how long it takes the
train to show up.
2) Assist the Partisans defending the village.
Partisan: "Help us, Comrades! The Germans are attacking!"
- Immediately send all of your infantry to the village north of your starting
position as soon as the mission starts. As soon as they're done defending
against the German attack, quickly move them west to the hill with the wind
mill on it. There's a heavy artillery piece up there that you need to stop
before it starts lobbing shells at you.
-----------------
Secret Objectives
-----------------
1) Neutralize the German armored reserve.
Partisan: "Abandoned enemy tanks sighted. This is the perfect opportunity
to wreak havoc on the Germans!"
- If you don't mind casualties, you can do this with the partisans after they
reappear on the map. They can't drive the tanks, but they can fire the
weapons. Or you can just build a massive pile of Standard Infantry and rush
the tank pile from the road, but again, that assumes you don't mind casualties.
If you want the high end casualties medal, you'll have to take a slower
approach to this with your artillery and Katyusha after you've cleared a
section of mines from in front of the German trenches. The Germans will man
the tanks, but you'll have an easier time avoiding casualties.
-----------
Walkthrough
-----------
Time is of the essence at the start of this mission, so quickly man your
vehicles (make sure the artillery officer goes in either the Katyusha or the
ISU-152) and head west to the German base. Take out the guard towers and the
tanks, then head around to the other side and move towards the train station,
destroying the other guard towers on the way. Meanwhile, send all of your
infantry north from your starting position to help the partisans defend the
small village there. When they're done, send them west across the north side
of the map and take out the artillery unit in front of the wind mill.
NOTE: If you have issues getting to the train station fast enough, just go
there first instead of taking the headquarters first. The only down
side is that the Germans might build some units there while you're at
the train station.
When you've captured the train station, wait for your three IS-2 reinforcements
to arrive, then move all of your vehicles back to the headquarters. German
tanks will periodically attack from the road, so make sure you always have
something here to defend the headquarters.
Now you have some options for how to end the mission. If you don't care about
casualties, you can build a massive infantry pile and rush the abandoned tank
group in front of the bridge. Capturing the tanks while they're unmanned will
allow you to take care of the German tank in front of the bridge and either
capture it if you survive long enough, or clear out enough units that the
partisans can secret crawl over and capture the bridge.
Of course that approach is suicidal to say the least, so if you care about
earning the high end casualties medal, you'll need a safer approach. Plus
you'll have to assault the trenches and stuff in front of the bridge to get
your officer medal and the Clear Level medal anyway.
With that in mind, build a sapper and a recon car. Move your IS-2s, artillery,
Katyusha, and one supply truck to the northern edge of the map on the west side
of the wind mill and leave your other tanks and the second recon car behind to
guard your headquarters (or just build some more tanks if you want).
What makes a vehicular assault on the bridge area so frustrating is that there
are landmines everywhere in front of the trenches. Carefully crawl your sapper
forward toward the northern-most trench to identify mines, then let your
vehicles destroy them. Be prepared to flee immediately if any artillery shells
start coming down on you, though. Use your recon car's scout ability to
reveal the map around this first trench, then use your artillery strike ability
and the recon car's air strikes to start wiping out the German defenses. If
you edge closer and closer to them after clearing out the mines, you can also
blast stuff from a distance with your artillery and Katyusha.
Continue inching your way forward in this manner, eventually wiping out the
German armored reserve in the same fashion. Keep your IS-2s in front of your
artillery and Katyusha for protection, and make sure your supply truck is
always within repairing distance. It might take you a while, but you can clear
all of the trenches and the defenses in front of the bridge this way. Just
make sure you don't capture the bridge on accident until you've wiped out all
of the Germans if you care about the Clear Level medal.
NOTE: There're only two enemy officers in this mission, which means you can
only get the Excellent Marksman medal.
=============================================================================
| |
| 1.15) The Boys of Belgrade |
| |
=============================================================================
-------
History October 1944
-------
"With their autumn offensive sweeping through the Balkans, it is time for the
Russians to lend an Internationalist hand to the local partisans in liberating
the Yugoslavian capital.
Having realized the hopelessness of their situation, the Germans are in full
retreat from Belgrade - carrying loot and intelligence clearly worth
pursuing."
----------------
Unit Information
----------------
New Core Units Added: Core Units:
None 1 Green Officer Slot
2 Green Infantry Slots
1 Red Officer Slot
1 Red Infantry Slot
Received units for the mission: What to Bring:
1 Flamethrower 1 Political Officer
3 Shock Infantry 1 Artillery Officer
2 Mortar Teams 2 Medics
3 Standard Infantry 1 Standard Infantry
3 Medics
1 Sapper
1 Sniper
1 Recon Car
Additionally, you can add a Partisan Elder to your core by freeing him from the
buildings on the east side of the map. (Numerous other Partisans will also
join you at the same time, but they won't be core.)
Partisan fighter: "We've been trapped here for days... Finally we can jump
into the fray!"
----------------------
Production Information
----------------------
Starting Resources: 0
Called-In Officers: 1
You won't be able to produce units during this mission, though you will be able
to add non-core Partisan units to your command in a few places. Since you have
no resources, you can't call in an officer even though you finally have the
ability to do it (if you didn't already bring any with you).
---------------
Main Objectives
---------------
1) Neutralize the Kingtiger tank!
Dying partisan: "Damn Kingtiger..... arrrrghhh..."
- Simple enough - Just use your mortar teams to lob shells at it from a as far
away as possible, or use the recon car's tactical airstrike ability.
2) Help the Partisans! Don't let them be wiped out!
Partisan Leader: "Prepare comrades! The time has come to liberate
Belgrade and get rid of the oppressors!"
- Focus on the field guns first - the Partisans will occupy them once the
Germans in them get killed. Partisan casualties won't count towards your Low
Casualties medal as long as the AI is still controlling them, but any surviving
Partisan units will be added to your non-core command as soon as you take the
square, so it's in your best interest to make sure as many survive as possible.
Plus you'll lose the mission if they all die before you force the Germans to
retreat.
3) Enter the German HQ!
Partisan Leader: "Let's aim for the heart of the beast! The Germans set
up their HQ over there!"
- It'll be marked for you, just send a guy into it. Make sure you pick up the
Partisan units on the far east side of the town square first (they're being
pinned down in the buildings by some German units). Move north along the east
side of the map towards the HQ, and you'll encounter more Partisans. Fight off
the Germans to add the Partisans to your group.
4) Capture the Abwehr officer!
Partisan spy: "An Abwehr Officer fled the HQ with a truck and headed for
the airport! He must be carrying the intel we need!"
- Approach the stadium from the east along the northern edge of the city. The
Germans have a few Flak 88s waiting for you as well as several tanks, so be
prepared to crush them all with grenades, mortars, and your shock troops. You
can also make ample use of your recon car's tactical and strategic airstrike
abilities as well as your artillery officer's barrage ability if you have him
with you. Gather your forces around the marked spot outside the stadium before
the timer reaches zero to complete this objective.
-------------------
Optional Objectives
-------------------
1) Take the depot!
- The depot's on the west side of the town square. Once the square's secure,
head to its north-west corner and destroy the tank there, then move farther
west to assault the depot. Don't move too far north of the depot, though - a
large German force is waiting there, and it'll utterly shred you if you provoke
it.
-----------------
Secret Objectives
-----------------
1) Panzer commander couldn't escape!
Russian Soldier: "Tank Commander! You have no chance to survive, make
your time."
- Destroy the tank in the north-west corner of the town square, then kill the
commander that pops out of it to complete this secret objective. The easiest
way to make sure he doesn't get away is to have your sniper(s) close to the
tank when it gets destroyed, or just crawl a pile of infantry right up next to
it using your medics for support.
-----------
Walkthrough
-----------
Your poor Partisan buddies are having a bad day a little to the west of your
starting position, so as soon as your Russian reinforcements show up, pick the
two mortar teams out of the pile and have them crush the Tiger from as far away
as you can.
Meanwhile, the Partisans will be encouraged by your reinforcements and launch
an assault on the town square. Gather the rest of your troops together and
help them out, concentrating on the field guns first (since the Partisans will
occupy them as soon as the Germans are knocked out). Make sure you take out
any units that get too close to your troops or the Partisans, too, or they'll
toss a grenade (or several) at you.
Continue sweeping north to break the German defensive line, forcing them to
retreat. By now the Tiger should be destroyed, and the first two main
objectives should be complete. Gather your men (including the surviving
Partisans, who'll now be under your control) and move to the north-west corner
of the town square. Destroy the tank here, then kill the commander that pops
out of it to complete the secret objective.
Continue heading due west towards the small depot. Take care of the machine
gun nest to the south, then take out the infantry and the pair of tanks around
the depot. Capture it to complete the optional objective, then move east again
once your units are healed. On the east side of the town square, you'll find
some Germans around some large buildings. Slaughter them all to free some
trapped Partisans, including a Partisan Elder that'll be added to your core.
Gather these new units and head north along the east side of the city. You'll
encounter another group of buildings, and more Partisans will be fighting some
German infantry. Aid them as quickly as possible to prevent them from being
wiped out, but watch out for the field gun and infantry south-west of the
cluster of buildings. Once the area's clear, take the new Partisan units under
your control and continue heading north towards the objective symbol near the
headquarters building.
More German infantry will be guarding the entrance. Crush them all, but before
you occupy the headquarters, take some time to clear out the rest of the map if
you want to get the Clear Level medal. Mostly you'll just need to make a clean
sweep between all of the buildings, especially in the south-east corner (if you
didn't go there earlier) and the area east of the stadium. Just be aware that
getting too close to the stadium is a suicide mission until you occupy the
headquarters (which causes the German tanks to retreat).
When you capture the headquarters, you'll have a five minute timer to make it
to the stadium. That's plenty of time, especially if you already cleared out
the rest of the map for your Clear Level medal. In fact, it's probably best to
occupy the headquarters before trying to clear the last two sections of
buildings directly east of the stadium, just to avoid any unfortunate encounter
with the German tank piles and Sturmtiger before they retreat.
Take care of the Flak 88s and remaining German units that're waiting for you at
the stadium, and you'll complete the mission.
NOTE: There're only two enemy officers in this mission, which means you can
only get the Excellent Marksman medal.
NOTE: Because you can't bring any core vehicles along with you on this mission
and there aren't any that you can capture during the mission, there
doesn't appear to be a way to earn the Core Unit Gain medal for this
mission.
=============================================================================
| |
| 1.16) Crimson Tide |
| |
=============================================================================
-------
History April 1945
-------
"Determined to best the Western Allies by reaching Berlin first, Stalin orders
Marshall Zhukov to launch a frontal assault on the last German defense line
protecting the German capital.
The battle for the Seelow Heights will either be the next chapter in Zhukov's
legend... or the very last mistake of his impressive military career."
----------------
Unit Information
----------------
New Core Units Added: Core Units:
1 Recon Car 2 Green Officer Slots
1 BM-13 Katyusha 4 Green Infantry Slots
1 Shock Infantry 6 Green Vehicle Slots
3 Standard Infantry 2 Red Infantry Slots
2 Red Vehicle Slots
Received units for the mission: What to Bring:
Multiple ground troops, artillery, 1 Artillery Officer
armored units with support 1 Squad Leader
vehicles plus production and 4 Standard Infantry (for vehicles)
support facilities. [In other 2 IS-2s
words, too much crap to count.] 2 Katyushas
The tanks and Katyushas aren't really necessary, but they're excellent for
defense on this mission. You'll start with a group of tanks by your factory
and another group by your headquarters, but your core units can be used to
reinforce them (and gain free experience on their crews in the process). Don't
hesitate to bring 2 moe
----------------------
Production Information
----------------------
Starting Resources: 4000
Called-In Officers: 2
Factory (.15 Regeneration Rate)
--------------------------------------------------
Unit Type Cost Production Time
--------------------------------------------------
T34-85 49 49
JS-2 99 99
SU-100 54 54
Supply Tractor 54 54
SU-122 63 63
SU-152 108 108
Headquarters (.15 Regeneration Rate)
--------------------------------------------------
Unit Type Cost Production Time
--------------------------------------------------
Recon Car 99 99
Supply Tractor 54 54
Bantam Jeep 27 27
M17 GMC 31 31
Halftrack Transport 31 31
Barracks (.15 Regeneration Rate)
--------------------------------------------------
Unit Type Cost Production Time
--------------------------------------------------
Standard Infantry 22 22
Medic 36 36
Sapper 27 27
Mortar Team 36 36
Flamethrower 27 27
Sniper 36 36
After capturing them from the Germans:
Barracks (.15 Regeneration Rate) [identical to the one above]
Barracks (.15 Regeneration Rate) [identical to the one above]
Factory (.15 Regeneration Rate) [identical to the one above]
Headquarters (.15 Regeneration Rate) [identical to the one above]
---------------
Main Objectives
---------------
1) Occupy the enemy HQ.
- Easier said than done. I recommend you capture or destroy (preferably
capture) all four of the field mortars before you attempt this, since your
forces will be pulverized by them if you don't. Before you try a frontal
assault from your base, consider the fact that there're land mines out there,
not to mention a huge hoard of tanks, infantry, and bazooka guys. It's best
to capture the field mortars first, then take the HQ from the south-west.
2) Destroy the four howitzers.
Russian Officer: "Remember, Comrades: standing orders are to destroy
these guns!"
- Here's the problem - the four Field Mortars for this objective are utterly
devastating, so ideally you'd capture them intact and use them for yourself
before destroying them. The downside is that doing so will prevent you from
getting the high end casualties medal since you're required to destroy the
Field Mortars to end the mission.
-------------------
Optional Objectives
-------------------
1) Capture the enemy Factory.
- The factory is directly south of the German HQ, but it's covered by the four
field mortars. You'll want to silence at least two or three of them before you
get anywhere near the factory. If you can manage to capture the guns intact,
they'll make cleaning out the German vehicles and infantry around the factory
much easier.
-----------------
Secret Objectives
-----------------
1) Both Barracks captured.
- One is on the south side of the middle of the map, the other is in the far
south-western corner. Your first target should be the field mortar near the
eastern barracks - once it's eliminated, taking the barracks is simple. Take
advantage of the shallow water directly west of the first barracks to sneak up
on the second one. Careful though - as soon as the Germans spot one of your
units, field mortar shells will come raining down. Make sure you scatter as
fast as possible, and never, ever stand still. Or just pick everything off
from a distance with snipers, mortars, and airstrikes from recon cars.
-----------
Walkthrough
-----------
Your first priority should be setting up three defensive lines of tanks. The
first wave of Germans will hit the northern bridge by your factory, so start by
setting up all of the non-core tanks up there into a nice line on your side of
the bridge. Get a repair truck and a medic to stand behind them as soon as
possible.
The shallow water on the southern edge of the map by your AI-controlled buddies
will be the next German target, and this one is a bit more of a problem than
the northern bridge because the first German howitzer is within firing range of
your side of the water. When German units get within eyesight of your units,
howitzer shells will start raining down on you until the howitzer runs out of
shells. Use the pile of non-core tanks that started near your headquarters to
make a defensive line here, but make it closer to the barracks than the water
to minimize your exposure. Get a supply truck and medic to stand behind these
tanks for the rest of the mission too.
The third defensive line will need to be on your side of the northern of the
two bridges west of your headquarters. Position your core tanks to face the
bridge, then place your Katyushas behind them as close to the water as possible
so they can fire at this bridge and the one on the northern edge of the map.
Get a supply truck and medic positioned next to these units as soon as possible
too, and if you don't feel comfortable with the core units you have defending
this bridge, build a few more tanks to help out.
Now that your defensive lines are ready, it's time to start preparing your
first assault. The first thing to keep in mind is that the fields on the west
side of the bridges are loaded with land mines, and there're tons of tanks and
bazooka soldiers everyone (not to mention the field mortars that have a massive
firing range). Instead of attempting a heavy vehicle assault on this mission,
it's easier to build a pile of snipers and medics to join the hoard of standard
infantry that you start the mission with. Start cranking medics and snipers
out at your barracks, and build a few recon cars too while you're at it. A few
mortar crews would be a good plan too if you're planning to go for the high end
casualties medal.
If you're trying to avoid casualties so you can get the medals for this
mission, you'll have to proceed very carefully while you take care of the four
field mortars. Send your sniper/medic/standard infantry pile to the south edge
of the map where the shallow water is. Edge closer and closer to it with the
snipers and the recon cars so you can start identifying targets (and don't
forget about the recon car's scout plane ability). Use your snipers and the
airstrikes from the recon cars to take out anything you spot from a distance
before you go anywhere near the howitzer. Remember that the enemy barracks
itself can "see" you, so take care of the howitzer before capturing the
barracks.
Now you have a choice to make. Capturing the field mortars intact is extremely
useful for this mission, but the down side is that you won't be able to get the
high end casualties medal if you occupy the guns since you have to destroy them
to end the mission. You can still easily win without the field mortars, but
it'll take longer if you also want to avoid casualties.
Your next target will be the south-west corner of the map where the second
German barracks is sitting. There are some German tanks patrolling the roads
in the area, so the best way to deal with them without incurring the wrath of
the field mortars is to use the scout planes from your recon cars to identify
the perfect times for you to run Sappers in and mine the paths the tanks are
taking. Then just use your mortar crews to destroy them while they're stuck
there.
Continue moving to the west, using scout planes from your recon cars to let
your snipers and mortars pick everything off from out of the enemy's site.
Remember not to get to close to the barracks itself until you've taken care of
the next two field mortars, or they'll be able to see you briefly until you
capture the barracks.
The two field mortars closest to the south-western barrcks are on some hills.
If you're not going to capture them anyway, the best thing to do is use the
scount planes to see them and then blast them from long range with airstrikes
and mortar crews. Your snipers can hit them from the roads too, but keep in
mind that you actually need to destroy the field mortars to end the mission.
With this entire southern area of the map cleared out, your next problem is the
last field mortar, which is inconveniently located behind the German factory
and headquarters. The easiest way to take it out is to use your scout planes
to see it, then blast it with the field mortar closest to it. But if you're
going for the high end casualties medal or if you already destroyed that field
mortar, the next best choice is to drive a Katyusha along the southern edge of
the map (to avoid the land mines in the middle) and position it on the southern
side of the water south of the last field mortar. If you have an artillery
officer in the Katyusha, you can blast the last field mortar (and anything else
nearby) from here (make sure you bring a supply truck with it to make sure it
has plenty of ammunition).
That only leaves you with a few tasks to accomplish during this mission.
Capturing the factory, capturing the headquarters, and clearing out the
remaining German units (if you care about the Clear Level medal). Go ahead and
take care of the factory first, using your same sniper/mortar/recon car tactics
(and enlisting the help of the Katyusha if you sent one over here already).
With the factory out of the way, start inching your way towards the bridges
with your snipers/mortars/recon car/Katyusha, and remember to bring a Sapper
with you.
There's a hoard of German infantry and tanks in these two mine fields, so
proceed with caution. Make ample use of your scout planes and clear everything
out of the stretch of territory between the German factor and headquarters and
the bridges that your units are guarding. Once you're absolutely sure you've
cleared it out, capture the headquarters to end the mission. Don't forget to
check the north-west corner for potential survivors too, depending on how
thoroughly you Katyusha'd everything up there earlier. Also recall that you'll
need to physically destroy any remaining German field mortars if you didn't
already destroy them.
NOTE: There're only two enemy officers in this mission, which means you can
only get the Excellent Marksman medal.
NOTE: Remember that if you want credit for the high end casualties medal, you
won't be able to occupy any of the four heavy Field Mortars. You're
required to destroy them to end the mission, and the only way to avoid
having them count as a casualty is if you never occupy them at all.
=============================================================================
| |
| 1.17) The Fall of Berlin |
| |
=============================================================================
-------
History May 1945
-------
"With the Western Allies holding their positions along the Elbe, it is up to
the Russians to enter the lair of the Nazi Beast and put an end to its reign
of terror with extreme prejudice.
In the final battle of a prolonged and bloody campaign, the future of Europe
and the very soul of Germany are at stake."
----------------
Unit Information
----------------
New Core Units Added: Core Units:
None 3 Green Officer Slots
5 Green Infantry Slots
8 Green Vehicle Slots
3 Red Infantry Slots
2 Red Vehicle Slots
Received units for the mission: What to Bring:
2 T34-85s 2 Artillery Officers
2 SU-122s 1 Squad Leader
1 Supply Tractor 3 Standard Infantry
1 BM-13 Katyusha 2 Medics
3 Shock Infantry 3 IS-2s
5 Standard Infantry (mission says 4) 1 ISU-152
3 Medics 3 Katyushas
2 Snipers 1 Supply Truck
Since they don't give you enough green infantry slots for your green vehicle
slots, just man any remaining vehicles with the non-core Standard Infantry that
they give you for this mission (they give you 5 units even though the mission
description info says 4). Or just bring stuff in your red slots if you don't
mind the time penalty, or don't mind abusing the restart glitch.
NOTE: The Squad Leader's Zeal ability can make the secret objective a lot
safer for your infantry.
----------------------
Production Information
----------------------
Starting Resources: 4000
Called-In Officers: 3
Once you capture it from the Germans:
Headquarters (.15 Regeneration Rate)
--------------------------------------------------
Unit Type Cost Production Time
--------------------------------------------------
T34-85 52 55
---------------
Main Objectives
---------------
1) Secure the Brandenburg Gate.
- You'll need to secure both depots near the Brandenburg Gate to finish the
mission. This will be infinitely easier if you complete the first optional
objective first, since a constant stream of Russian airstrikes will be able to
come in and severely weaken the defenses around them. These airstrikes also
serve as free recon for you, which makes it easy to edge your Katyushas closer
and closer to the gate, annihilating everything from a safe distance.
-------------------
Optional Objectives
-------------------
1) Clear the defenses around both Flak Towers.
- These are... quite the structures, to say the least. The earlier you can
capture them, the better - Russian aircraft will continuously appear on the map
to strike the German defenses, but they'll be shot down instantly by these
towers. Tower H (on your side of the river) should be your first target. Move
your IS-2s west until you can see something, then let the Katyushas devastate
it. Retreat, repair, and repeat until everything around the tower is
destroyed (you don't need to destroy the Sturmtiger right behind the tower for
some reason, but you'll obviously want to make it a priority before it shreds
your units). Repeat the process for the second tower after crossing the river
and capturing the Headquarters.
2) Neutralize the German Tank Ace.
- He's controlling the Panzer VIII (Maus) sitting slightly south-east of the
depot on the east side of the river, or if you capture the depot/threaten the
area enough, it will retreat across the bridge and sit near the howitzer by the
eastern Brandenburg Gate defenses. Of course, if you want to complete the
secret objective, you'll need to capture the Maus, not destroy it. See the
secret objective description for details.
-----------------
Secret Objectives
-----------------
1) Capture the Panzer VIII.
- You'll find the Maus slightly south-east of the depot on the east side of
the river at first, or if you've already taken the depot or threatened the area
around it enough, the Maus might have retreated across the bridge and settled
in near the howitzer on the east side of the Brandenburg Gate area. You're
much better off capturing it while it's still on this side of the river,
though. The trick is to edge your way closer to the depot area, allowing your
Katyushas to pulverize things from a distance - but don't allow them to fire a
shot at the Maus. Set your units to Passive mode if you have to.
When you've cleared the forces out around the Maus, gathern a bunch of Standard
Infantry units and all of your medics. Set the Standard Infantry units to
Passive mode, then crawl right up next to the Maus while the medics heal you.
When you're close enough, order the Standard Infantry to hit the Maus with
magnetic mines (it takes 8 or 9 mine hits to kill the crew, so bring at least
that many units with you if you can - dump the crews from your vehicles
temporarily to get enough units). Using the Squad Leader's Zeal ability is a
good way to avoid unnecessary casualties while you're doing this.
-----------
Walkthrough
-----------
If you want the high end casualties medal and the Clear Level medal, this
mission is going to take you a long time. There are buildings everywhere that
can easily hide annoying German infantry units, and the heavy artillery
scattered around the map makes it difficult to move around safely.
One of the best things you can do to help yourself is to take control of the
flak towers and the headquarters as early as you can. This will allow the
constant stream of Russian aircraft to eliminate a lot of the German defenses
on the eastern side of the river for you.
Begin by heading west towards Tower H on your side of the river. Lead with
your tanks, and have your Katyushas follow them, and your supply trucks
following behind the Katyushas. The ideal approach is to loop under the tower,
then up around it on the west side to deal with the Sturmtiger, then back over
the north end of the tower to deal with the remaining units. Stop to repair
your vehicles and heal their crews with your medics as often as necessary, but
make sure you're not stopped somewhere that the Germans will be able to blast
you with heavy artillery.
With Tower H eliminated, line your Katyushas up along the water to the west of
it and wait for one of your Russian planes to reveal the German defenses there.
You can wipe out a big chunk of them from the safety of this side of the river,
which will make it a lot easier to take the headquarters later.
When you're done with that, head north along the water and deal with the German
guns and anti-aircraft emplacements along the way. When you start getting too
close to the bridge though, be careful - artillery from the German supply depot
to the east and a field mortar from the north of the bridge on the west side of
the water will be able to reach you, and they can seemingly magically see your
units even when there's nothing within visual range.
You're better off assaulting the German depot from the south-eastern edge, just
for the sake of avoiding the field mortar on the other side of the river. Set
your Katyushas and artillery to Passive mode to make sure they only fire at the
targets you tell them to fire at, then start identifying targets by moving one
of your IS-2s closer and closer to the depot, keeping it repaired and healed
with your supply trucks and medics. Watch out for garrisoned buildings along
the way.
The Maus that you need to capture for the secret objective should be parked on
the south-eastern edge of the buildings around the depot, unless you've already
scared it into retreating over the bridge. Ideally you'll clear the artillery
and as much of the other stuff out of the area before you attempt to capture
the Maus, and even more importantly, hopefully you won't damage it very much
prior to making your capture attempt.
It takes 8 or 9 magnetic mine hits to kill the crew, which will also cause
about 75% damage to the Maus, so it needs to be in good shape for this to work.
Gather your Standard Infantry together, dumping crews from vehicles to get the
9 units you need. Trail them with your medics, with everyone prone. Have your
Squad Leader with them too (his Zeal ability will be a major help to avoid
casualties). Crawl the infantry pile right up next to the Maus and quickly hit
it with your magnetic mines to kill the crew, then retreat if there are any
remaining German units nearby.
Re-occupy your vehicles, then deal with any German survivors before you capture
the Maus and the depot. By the way, destroying or capturing the Maus or
capturing the depot will also cause 3 Katyushas and a recon car to appear in
the north-eastern corner of the map. They will take damage immediately from
the field mortar on the west side of the river, and they'll also park right in
front of some German tanks that will appear from the north end of the map if
you don't immediately take control of them. Turn them back to the east and
have them sit there in the corner until you're able to safely fight your way to
them.
With the depot and the Maus under your control, finish clearing out every nook
and cranny of the east side of the river if you care about the Clear Level</pre><pre id="faqspan-3">
objective. Put your Squad Leader into the Maus and start using it as the lead
tank in your assault force. This thing is extremely strong, so it can take a
shell from one of the German howitzers without much risk.
When the east side of the river is completely safe, use two Katyushas with your
artillery officers in them (for the range bonus) to line up on the destroyed
bridge on the north side of the river. Use the recon car's scout plane to
scout the west side of the destroyed bridge, and then let your Katyushas wipe
out everything that it sees. Repeat this process several times, moving a bit
more to the south each time. You can easily wipe out that pesky field mortar
this way along with a ton of the German defenses near the intact bridge.
Next, cross the bridge with your tanks and head south to the headquarters to
secure it. There's another field mortar north-west of the second flak tower,
so you'll have to keep that in mind as you move through the rest of the map.
Secure the headquarters, annihilate everything around the flak tower with your
Katyushas using the Maus as bait, and then move your way north to the two
depots by the Brandenburg Gate. Capture them both to end the mission, but make
sure you thoroughly explore every square inch of the city looking for German
units first if you care about the Clear Level medal.
Campaign ending: "Congratulations! Comrades! Compatriots, men and women!
Fascist Germany, forced to her knees by the red army and the
troops of our allies, has acknowledged her defeat and
declared unconditional surrender. Praise to our red army
which upheld the independence of our motherland and won
victory over the enemy...
And eternal glory to the heroes who gave their lives for the
freedom and happiness of our people."
=============================================================================
::::::::::::::::::::::::::::::::
1.20) Western Campaign
::::::::::::::::::::::::::::::::
=============================================================================
| |
| 1.21) New Year's Eve |
| |
=============================================================================
-------
History December 1944
-------
"Multiple columns of German armor have plunged into the heavily forested
Ardennes region of Eastern Belgium,. Their goal is to reach the sea and
impel a negotiated peace on the Western Front.
The US infantry divisions advancing on Germany were hit with full force. The
survivors are now struggling to find their way through the frozen wilderness
and link up with General Patton's 3rd Army."
----------------
Unit Information
----------------
Received units for the mission:
1 Standard Infantry
1 Medic
Core Units:
1 Green Officer Slot
2 Green Infantry Slots
1 Red Infantry Slot
(Starting Core:)
1 Ranger Officer
1 Medic
3 Standard Infantry
Additionally, you can add a Medic to your core by finding him in the trees
north of the two guard towers north of the depot, and you can add a Sniper to
your core by completing both secret objectives. You can also add a Mortar Team
to your core by searching the trees west of the depot on the south side of the
map.
What to Bring:
Your choices are a tad limited for this mission. Time shouldn't be much of
a factor, so I suggest you bring all four of your units along.
----------------------
Production Information
----------------------
Starting Resources: 4400
Called-In Officers: 0
You don't start with any facilities and won't be able to capture any on this
mission, nor can you call in any additional officers, so it's kind of pointless
that you have 4400 resources.
---------------
Main Objectives
---------------
1) Save the Paratroopers.
US Paratrooper: "Need some help here!"
- A damaged Tiger will be picking them off slowly from the east. Send your
infantry up there and destroy it with your magnetic mines.
2) Secure the Crossroads.
Guffy: "Don't let their uniforms fool you; kill them all! You'll find
find your reward in that house. Send a rifleman to get it!
- The soldiers standing there are actually Germans. When you rescue the
paratroopers, approach the nearby house to complete the first secret objective,
then enter another house near the crossroads to complete the second. Guffy
will then identify the soldiers as Germans, and you can wipe them out.
3) Link up with the Allied forces.
- Simply run your infantry towards the flashing objective marker by the bridge
where Patton's tanks are moving.
-------------------
Optional Objectives
-------------------
1) Capture the Depot.
- The depot is just west of your starting position. A few weak infantry units
and a pair of guard towers are the only things guarding it, but watch out for
the second Tiger - it likes to move in on the depot from the west.
-----------------
Secret Objectives
-----------------
1) Sergeant Guffy's cache found.
US Soldier: "Sergeant Guffy says there ain't no such thing as a free
lunch, sir. He will help us get out of here... but he wants
us to retrieve his stuff from the Germans first."
- Simply approach the house near the paratroopers' starting position to
complete this secret objective.
2) Retrieve Guffy's goods.
US Soldier: "WoW! A scoped Springfield!"
- Occupy the house near the crossroads after completing the first secret
objective to complete this one. Guffy will reward you with a core Sniper unit
if you send a unit into his house. I suggest you leave the non-core Standard
Infantry unit there after destroying the Tiger to save time.
-----------
Walkthrough
-----------
Move north and take care of the single German in the trees, then continue
farther north to aid the paratroopers. Your infantry can easily handle the
Tiger if you get them close enough to use their magnetic mines, but you'll need
to get them there as soon as humanly possible after the mission starts if you
want to avoid any of the paratroopers being killed. Any surviving paratroopers
will be added to your command (non-core) as soon as the tank is destroyed.
Move a unit closer to the nearby house to complete the first secret objective.
Completing the second secret objective will require you to send a unit of
Standard Infantry into this house later, so leave the non-core unit behind to
save yourself some time later. (It has to be Standard Infantry, no other unit
type will work.)
NOTE: For some reason, the unit you use to enter this house later will count
as a casualty because it briefly leaves your command and comes back.
That means you won't be able to earn the high end casualties medal if
you complete the second secret objective.
Gather your units and head west towards the trees north of the guard towers.
There's a medic hiding here that you can add to your core. Eliminate both
guard towers, then head south to the depot and capture it (there's another
guard tower south of it that needs eliminating too).
A tank will be patrolling the road near the depot, so be ready to destroy it as
soon as it appears. If you're lucky, you can catch it on the right part of its
patrol route and use the paratroopers to set an explosive charge in its path,
which you can then detonate to take care of it.
There's a mortar team hiding in the trees west of the depot that you can add to
your core, so make sure you pick them up. The next thing you need to do is
take care of the guard tower south of the house by the crossroad, but this is
especially dangerous because there are two snipers in the trees next to the
house. Try to make sure your medics are working full blast to prevent
casualties.
When you enter the house, you'll be told that Guffy has a reward for you. Use
the unit of Standard Infantry that you left behind earlier and enter the house.
A sniper will be added to your core. Send it and the Standard Infantry back
over to the rest of your forces, then clear out the German officer and infantry
in the very south-western corner of the map.
If you don't care about the Clear Level medal, simply wipe out the Germans at
the crossroad and continue north to the spot in the road where the Allied tanks
are turning towards the bridge.
If you do care about the Clear Level medal, you'll need to pull a little
trickery here. Keep half of your men at the end of the road in the southern
part of the map, then use the other half to deal with the Germans at the
crossroad. As soon as the crossroad objective is complete, German troops will
appear from the southern edge of the map. Use your second group to quickly
eliminate them while your first group runs for the rendezvous. If you time it
right, you'll complete the mission before any additional German reinforcements
arrive, which will allow you to earn the Clear Level medal.
NOTE: Since you don't start with any core vehicles and you can't get any
during the mission, it doesn't appear to be possible to earn the Core
Unit Gain medal.
NOTE: For some reason, the unit you send into Guffy's house to get the sniper
will count as a casualty, even though the unit comes back out. That
means that if you complete the second secret objective, it won't be
possible for you to get the high end casualties medal.
NOTE: Since there's only one German officer on this map, you can only earn the
US Marksman medal.
=============================================================================
| |
| 1.22) The Big Push |
| |
=============================================================================
-------
History February 1945
-------
"The German war machine is crumbling under the pressure of the Allied bombing
campaign. The US forces near Cologne are to use the disarray caused by the
night raid to push forward to the Rhine and secure a crossing for their
armored divisions.
Accomplishing this will give further momentum to the Allied offensive sweeping
through the German heartland towards the ultimate prize - Berlin."
----------------
Unit Information
----------------
New Core Units Added: Core Units:
None 1 Green Officer Slot
4 Green Infantry Slots
2 Red Infantry Slots
Received units for the mission: What to Bring:
3 Standard Infantry 1 Ranger Officer
3 Bazookas 1 Medic
2 Snipers 2 Standard Infantry
2 Medics 1 Sniper
3 M7 Priests
1 M4 Sherman Skink
2 Supply Trucks
The two Supply Trucks will actually be added to your core at the start of the
mission.
----------------------
Production Information
----------------------
Starting Resources: 1650
Called-In Officers: 0
Once you've captured it from the Germans:
Factory (.15 Regeneration Rate)
--------------------------------------------------
Unit Type Cost Production Time
--------------------------------------------------
Recon Vehicle 110 110
M4 Sherman 'Firefly' 55 55
Decoy Truck 20 20
Supply Truck 60 60
---------------
Main Objectives
---------------
1) The Allies must reach the Bridge.
- German reinforcements will flood this map like mad, and so will AI units on
your side too. They'll meet in the middle and cause a disasterous stalemate
for a while, but if you don't help them out, the Germans will eventually take
the advantage and crush them. Check the walkthrough for details on a good
strategy to attempt.
2) Hold the Depot.
- There's really no threat to the depot during the mission unless you've
pretty much already failed anyway.
-------------------
Optional Objectives
-------------------
1) Destroy the Flak 88s.
- They're in a line between the row of bunkers and the road. The easiest way
to deal with them quickly and without casualties is to capture the radio
station in the south-east corner of the map to get the artillery bombardment
ability, and also to capture and repair/reload the German field mortar sitting
next to the radio station. That thing has insane reach and deadly firepower,
so it will make annihilating the Flak 88s a joke. When all four guns are
destroyed, you'll receive three non-core recon vehicles, and paratroopers will
also start dropping in right in front of the depot. These will be under your
control, so you'll have to be diligent to avoid them getting slaughtered and
ruining your chances at the high end casualties medal.
2) Capture the Factory.
- It'd be nice if the factory was in a spot where capturing it would help you
with the mission, but unfortunately it's so close to the bridge that it's more
or less useless to you. Check the walkthrough section for a good strategy to
try for capturing it. Keep in mind though - capturing the factory will trigger
two really unfortunate problems that can be a pain in the ass to deal with.
First, all the AI-controlled units on the map will become under your control,
which makes it a million times harder to get the low casualties medal. And
secondly, it appears to trigger some kind of fog glitch that can sometimes make
the map literally impossible to see (it's like the chemical smoke screen from
the fourth Western Allies mission, only way, way worse). For these reasons,
it's best to wait as late as possible before capturing the factory.
3) Capture the Communications Tower.
- This is the radio building east of your starting position. It should be
your first destination since there's also an abandoned German field mortar
sitting next to it that you can use. Capturing this building will give you the
ability to call in artillery strikes every few minutes. They're not all that
powerful, but they have their uses (and can be extremely helpful in eliminating
the north-western German field mortar).
-----------------
Secret Objectives
-----------------
1) Capture the enemy Headquarters.
- There's a small house with German infantry in it and around it (as well as a
field mortar) in the north-western corner of the map. Eliminating the soldiers
in it will complete this secret objective, and more importantly, it will stop
the German airstrikes on the map. Plus it's a good idea to get rid of the two
field mortars up here. The problem is that there's also an endless stream of
German tanks entering the map from this corner, which makes approaching the
headquarters very difficult. Check the walkthrough for a ridiculously cheap
but extremely effective tactic to help make this easier for you.
NOTE: Destroying the house before you get credit for killing the soldier
inside will prevent you from completing the secret objective, so don't
get careless with your explosive packs.
-----------
Walkthrough
-----------
Attempting to get all possible medals on this map will likely infuriate you
since it's a total pain in the ass to avoid casualties, and even more of a pain
in the ass to get credit for the Clear Level medal. Note that since you don't
start with any core vehicles and can't get any during the mission, it doesn't
appear to be possible to get the Core Unit Gain medal. Keep that in mind when
deciding if you really feel like burning the time on the low casualties and
Clear Level medals.
Anyhow, gather your infantry into a group and send them east towards the radio
station with your medics trailing them. Keep your vehicles close to the medic
station right next to your starting position, and keep one of your repair
trucks south of them so it can keep them repaired in the event any stray shells
land on them or a German unit makes it this far south.
Meanwhile, take control of the radio station with your infantry, then use your
second supply truck to reload and repair the German howitzer next to it. I
suggest you man it with a core unit of infantry since it's going to be raking
in kills like crazy, so it's a great source of free experience. In fact, it's
a good idea to swap the crews out of your M7s with any other core Standard
Infantry you brought along too since they'll likely be raking in quite a few
kills this mission too.
With the radio station under control, you'll have the ability to call in an
artillery strike every few minutes. Use these to take out gun emplacements
during the mission when your scout planes see them.
Speaking of scout planes, it's time to deal with the four Flak 88s. Crawl your
infantry closer to the line of concrete bunkers north of the radio station and
start taking them out one by one. The captured howitzer will help, and your
M7s should be close enough to assist too. Be careful though - artillery shells
may start landing on your infantry, so keep your medics handy and be ready to
run on short notice.
With the bunkers eliminated, start creeping beyond them towards the street to
get a glimpse of the Flak 88s. As soon as you spot one, your captured
howitzer should start taking shots at it. Repeat as many times as necessary
until all four of them are gone. You'll be given three non-core recon vehicles
as a reward. Paratroopers will also start dropping in right in front of the
German depot near where the Flak 88s were, so you're going to need to capture
it ASAP to avoid them getting wiped out.
Use the artillery barrage ability you got for capturing the radio station to do
some damage to the units around the depot, then edge your recon vehicles within
site of it and call in airstrikes to finish the rest. Move your infantry in to
capture it, then drop some medical supplies there with your medics. Move your
recon vehicles, M7s, and Skink to the depot and set up a defensive line
facing west, making sure that all of your units are within repair range of the
depot (and your second supply truck, which you should also relocate here).
Retreat your infantry pile back to your original starting position, and as the
paratroopers land, start sending them down there too (8 units should land).
The next step is to complete the secret objective, and it's a total pain in the
ass to do without casualties. The paratroopers will be critical to this
strategy though, and the strategy will also make the rest of the mission a
million times easier because it will give your AI buddies a huge advantage in
the center of the map.
You're going to send your officer, snipers, medics, and all of your paratrooper
units due west to the edge of the map, then advance north up the side. When
you reach the city, there'll be a howitzer and a repair truck sitting next to
it. The street directly north of the howitzer is an entry point for an endless
stream of German tank reinforcements, so you'll have to be careful. There's
also another howitzer in the north-west corner that can fire at you once you're
detected, so this can be a touchy operation.
You can try to use your recon vehicles to send scout planes into the corner of
the map to find the second howitzer, then call in your artillery strike on it
to try and eliminate the crew. It might take two attempts, but if you're able
to do it, it will make this next step a lot safer.
Creep up on the lower of the two howitzers and either destroy it or kill its
crew (and the repair truck next to it), then retreat everything except for the
paratroopers. These guys have an explosive charge ability, and we're going to
use it to stop the steady stream of German tanks from entering the map. Sit
and wait patiently for a good opportunity when there's a gap between tanks (use
your scout planes for better visibility if necessary), then rush the entire
pile of paratroopers between the two buildings directly north of the howitzer
you just eliminated. Drop all of their explosive charges in the street, then
retreat to the south as fast as possible.
Now wait for German tanks to drive over the explosives and detonate them when
the tanks are in the best positions possible to block the entire road. If you
do this right, you can create a complete bottleneck here that will entirely
prevent the German tanks from making it onto the map at all, which will make
the mission way easier. Here's a screenshot with an example to help you out"
http://thebrink.us/rushforberlin/rfb-thebigpush.png
With the tanks stalled here, heal your infantry and then rush them past the
tanks as safely as possible to get them up to the corner where the other
howitzer was sitting. There are snipers and some other infantry up here, so
use your artillery strike again to try and do some damage to anything you can.
Take care of the rest, including the rocket soldier inside the house, and you
should get credit for completing the secret objective, which will stop the
German airstrikes on the map.
Next, take care of the Germans around the factory. Capturing it is going to
turn control of all of the Allied units on the map to you, which is both good
and bad. It's good because you can use them intelligently instead of suiciding
them into bottlenecks, but it's also awful because it means their casualties
will now count towards your ability to earn low casualties medals. Try to stop
as many of them as you can when you get control of them, and send them over to
your captured depot. You'll also get a pile of Skinks on the southern edge of
the map that you can send near the factory to help.
Here's where things get interesting. If you want the Clear Level medal, you
have to wipe out the forces north of your depot and the forces in front of the
bridge, but you also have to annihilate the tank pile that you stalled with the
explosive charges on the west side of the map. And you have to time it
perfectly so that the tank pile is gone right when you get to the bridge, which
can be incredibly hard to do.
To make things worse, there are two German vehicles on the east side of the
bridge that you have to eliminate too, but you can't get near the bridge to do
it. Instead, you'll need to use your scout planes and destroy them with M7s
from this side of it. Also make sure no annoying German paratroopers landed
back near the north-western corner of the map.
NOTE: Since you don't start with any core vehicles and you can't get any
during the mission, it doesn't appear to be possible to earn the Core
Unit Gain medal.
=============================================================================
| |
| 1.23) The Breach |
| |
=============================================================================
-------
History Early March 1945
-------
"Still without a secure crossing over the Rhine, the US mobile infantry is
about to embark on a risky mission to Remagen, an ancient township help by a
meager German defense force.
The goal is to surprise and supress them - or be forced to watch the local
bridge be destroyed on schedule by German demolition squads."
----------------
Unit Information
----------------
New Core Units Added: Core Units:
1 Sniper 1 Green Officer Slot
1 Airborne Infantry 5 Green Infantry Slots
2 Bazookas 3 Red Infantry Slots
Received units for the mission: What to Bring:
1 Airborne Infantry 1 Ranger Officer
1 Medic
2 Snipers
2 Standard Infantry
Additonally, you can add an M26 Pershing to your core by completing both the
second optional objective and the third secret objective. Also, you can add a
SAS Officer and any other non-core infantry unit to your core by completing the
third secret objective. Any units you have in the M26 will become core when
you fuel it, so put the SAS officer and another non-core unit into the M26
before you fuel it. I'm always fond of free core snipers, personally, but you
get two more added to your core at the start of the next mission anyway. It's
either that or paratroopers though, so the sniper seems like an easy choice.
----------------------
Production Information
----------------------
Starting Resources: 1100
Called-In Officers: 0
After capturing it from the Germans:
Headquarters (.15 Regeneration Rate)
--------------------------------------------------
Unit Type Cost Production Time
--------------------------------------------------
M4 Sherman 'Firefly' 55 55
Standard Infantry 25 25
Sniper 40 40
M26 'Pershing' 85 85
Decoy Truck 20 20
---------------
Main Objectives
---------------
1) Free the snipers.
- Attack the prison camp in the town before the 15 minute timer is up to
complete this objective. Keep in mind though that you'll actually want to get
here when there's at least 5 minutes left on the timer if you plan to complete
the second optional objective, since the Germans will execute the paratroopers
right around that time.
2) Protect the Bridge.
- After freeing the snipers from the town, you'll have a few minutes before
German boats show up and float their way to the bridge. Stop them before they
blow it up to complete this objective. A sapper will also come off of a train
on the north side of the map, and you'll have to kill him too. Don't get smart
and try to blow that reinforcement train up before it unloads, though - that
will glitch the mission, and you won't be able to complete it (the sapper has
to actually appear on the screen and then get killed, he can't die in the
train itself).
-------------------
Optional Objectives
-------------------
1) Convince the Germans to leave.
US Soldier: "It seems the city is well guarded. If we could lure the
Germans out somehow, we could make our way into the town
easier."
US Soldier: "I wonder why the Germans were defending this unremarkable
house... What could be inside?"
- Had to include that second quote, I mean come on. Simply kill the soldier
in the house by the silo west of your starting position, then occupy the
building with one of your units to complete this objective. Doing so will make
the German vehicles in the town retreat off the edge of the map, which makes
things much easier for the rest of the mission. Note that if any Germans set
of one of the alarm posts before you complete this, you'll fail it.
2) Recapture the M26.
US Command via Radio: "The Germans are transporting a captured M26 by
train for examination. Try to recapture and use
it!"
- Use your paratroopers to drop an explosive charge on the railroad tracks
where the game puts the flashing symbol, then detonate the charge to damage the
tracks. When the train shows up (about 5 minutes into the mission), you'll get
credit for this objective.
3) Secure both bridgeheads.
US Sniper: "We better move fast - their Sprengkommandos might show up
anytime now!"
- Simply place a sniper in the boat on the south-west side of the bridge and
another either in the house on the north-east side or the pier on the
north-west side (you only need to be positioned in one spot on the north end of
the bridge, not both). Yes, it has to be snipers, no other units work. Once
you've gotten credit for the objective, you can retreat the units from these
positions if you really want to for any reason.
-----------------
Secret Objectives
-----------------
1) You saved the farmer from losing more of his spirits.
Herr Nudel: "Thanks for getting those pesky Germans out of my house!
Those Nazis ate all my Knoblauch and drank nearly all my
Schnapps!"
- There are two units of German troops at the farm in the very south-western
corner of the map. Eliminate them both to complete this secret objective. The
farmer will then wander around in the town, allowing you to see glimpses of
German activity there.
2) All imprissoned British Paratroopers saved from execution.
US Mobile Infantry Officer: "Listen up, girls. We go by the book on this
one - get in, do the job and get out, fast as
we can!"
- If you reach the prison compound when to free the snipers when there are
still at least five minutes left on the timer, you'll rescue some British
paratroopers and a SAS Officer along with your snipers.
3) You found fuel for the M26 and refuelled it.
US Airborne: "Damn! We need to refuel the M26 before we can use it."
- There's a fuel truck at the German camp just barely south-east of the bridge
that you can take control of if you get a unit close enough to it. Target the
M26 with it, and you'll complete this secret objective. The M26 and anything
in it will be added to your core, so be smart and take this opportunity to turn
two non-core units into core units (the SAS Officer and any other unit can both
be in the M26 when you fuel it).
-----------
Walkthrough
-----------
First of all, keep in mind that the alarm posts are only a problem if you let
one get set off before you've completed the first optional objective because
firstly, you won't be able to complete it anymore, and secondly, a hoard of
angry German units will scramble at you. If you let an alarm get set off after
you've already completed the first optional objective though, the only
consequence is the annoying alarm sound for a few seconds.
With that in mind, the timer isn't THAT serious of a problem for this mission,
but keep in mind that you need to reach the prison compound with at least five
minutes left on the clock to complete the second secret objective. The only
thing that's really a problem as far as the timer goes is if you want to go for
the Clear Level objective.
Start by ignoring the guard tower north of your starting position - you can
deal with it with the captured M26 later. Instead, head west with all of your
units and silence the pile of Germans around the first alarm post. Proceed
farther west until you find the little house that the Germans are guarding.
Wipe them out and get one of your untis inside, and you'll complete the first
optional objective (and eliminate any real threat from the Germans reaching any
of the other alarm posts). Completing this objective will make all of the
German tanks leave the city, which is a huge benefit.
Have your paratrooper unit leave an explosive charge on the train tracks in the
shadow of the silo and detonate it to block the train that will appear later.
Continue west to the very south-west corner of the map. There's a farm here
with two German infantry units guarding it, and if you wipe them out, you'll
complete the first secret objective.
Head north into the city now and spend some time wiping out German patrols.
Stay away from the gates to the prison camp until you absolutely have to if you
want to make an attempt at the Clear Level medal. You can wait up to the 5
minute mark before you fail the second secret objective, so wipe out as much
German stuff as you can before you free the paratroopers and the snipers. This
includes raiding the small German outpost at the south-east corner of the
bridge if you've got time. There's a fuel truck there that you can capture by
getting an infantry unit close enough to it, and you'll need it for the third
secret objective.
When you're ready, get your infantry pile close enough to one of the gates of
the prison compound and free the snipers and paratroopers inside. Now you're
going to have a race on your hands if you're trying to get the most out of this
mission as far as medals and new core units. Send the SAS Officer and a
non-core sniper down to where the M26 is stalled on the train tracks that you
blew up earlier (and send a unit of paratroopers with them to help deal with
the German infantry unit near the tank). You want to make sure you get the
sniper and the SAS Officer into the tank before you refuel it so that they can
both be added to your core along with the tank itself.
Meanwhile, if you didn't already capture the fuel truck from the south-east
corner of the bridge, go do that immediately with all of your remaining units
except for one - leave a unit of paratroopers standing in the road south of the
headquarters (that you should have captured already) and drop an explosive
charge in the road. A German car will drive by eventually, and it has a sapper
in it that needs to be killed. If he makes it by you, he'll drive over the
bridge and try to board a boat on the north-east side, so just stop him there.
Send the fuel truck to the M26 and get close to it as soon as the sniper and
SAS Officer are inside, then dump the sniper and replace him with the
paratroopers. Send the tank and the sniper east to deal with the small German
force in the south-east corner of the map that you skipped when the mission
first started (or send them to the bridge if you already took care of that area
earlier).
All that's left to do is deploy your snipers on both sides of the bridge and
cross it to deal with the German units there. Put a sniper in the boat at the
south-west corner of the bridge and another in the house at the north-east
corner to complete the last optional objective, and deal with the Germans
around the north entrance to the bridge and the train station to the west.
Eventually a train will arrive carrying more troops, and you have to let the
German infantry get off of it. Destroying it before it unloads will glitch
your mission to the point that you won't be able to finish it, which is because
there's a sapper on the train that you need to kill, and he actually has to
appear on the map before it'll count.
The only real trick left for the Clear Level medal is that you have to destroy
the train itself and all of the reinforcements while leaving the sapper for
last. Make sure you set your units to Passive mode to make it easier to pick
your targets.
NOTE: Getting the Clear Level medal can be touchy on this one. Make sure you
spend some time clearing out the town before freeing the paratroopers
and snipers if possible. Don't forget that the reinforcements that come
in on the train north of the bridge have to get wiped out too, as well
as the train itself. The tricky part is that you have to make sure that
one of the sappers is the last unit left alive, or you'll accidentally
end the mission before you've had time to wipe everything out.
NOTE: I haven't been able to figure out a way to earn the Core Unit Gain medal
on this mission. The premise from the Russian missions doesn't seem to
apply here, since you can clearly occupy, empty, and re-occupy the M26
and still not get credit for the medal.
NOTE: There's an unfortunate glitch with this mission similar to the first
Western Allies mission, which is that whatever unit opens the gate of
the prison compound will briefly become neutral and then return to its
previous state, which the game will count as a casualty for you. That
means that there's no way to complete this mission while earning the
high end casualties medal.
=============================================================================
| |
| 1.24) Devils' Due |
| |
=============================================================================
-------
History Late March 1945
-------
"It is time for the Western Allies to cross the Rhine by force, thus conquering
the last major obstacle between them and the German Capital. A high risk
operation by nature, it is to be spearheaded by crack airborne units - among
them, Britain's finest, the legendary Red Devils.
Dropped in behind enemy lines on the eve of the main assault, they are to
disrupt communication lines and silence a German heavy battery."
----------------
Unit Information
----------------
New Core Units Added: Core Units:
1 Medic 1 Green Officer Slot
1 Airborne Infantry 8 Green Infantry Slots
2 Snipers 3 Red Infantry Slots
2 Standard Infantry
Received units for the mission: What to Bring:
2 Airborne Infantry 1 SAS Officer
2 Medics
2 Bazookas
4 Snipers
If you didn't pick up the SAS Officer in the previous mission, just bring your
Ranger Officer instead. The SAS Officer is just ridiculously convenient
because he can call in paratroopers. You can rescue another SAS Officer from
the prison camp, but he won't have enough experience yet to call any
paratroopers in.
If you don't have 4 core sniper units, just bring Standard Infantry instead.
The snipers will be extremely useful on this mission though since they can make
short work of enemy infantry before they have a chance to steal your M22s.
----------------------
Production Information
----------------------
Starting Resources: 1650
Called-In Officers: 0
After capturing it from the Germans:
Factory (.15 Regeneration Rate)
--------------------------------------------------
Unit Type Cost Production Time
--------------------------------------------------
Bantam Jeep 30 30
M4 Sherman 'Firefly' 55 55
Decoy Truck 20 20
Supply Truck 60 60
---------------
Main Objectives
---------------
1) Secure the hilltop.
UK Officer: "About bloody time! Let's clear that hilltop and let General
Patton do the rest!"
- The north-west corner of the map has a hill with a bunch of bunkers guarding
it. Luckily the three field mortars up there are out of shells, so it's pretty
easy to get up there and wipe them out (especially if you raid the prison first
to get reinforcements). Some German vehicles will show up eventually and try
to resupply the mortars though, so don't let them make it up the hill.
-------------------
Optional Objectives
-------------------
1) Get at least 3 M22s.
- The one in the road north-east of your starting position is the only
dangerous one since the Germans will have a lot of infantry in easy range of
capturing it. The other four are west of the prison in some trees, north-west
of the prison in a field, north-west of your original starting position, and in
the barn south of the hilltop. Also as a word of caution, if you have bazooka
soldiers with you, be careful when fighting Germans near the unoccupied M22s,
or stray rockets can really mess them up.
2) Free the prisoners.
UK Paratrooper: "There's a POW camp at the river, sir. I bet our lost
squad is being held there!"
- This should be pretty much your first priority since there're two snipers,
two bazooka soldiers, two medics, four paratrooper units, and a core SAS
Officer waiting for you when you complete this objective. Wipe out the German
units around the outside of the camp as well as inside the fence to make the
reinforcements come out of the buildings.
3) Capture the factory.
- It's on the northern edge of the map on the eastern side. It's very lightly
guarded, so it won't be much of an issue. Especially if you free the prison
camp first, since there're two more rocket soldiers in there.
-----------------
Secret Objectives
-----------------
1) Destroy the Chemical Factory.
- Clear the infantry out of the chemical plant in the south-west corner of the
map to complete this objective, but in all seriousness, you might want to wait
until the last minute for it. The chemical cloud it causes on the map makes it
kind of annoying to see what you're doing. It only lasts for a few minutes,
but that's time you could be saving on your score.
2) Get the M22s.
- Capture all five of the M22s to complete this objective. The one in the
road north-east of your starting position is the only dangerous one since the
Germans will have a lot of infantry in easy range of capturing it. The other
four are west of the prison in some trees, north-west of the prison in a field,
north-west of your original starting position, and in the barn south of the
hilltop. Also as a word of caution, if you have bazooka soldiers with you, be
careful when fighting Germans near the unoccupied M22s, or stray rockets can
really mess them up.
-----------
Walkthrough
-----------
Start by heading north-east with your men and finding the first M22 in the road
by the trees. Immediately kill any Germans you see so they can't steal the M22
from you, then occupy it with a unit of paratroopers (don't forget that if you
brought your SAS Officer that I had you pick up in the previous mission, he can
call in additional paratroopers to help you replace the ones that man each of
the M22s).
Continue towards the prison camp and start picking off its defenders with your
snipers. There's another M22 in the trees west of the camp, and another in the
field north-west of the camp. Pick them both up while you whittle away the
defenses around the fence, then enter the camp and deal with any remaining
German units. You'll get a ton of reinforcements from here, including a SAS
Officer that will be added to your core.
With your infantry pile now completely out of hand (especially if you've been
calling in more paratroopers), head to the factory and take control of it.
Start building some Fireflies and two supply trucks after that. You don't need
them at all to finish the mission, but German paratroopers will constantly land
on the map, so you'll want something there to make sure they don't recapture it
(and the M22s kind of suck ass, so you probably shouldn't leave it up to them).
Head west now and pick up the remaining two M22s (one by the bridge north-west
of your starting position and one in the barn south of the hilltop entrance).
You should fight your way up the hilltop now too, but set your units to Passive
mode first to make sure they don't accidentally wipe out the field mortar crews
before you're ready (unless you don't care about the Clear Level medal, in
which case just slaughter them).
The tricky part about getting the Clear Level medal on this one is that there
are some hard to reach bunkers on the hilltop that you'll want to deal with,
and you have to also remember to clear out the chemical plant in the south-west
corner of the map (remembering that I had you wait until now because the smoke
screen makes it ridiculously hard to see).
To make things worse, German tanks and repair trucks will show up and try to
make it up the hill to resupply the field mortars, so you have to make sure
they don't get close enough. You also have to be sure there aren't any
paratroopers left anywhere in the center of the map, so you'll have to spread
out pretty far to see as much territory as possible.
NOTE: Since you don't start with any core vehicles and you can't get any
during the mission, it doesn't appear to be possible to earn the Core
Unit Gain medal.
=============================================================================
| |
| 1.25) Azgard Fortress |
| |
=============================================================================
-------
History Early April 1945
-------
"Wise to the impending demise of the Third Reich, Heinrich Himmler is ordered
to relocate his command to the National Redoubt, a secret mountain hideout in
the Bavarian Alps.
With Berlin and the Fuhrer cut off by Russian troops, the Western Allies mount
a strategic operation to secure the National Redoubt and prevent the Nazis
from using its means to engineer a 'civil uprising' in liberated Germany."
----------------
Unit Information
----------------
New Core Units Added: Core Units:
1 Sniper 1 Green Officer Slot
6 Green Infantry Slots
1 Red Officer Slot
2 Red Infantry Slots
1 Red Vehicle Slot
Received units for the mission: What to Bring:
None 1 SAS Officer
2 Medics
2 Bazookas
4 Snipers
As always, I'm fond of the SAS Officer since he can call in free paratroopers.
Vehicles won't really play a role in this one, so there's not much of a point
in bringing any of your core ones along. Keep in mind though that bringing
your M26 Pershing along is the only possible way to earn the Core Unit Gain
medal on this mission.
----------------------
Production Information
----------------------
Starting Resources: 1100
Called-In Officers: 1
After capturing them from the Germans:
Barracks (.15 Regeneration Rate)
--------------------------------------------------
Unit Type Cost Production Time
--------------------------------------------------
Standard Infantry 25 25
Medic 40 40
Sapper 30 30
Mortar Team 40 40
Flamethrower 30 30
Sniper 40 40
Airborne Infantry 25 25
Bazooka 40 40
Headquarters (.15 Regeneration Rate)
--------------------------------------------------
Unit Type Cost Production Time
--------------------------------------------------
Standard Infantry 25 25
Sniper 40 40
Medic 40 40
M4 Sherman 'Firefly' 55 55
Supply Truck 60 60
Barracks (.15 Regeneration Rate) [identical to the one above]
---------------
Main Objectives
---------------
1) Occupy the Camp.
- This is the barracks west of your starting position. Occupy it to complete
this objective. Make sure you leave a small force behind to guard it at all
times after you take it, or German paratroopers are likely to land and steal it
back from you.
2) Secure the key locations.
US Soldier: "This is a damn big place..."
- The names of the structures are a bit off, but this is referring to the
barracks, the Comms Center, and Comms Tower in the German fortress. Should be
pretty easy to figure out which ones they are - they're the only ones with
flags. Note that the two Comms buildings have to be captured intact, but
there's really no threat of damaging them too much unless you attempt to
detonate something with explosive charges from paratroopers for some reason, or
if you have a ridiculous hoard of bazooka troops with you.
-------------------
Optional Objectives
-------------------
1) Take over the German HQ.
- This is in the north-west corner of the map. If you complete the first
secret objective, a small group of French units will aid you in your attack.
Note that the bridge south of the headquarters will blow up after you cross it
from either direction, so make sure you account for that before using it. Also
since the French units will turn and attack the Redoubt as soon as the
headquarters is captured, you're better off leaving this piece for last if
you're trying to get the Clear Level medal.
-----------------
Secret Objectives
-----------------
1) Contact the French Officer.
Civilian: "I am in your debt, soldier! I must tell you... I saw some
Frenchmen around here."
- There's a camp fire in the woods east of your starting position, and if you
approach the officer standing there, he'll join you (as a non-core Marquisad</pre><pre id="faqspan-4">
Leader). A pile of French infantry and tanks will appear in the north-west
corner of the map, and if you assault the German headquarters near their
position, they will attack it with you and then turn up the hill and attack the
Redoubt.
2) Use the tunnel near the gate.
US Soldier: "Whoever built this tunnel... If they were here right now,
I'd kiss 'em."
- Check for a path that leads up the hill just a little north-west of the
first set of bunkers along the road. There's a tunnel there that will transfer
you to a path south-east of the Redoubt. This is a great way to attack the
bunker near the bridge from the back, where it won't be able to fire at you as
much.
3) Infiltrate the Redoubt.
US Soldier: "I thought they'd do a better job of guarding their stuff."
- There's another tunnel along the road at the very northern part of the map.
Rotate your camera so that north is on the bottom of the screen if you're
having trouble seeing it. Going through the tunnel will make your men show up
inside the Redoubt itself, right next to an unguarded supply truck and Panzer.
I wouldn't recommend occupying them though, or you might risk your chances at
the high end casualties medal.
-----------
Walkthrough
-----------
Send a bazooka soldier east into the woods towards the camp fire there to meet
up with the French officer to complete the first secret objective. Meanwhile,
send the rest of your forces west and assault the barracks in the corner of the
map. Capture it and start building a few more medics, bazooka troops, and
snipers. Keep your eyes peeled for German paratroopers landing in the area, or
they may surprise you and wind up taking the barracks back or killing any units
that you leave isolated.
If you're interested in the Clear Level medal for this mission, you'll need to
follow the entire road, including circling around above the Redoubt. It's best
to leave the headquarters in the north-west corner for last, since the French
troops will move from there to the Redoubt once the headquarters is captured.
Start by moving north from the barracks and following the road until a path
leads north through the hills about a third of the way from the west side of
the map. You can use this path to get up to the next section of street, which
will allow you to assault the two bunkers on the east side from behind,
limiting their ability to fire at you.
Slightly north-west of that set of bunkers, you'll find another path in the
hills that leads to a tunnel. Sending at least one unit through it will
complete the second secret objective, but you can go ahead and send all your
units through there if you want. You'll appear in a little alcove south-east
of the Redoubt, and from here, you can attack the bunker next to the bridge
from behind, which will limit its ability to fire back at you.
If you're interested in the Clear Level medal, continue down the street on the
south side of the water to clear out the Germans all the way back down to
where you got in the tunnel. DON'T cross the bridge south of the headquarters
though. The Germans will blow it up if you do, and that will complicate your
ability to continue clearing out the level.
If you've been continuously dropping paratroopers onto the map with your SAS
Officer and/or reinforcing yourself with your barracks, you probably have a
ridiculous pile of infantry by now. Use them to clear out the entire road all
the way around the Redoubt, and send at least one unit through the tunnel on
the north side of it to get credit for the third secret objective.
I also suggest you go ahead and make a full blown assault on the Redoubt now if
you're planning to get the Clear Level medal. It'll be a lot easier without
the AI-controlled French units potentially ending the mission before you're
ready. Just be sure that you don't accidentally capture all three of the
flagged German buildings in the Redoubt, and you can take as much time as you
need to clear the place out. Make sure you get all of the towers along the
walls.
When you're ready, assault the headquarters in the north-west corner of the
map, annihilate the Germans around it, capture it, and then capture any
remaining flagged buildings in the Redoubt to end the mission.
NOTE: Since there aren't any core vehicles to be gained during this mission,
the only possible way for you to earn the Core Unit Gain medal is if you
brought your M26 Pershing along with you at the start of the mission.
Sucks, but oh well.
=============================================================================
| |
| 1.26) Sudden Chance |
| |
=============================================================================
-------
History Mid April 1945
-------
"Facing stubborn German resistance, the armored spearhead of General Hodges'
2nd Army continues to push forward on the perilous paths of the Black Forest.
The unspoken goal is to find a back door on the enemy line and sneak through
it to beat the Russians to the German capital."
----------------
Unit Information
----------------
New Core Units Added: Core Units:
1 M7 'Priest' 2 Green Officer Slot
1 M36 'Slugger' 8 Green Infantry Slots
1 Mortar Team 2 Green Vehicle Slots
1 Bazooka 1 Red Officer Slot
2 Standard Infantry 4 Red Infantry Slots
1 Comms Officer 3 Red Vehicle Slots
Received units for the mission: What to Bring:
1 M36 'Slugger' 1 SAS Officer
5 M26 'Pershing's 1 Ranger Officer
2 Medics
6 Snipers
2 Supply Trucks
If you don't have all six snipers in your core, just bring some Standard
Infantry units instead. Also it might be worth the time penalty to go ahead
and bring your core Pershing and Priest along with you (and two more Standard
Infantry units to man them). Having the extra vehicles will make it easier to
complete the secret objective for 80% or more of the convoy surviving,
especially if you're also trying to get the high end casualties medal.
Additionally, two M7 Priests will be added to your core if you complete the
secret objective for 80% or more of the convoy surviving.
----------------------
Production Information
----------------------
Starting Resources: 2200
Called-In Officers: 2
Headquarters (.15 Regeneration Rate)
--------------------------------------------------
Unit Type Cost Production Time
--------------------------------------------------
Standard Infantry 25 25
Medic 40 40
Sniper 40 40
M4 Sherman 'Firefly' 55 55
M26 'Pershing' 85 85
After you've captured it from the Germans:
Headquarters (.15 Regeneration Rate)
--------------------------------------------------
Unit Type Cost Production Time
--------------------------------------------------
Recon Vehicle 110 110
Bantam Jeep 30 30
M4 Sherman 'Firefly' 55 55
Decoy Truck 20 20
M26 'Pershing' 85 85
M36 'Slugger' 55 55
Dodge Transport 30 30
Supply Truck 60 60
M7 'Priest' 70 70
---------------
Main Objectives
---------------
1) Reach the Autobahn to Berlin.
US Private: "Jerry sure knows how to build highways..."
- Pretty simple, just get a single unit to the highway in the north-west
corner of the map.
2) Protect at least 50% of the convoy.
- The convoy appears about half way up the map on the east side, then follows
the road to the south-west corner. The problem is that there's a hoard of
German tanks and infantry along the south-west part of the road, and they'll
utterly slaughter the convoy if you don't interfere immediately. Send all of
your tanks west to the road as soon as the mission starts, and try to maintain
a defensive position north of the road where the crashed plane is. Use your
infantry to move farther to the west on the road to stop the German bazookas
and other infantry that show up there. Keep in mind that you need to save at
least 80% of the convoy for one of the secret objectives.
-------------------
Optional Objectives
-------------------
1) Capture all enemy buildings.
US Aide: "Allied High Command appreciates your efforts to capture the
Factory."
- There's a road that heads east and west along the northern part of the map,
and there's a depot on the far east and far west sides of it that need to be
captured along with the factory to complete this objective.
2) Bring a Panther V IR to your HQ.
US Private: "We must take good care of the captured Panther."
- The easiest conceivable way to capture one is with your Ranger Officer's
Lightning Strike ability, since it instantly captures the vehicle without
damaging it. If you don't have a Ranger Officer or he's not a high enough
level to use the Lightning Strike ability, you're going to have to do this the
old fashioned way with magnetic mines from Standard Infantry units.
-----------------
Secret Objectives
-----------------
1) Protect 80% of the Allied convoy.
- As long as you make an aggressive assault on the road west of your starting
position as soon as the mission starts, this shouldn't be too difficult. The
real trick is that you also need to be prepared to deal with the infantry units
that'll show up in the south-west corner of the map too, or the bazooka troops
will shred the light vehicles on their way by.
2) Request reinforcements via radio.
US Private: "The Limeys sent us Crocodile tanks! Oh boy... what kinda
trouble can we make with these?"
- Half way up the map on the east side, you'll see a radar station on top of a
big hill. Get your infantry to the top and capture it, and you'll gain an air
strike ability. Three non-core Crocodiles will also appear near your
headquarters, which you can then use to complete the last secret objective.
These things are also great for dealing with the Maus later on as well as any
pesky Jagdtigers that give you trouble. Simply hit a target with some flames,
and the target's armor rating is reduced to the point where a few shots will
blow it apart.
3) Dazzle the German Panther crews.
US Private: "Those logs burn like hell itself! Jerry will love it for
sure!"
- This... is a bizarre objective, to say the least. First, complete the
second secret objective to get the Crocodile reinforcements (flame tanks).
Next, head to the center of the map and find the small pile of logs that you
can target, then light them on fire with the Crocodiles. The fire will spread,
and supposedly disrupt the Panther crews since they're using night vision
goggles.
-----------
Walkthrough
-----------
Start by sending all of your vehicles west to the road, with the supply trucks
trailing them. Send your snipers and medics west too, but stay behind the
tanks until the initial combat is done. If your Ranger Officer has the
Lightning Strike ability, use it to capture one of the first Panthers you can.
It will be a huge help in your initial defense of the road. You can use your
SAS Officer to call in paratroopers too, which is an easy way to get that
Panther manned after you capture it.
Once the initial defense of the road is complete, get your tanks positioned for
a defense of the road by positioning them near the crashed plane (face them
north). Don't forget to have your medics drop some med kits behind them, and
keep the supply trucks behind them too. Meanwhile, get your snipers and medics
into the south-west corner of the map to deal with the German infantry that
will show up there, or they'll slaughter vehicles on their way by.
If you're vigilant during this mission and use your Ranger Officer's Lightning
Strike ability effectively, you can capture a few Jadgtigers and King Tigers,
which will make things much safer for you if you're trying to avoid casualties.
When the convoy is safely by, you'll receive two non-core supply trucks. If
you also saved more than 80% of the convoy, you'll receive two core M7 Priests.
Feel free to build more Pershings at your headquarters, too. If you've been
remembering to drop additional paratrooper units with your SAS Officer, add
them to your sniper pile. Send all of your infantry up the east side of the
map and attack the radar station on the top of the hill. When you capture it,
you'll get an air strike ability that you can use to weaken some stationary
targets. More importantly, you'll also receive three non-core Crocodiles for
it.
These are essential for the last secret objective. Drive one of them into the
center of the map and look for the log pile there that you can target. Light
it on fire, then simply sit back and wait for the fire to spread far enough.
These Crocodiles are also great for weakening heavy targets, like Jadgtigers or
the Maus that you'll encounter near the north-west corner of the map. Simply
hit a target with some flames, then watch as the rest of your tanks shred it
much faster (since the flames reduce the target's armor severely).
If you haven't already driven a Panther to your headquarters for that optional
objective, go ahead and do so. The Panther will disappear when you do though,
but luckily it won't count as a casualty. If you're careful with how close you
get it to the edge of the screen, you can also get your unit out of it before
it disappears. Otherwise your unit vanishes with it.
All that's left to do is secure the enemy headquarters, capture both repair
depots on opposite sides of the northern road, and get a unit to the Autobahn.
If you don't care about optional objectives or casualties, just send all your
stuff to the north-west corner of the map and blast your way to the Autobahn.
If you do care about optional objectives and casualties, be prepared for a
somewhat long and careful fight to finish clearing out the rest of the level.
Gather all of your tanks and head straight up the middle of the map to the
water. I recommend you take care of the headquarters first along with the
depot on the eastern edge of the road. The problem is that there's a hoard of
heavy German tanks up here, along with lots of other annoying units. You'll
have to proceed carefully and use hit and run tactics if you want to avoid
casualties. You can use your air strike ability as a means to scout ahead if
you want, which will allow you to deal some damage with your M7s. Your Comms
Officer will also get the Photo Recon ability once he's a high enough level,
which will give you another scouting method.
Again, one of the best things you can do to help avoid casualties is seize
every opportunity to use your Ranger Officer's Lightning Strike ability to
capture Jadgtigers or King Tigers, since they're much more durable than your
own tanks. Unfortunately the Maus in the north-west corner of the map is too
close to the final objective to make it very useful to you.
Anyway, with the headquarters captured and the eastern depot under your control
(watch out for the German rocket launcher next to it), head west and deal with
the second repair depot. You can put your M7s on the south side of the water
by the depot to safely lob shells at the defenders if you want. Otherwise, be
careful with how high your approach vector is with your tanks on the north side
of the water, or they'll draw heavy fire from the Autobahn area.
With that depot captured, you can finally head into the corner and wipe out the
last defenders between you and the road. Just be careful not to actually get
on the road until you've had a chance to wipe out the remaining German units if
you care about the Clear Level medal. The Comms Officer's Photo Recon ability
will make locating any stragglers pretty easy.
NOTE: If you didn't bring any of your core vehicles that have to be manned,
you can use the M7 Priests that you earn from the 80% convoy survival to
earn the Core Unit Gain medal. Just remember to dump the crews out of
them when they arrive and then put them back in.
=============================================================================
| |
| 1.27) White Star Rising |
| |
=============================================================================
-------
History Late April 1945
-------
"Seizing the sudden chance presented to the valiant tank crews of the 2nd US
Army, General Eisenhower gives the green light to operation High Crusade, the
full scale Allied assault on Berlin.
Using combined task forces of airborne infantry and armor, Montgomery and
Patton are to penetrate the last German defense line along the Spree Canal and
end Hitler's reign of terror with extreme prejudice."
----------------
Unit Information
----------------
New Core Units Added: Core Units:
1 Sapper 2 Green Officer Slot
2 Snipers 6 Green Infantry Slots
1 Bazooka 1 Red Officer Slot
3 Red Infantry Slots
Received units for the mission: What to Bring:
None 1 SAS Officer
1 Ranger Officer
2 Medics
2 Snipers
2 Mortar Teams
Time may actually be a serious problem on this map if you're trying to get the
Clear Level and high end casualties medals, so keep that in mind before using
those 4 red slots. If you are going to use them though, the Comms Officer is a
good choice so you can use the Photo Recon ability, and it certainly won't hurt
to have more snipers along with you. Having a SAS Officer with the paratrooper
ability is a massive benefit on this map, so definitely bring one if you can.
----------------------
Production Information
----------------------
Starting Resources: 110
Called-In Officers: 3
After capturing them from the Germans:
Headquarters (.15 Regeneration Rate)
--------------------------------------------------
Unit Type Cost Production Time
--------------------------------------------------
Pz. VI 'Tiger' 70 70
Supply Truck 60 60
Barracks (.15 Regeneration Rate)
--------------------------------------------------
Unit Type Cost Production Time
--------------------------------------------------
Standard Infantry 25 25
Medic 40 40
Sapper 30 30
Mortar Team 40 40
Flamethrower 30 30
Sniper 40 40
Airborne Infantry 25 25
Bazooka 40 40
---------------
Main Objectives
---------------
1) Find the survivors.
- You'll need to find any three of the following units to complete this
objective. This is very easy to do since there aren't any enemies within
firing range of any of them except for number 5. Go ahead and start the
mission off by collecting all six of the units.
1: Bazooka along the eastern edge of the map, directly north-east of your
starting position.
2: Paratroopers in the far south-eastern corner of the map.
3: Sniper along the eastern edge of the map, directly next to the giant
red building with the tower on the south side.
4: Paratroopers north of the triangle of buildings directly north of your
original starting position.
5: Bazooka in the middle of the buildings directly north-west of your
original starting position.
6: Medic inside the triangle of buildings directly north of your original
starting position.
2) Neutralize both Flak Towers.
- These aren't nearly as well defended as they were in the Russian version of
this map, but you also don't have the luxury of Katyushas this time. Or any
vehicles at all for that matter. Once you've gathered your reinforcements,
crawl your snipers closer and closer to the tower on the east side of the water
and use them and your mortar crews to wipe out everything around it. When you
do, a unit of paratroopers will be dropped in the south-west corner of the map
to help you capture the second tower.
Use the new paratroopers to gather the second set of six reinforcement units,
but the second tower is pretty heavily guarded compared to the first. You
might want to consider waiting until you've had time to get some mortar units
over there (or the captured Maus) before you assault it. See the walkthrough
for a great tactic to make this a lot easier.
3) Hold all three objects.
- Typo aside, what they mean is that once you've captured the barracks and the
two depots by the Brandenburg Gate, you have to hold them when the German tank
counter-attack shows up. If they manage to take any of them back, you lose.
Thankfully, their arrival approaches are predictable, so all it takes to stop
them is a cluster of well-placed landmines or explosive charges. Three tanks
(including a Maus with an officer) will arrive on the street to the north and
slightly east of the western depot, and three more tanks will arrive on the
road directly north and slightly east of the barracks. Mine the living crap
out of those two spots or dump a ton of explosive charges there, and you can
stop all of the tanks before they even come close to the depots. Just make
sure you get that done before you capture them all, or the tanks will arrive
within a few seconds.
-------------------
Optional Objectives
-------------------
1) Capture the factory.
- This will be relatively easy with the paratroopers you'll get after you take
out the eastern flak tower and the reinforcements you can find in the city on
the western side of the river (see the walkthrough for details). Unfortunately
since the game only gives you a 110 resource cap, you won't really be able to
do a whole lot with this factory.
-----------------
Secret Objectives
-----------------
1) Capture the Panzer VIII.
- Similar to the Russian version of this map, there's a Maus by the depot on
the eastern side of the map. There are tons of garrisoned buildings, vehicles,
infantry, and artillery around it, but thankfully, the Maus itself isn't manned
this time. The easiest way to take it casualty-free is by using snipers and
mortar crews from the western side of the map. See the walkthrough for more
details on how to do it.
-----------
Walkthrough
-----------
This map will look familiar to you if you already finished the Russian
campaign, since it's the same map. This time around though, all you'll have is
a pile of infantry, so things will be even more annoying than they were in the
Russian version if you're trying to get the high end casualties medal and also
want to get an Excellent score.
The key to this mission is your SAS Officer's paratrooper ability, which makes
the mission a million times easier thanks to the fact that there's virtually
nothing defending the German barracks on the northern side of the western half
of the mission. Start the game by dropping paratroopers along the northern
edge of the map north of the barracks.
While the paratrooper ability recharges, take the time to collect the six
reinforcement units using your core units. You can find them in the following
locations:
1: Bazooka along the eastern edge of the map, directly north-east of your
starting position.
2: Paratroopers in the far south-eastern corner of the map.
3: Sniper along the eastern edge of the map, directly next to the giant
red building with the tower on the south side.
4: Paratroopers north of the triangle of buildings directly north of your
original starting position.
5: Bazooka in the middle of the buildings directly north-west of your
original starting position.
6: Medic inside the triangle of buildings directly north of your original
starting position.
None of them are guarded by any Germans, although the bazooka soldier in number
five might get you shot at a little by the flak tower if you get too close.
If your paratrooper ability is ready again, drop more of them in the same place
you did before (north of the German barracks). Use these four paratroopers to
take the barracks and the depot south of it, then build two medics and a pile
of mortar teams. Since your resource cap is so low in this mission, it will
take quite a long time for the mortar crews to build, which is why I recommend
you capture that barracks as early as you can.
Meanwhile, while the barracks is slowly training mortar crews, use your pile of
troops on the eastern side of the river to attack the eastern flak tower from
the street south-east of it. Clear out all of the Germans around the tower,
and you'll get a unit of paratroopers as reinforcements on the western side of
the river. Just like before, you can collect a half dozen stray units as
reinforcements with them. You should also consider dropping additional
paratroopers down there if your ability is recharged already.
1: Comms Officer directly north-west of the landing spot.
2: Sniper slightly north of where you find the Comms Officer.
3: Bazooka slightly north-east of your landing zone, near the water.
4: Sapper directly east of the first garrisoned building closest to the
water.
5: Sapper in the middle of the cluster of buildings north of the landing
zone.
6: Medic in the middle of the cluster of buildings north of the landing
zone.
Your next goal is to capture the factory with this new pile of southern units.
The factory itself won't be much use to you, but it will increase your resource
regeneration rate, which is at least somewhat useful. Depending on how fast
you've been, there might be one or more German tanks already lurking in the
area, so keep your eyes peeled. If one of them surprises you and attacks,
don't try to fight it. Simply run away as fast as possible and use your
sappers or paratroopers to drop a landmine or explosive charge in its path. As
it follows you, it will either hit the landmines or you'll be able to blast it
with the explosive charge. Either way, it'll be stuck, and you'll have a much
easier time dealing with it
With the factory under your control, leave this southern pile of infantry alone
for now. Head back up to your barracks and collect your newly trained medics
and mortar crews. Bring them and the paratroopers east to the water, then head
south slowly. The goal now is to take out all of the German tanks and
artillery that're defending the bridges. Keep your eyes peeled for enemies
inside buildings, since they'll not only fire at you, but the fact that they
can see you also means that artillery shells will be landing on you in a few
seconds. Make sure you retreat often to keep yourself healed if you're trying
to get the high end casualties medal.
Continue your steady southern advance until you've reached the factory. We're
going to ignore the flak tower for now, so go ahead and send your mortar teams
to the bridge. The next objective is to capture the Maus by the depot on the
eastern side of the river, but it's heavily guarded. Start by creeping your
paratroopers closer and closer to the buildings on the west side of the depot
to draw fire from the artillery units nearby while your mortar teams wipe out
the garrisoned units inside the buildings. This will help stop the artillery
units from seeing you.
Continue in this manner until you've cleared the western side of the buildings
around the depot, which will allow you to link your mortar teams up with all of
your units that you left at the eastern flak tower earlier. Now you'll be able
to get around the depot buildings and attack it from the north, which will let
you perform even more hit and run tactics to take care of the artillery units
next to the depot.
With them and any other garrisoned buildings out of the way, you can stick a
unit of paratroopers in the Maus to capture it, then let the depot repair and
reload it. Put a Comms Officer in it if you have one, and it becomes the
ultimate scouting vehicle. Drive it very slowly out the southern exit of the
depot so it can identify more targets for your mortar teams, but be ready to
drive it backwards towards the depot to repair it when necessary.
Take the time to annihilate every single German on the eastern side of the
river if you want to earn the Clear Level medal. Otherwise, take your Maus and
all of your infantry and head west over the bridge again to assault the second
flak tower. Approach it from the road by the water directly north of the tower
and drive slowly towards it, allowing the Maus to reveal targets for your
snipers and mortar teams.
When you've eliminated the second flak tower, take the time to clear out all of
the German units on this side of the map, but make sure you stay away from the
remaining uncaptured depot so you don't trigger the final German attack.
When you're sure you've cleared the map, use your paratroopers or sappers to
drop landmines or explosive charges in two key locations:
- The northern edge of the map on the road directly east of the western
depot.
- The northern edge of the map on the road directly east of the barracks.
Three German tanks will arrive at each of those locations as soon as you take
the second depot, so be ready to detonate the explosive charges to stop them in
their tracks. Wipe out all of the tanks, and the mission will be complete.
NOTE: Since you don't start with any core vehicles and you can't get any
during the mission, it doesn't appear to be possible to earn the Core
Unit Gain medal.
Campaign ending: "Congratulations! Today, 8 May 1945, all hostilities
officially ceased in the European theater. The war against
Germany has ended in complete victory for the United States
and its allies. This is an accomplishment of which you may
well be proud. It was achieved by your stamina, your
courage, your skill and your devotion to duty. I wish you
the best of luck, and want to express my appreciation for
what you have done."
=============================================================================
::::::::::::::::::::::::::::::::
1.30) German Campaign
::::::::::::::::::::::::::::::::
=============================================================================
| |
| 1.31) Schwarzer Freitag |
| |
=============================================================================
-------
History September 1944
-------
"Encouraged by their victory in France and the low morale of the German
occupying force in the Low Counties, the Western Allies have launched a major
offensive to circumvent the first line defences of the Third Reich from the
north.
With the Ruhr, the industrial heart of the Fatherland at stake, the Germans
have no option but to retake the strategic Arnhem Bridge before the armored
spearhead of the Allied offensive strikes home."
*Low Countries typo is actually in the intro text.
----------------
Unit Information
----------------
Received units for the mission:
Multiple ground troops, artillery, armored units, support vehicle(1) plus
production and support facilities.
That makes it sound like you're starting with a lot, but you really don't.
These are the units you have on the map at the start of the mission:
1 PaK 50 (manned with 1 Standard Infantry)
3 Standard Infantry
1 Sniper
1 Mortar Team
1 Medic
1 Panzergrenadier
1 Engineering Officer
1 Kubelwagen (manned with 1 Standard Infantry)
1 Supply Truck
1 Recon Vehicle
2 Pz. IV F2s
Core Units:
6 Green Infantry Slots
1 Green Vehicle Slot
1 Red Infantry Slot
(Starting Core:)
1 Medic
1 Sapper
1 Sniper
3 Standard Infantry
1 Panzergrenadier
1 Pz. IV F2
Additionally, you can add a Panzer VI 'Tiger' to your core by completing the
first secret objective, and whatever unit you use to capture it will also
become a core unit (so I suggest you take the opportunity to capture it with
the non-core Engineering Officer that you have on this mission). You can
also add a fully leveled Volksturm Officer to your core by completing the
second secret objective.
What to Bring:
1 Medic
1 Sniper
3 Standard Infantry
1 Panzergrenadier
1 Pz. IV F2
----------------------
Production Information
----------------------
Starting Resources: 500
Called-In Officers: 0
Barracks (.15 Regeneration Rate)
--------------------------------------------------
Unit Type Cost Production Time
--------------------------------------------------
Standard Infantry 25 25
Medic 40 40
Sapper 30 30
Mortar Team 40 40
Flamethrower 30 30
Sniper 40 40
Fallschirmjager 25 25
Panzergrenadier 40 40
---------------
Main Objectives
---------------
1) Secure both bridgeheads.
- Pretty straight forward. Just remember that the mission will end once you
complete this, so you'll want to make sure you leave it for last if you care
about the Clear Level medal and all of the optional/secret objectives.
2) Don't let the Allies take your Depot.
- Paratroopers and infantry piles will constantly bother you at the depot, and
paratroopers will also sometimes land at your barracks. Your tanks are more or
less unnecessary on this map anyway, so I suggest you leave all three of them
and the recon vehicle at the depot along with the repair truck and Kubelwagen.
They're safer there anyway since you're likely to hit a landmine if you drive
around too much. You'll also want to leave at least one medic behind the tanks
to keep the crews healed, and make sure you remember to have the medic drop a
first aid station on the ground so he can stay healed himself.
-------------------
Optional Objectives
-------------------
1) Take the two strategic points.
German General: "We are running low on supplies - make up for our
shortages by stealing from the enemy!"
- There are flags near the water on the north and south sides of the bridge.
Capture them both to complete this objective. The one on the south side of the
bridge is a good choice to target first because your barracks is closer to it
and because your resources will be refilled when you capture it, which you can
then use to build a second strike team to capture the second point.
-----------------
Secret Objectives
-----------------
1) Recapture the Panzer VI at the Depot.
German Private: "We believe the Amis have captured some of our equipment.
Let's give them a taste of their own medicine!"
- There's a captured Tiger in the street slightly east of the depot on the
eastern side of the bridge. Clear out all the Allied units around it first,
then tag it with magnetic mines until you wipe out the crew. Keep in mind that
whatever unit you use to capture it will become core along with the tank, so
it's ideal to capture it with the Engineering Officer so you can have him in
your core later.
2) Liberate the captured German Officer.
Liberated German Officer: "Danke, kamerad! I am ready for duty!"
- There's a house in the south-west corner of the map with some Allied units
guarding it. If you wipe out the defenders, a core Volksturm Officer will join
you. Ideally you'd do this by actually crossing the bridge and heading south
through the buildings, but you can also use the boats next to the depot by the
water. There are two garrisoned houses directly in front of the landing zone,
but if you send Standard Infantry over first, they can rush up against the side
of the houses to stay out of view.
3) Retake the bridge in time.
German General: "Bridge secured ahead of schedule."
- Easy enough, as long as you time it well. The scout team will arrive at
some point after you capture the eastern point, or around 2 minutes before the
timer runs out. You can avoid both problems by simply capturing both points at
the same time before the timer gets near 2 minutes.
-----------
Walkthrough
-----------
Be prepared for frustration if you want to complete this mission with all of
the best medals. The time limit can be quite challenging when you're trying to
avoid casualties, and so can trying to hunt down every Allied unit on the map.
Your forces start split between the two eastern corners of the map. Begin by
setting up a defensive position at the depot. Man your core Panzer with a unit
of infantry and send it to join the other vehicles at the depot. Send all of
the infantry at the depot to join the rest of your forces at the barracks.
Leave the medic at the depot though, since you'll need him to help keep the
crews healed.
Line the tanks and the recon vehicle up in front of the depot to defend it, and
keep the repair truck and Kubelwagen behind them for cover. Drop a first aid
station behind the vehicles with your medic, then have him lay pront near it to
help keep things healed. Allied infantry and paratroopers will attack the
depot constantly, so you'll want to be vigilant that they don't kill anything
when you're not paying attention. Remember not to dump the infantry out of the
Kubelwagen if you want to avoid it counting as a casualty, or make sure you
remember to re-occupy it before ending the mission.
You have limited resources for this mission, so the goal is to create a combat
unit that you can use to work your way around the map while your resources
regenerate. Your Engineering Officer will also help you can some back as you
destroy enemy vehicles near him, and when you capture the southern point by the
water, your resources will be entirely refilled.
A good starting combat unit would include at least four medics (you're going to
be doing a lot of hit and run tactics), four standard infantry, four snipers,
and four bazookas. The worst problem for avoiding casualties on this map will
be the enemy tanks you run into, so the more bazookas you can get, the better
(so you can vaporize a tank the instant it's within range).
My path through this map will assume that you're trying to get the Clear Level
medal, but if you don't care about that, you can avoid the majority of trips
through the city itself, since the only point in going through it is to wipe
out garrisoned units.
Start by taking your strike force north to the farm and wiping out the Allied
vehicles there, and take care of the garrisoned units in the buildings along
the row of houses north of the farm. The bunker west of that row of houses is
your next target, but sneak towards it carefully until you can see the Allied
tanks nearby. Deal with those first, then take care of the hoard of infantry
and the bunker itself until you're able to capture the depot. This will refill
your resources, so start training an entire second strike force.
While your second strike force is training in your barracks, use your first
strike force to clear garrisoned houses on the north side of the row you just
cleared by the farm. Be careful when you're doing this though, since heavy
artillery shells will occassionally land on you from the depot by the eastern
edge of the bridge.
When you've cleared that section of houses and you're back at the western edge
of the town, move north along the road. That heavy artillery unit is sitting
just a tiny bit west of the depot, and you should take care of it as fast as
possible. Be prepared to deal with some other field guns, anti-aircraft guns,
and some counter-attacking enemy tanks and infantry too. Most importantly,
DON'T capture the depot yet. You want to leave it for later so you can capture
it at the same time as the western side of the bridge to eliminate any issues
with Allied counter-attacks and guarantee your ability to easily complete the
third secret objective.
The captured Tiger that you need for the first secret objective is just a bit
east of the depot in the street, but I'd suggest waiting to make your move on
that for a while. Instead, loop through the town again just south of the main
street and deal with even more garrisoned buildings, then when you get to the
eastern edge of the main road, creep closer to the Tiger and make sure there
aren't any garrisoned buildings on either side of it. Still leave it there by
itself for now though. We'll capture it later when we're sure there's nothing
else around.
NOTE: If you're feeling particular adventurous, you can try to capture the
flak cannons back intact, and then use them to shoot down the paratroop
planes before they have a chance to drop reinforcements.
Continue to clear out the buildings closest to your depot now, and be ready for
a group of Allied tanks to attack you from the town. Work your way to the
water from here, wiping out all of the units and garrisoned buildings along the
way. One especially annoying infantry unit is hiding on the absolute northern
edge of the map above a cluster of buildings, so don't miss him. Make ample
use of your recon car's scout plane ability to help you identify any other hard
to find garrisoned buildings throughout the mission, too.
The water area near the second flag for the optional objective is pretty
heavily guarded, so be careful as you attack it. You should worry about the
tanks first, then worry about a sniper near the wharf, then worry about the
mortar crews and everything else. Capture the flag when you're ready, and the
optional objective will be complete.
By now, your second strike force should be ready too. You have two insanely
difficult tasks left to complete if you want to earn the Clear Level medal
while also earning the high end casualties medal. There are two snipers in
buildings in the north-west corner of the map with a tank between them, and the
only way over there is to use the wharf to send units over there one at a time
on the boats.
Send your Engineering Officer over first since he can take a decent amount of
damage, but be ready to run him immediately up against the front of the
southern of the two garrisoned buildings so he'll be out of their firing
solution. The good news is that his Goliath should severely damage and disable
the tank, which leaves just the snipers to deal with. Send some Standard
Infantry over, and when they land, immediately run them up against the corner
of the northern garrisoned building, where they'll be out of the firing
solution. Kill that sniper, then kill the other one. Chances are that the
Standard Infantry units are missing some guys now, so you should probably just
leave them up here where it's safe to avoid them becoming casualties. Send the
Engineering Officer back over to the eastern side of the river though.
While he's boating himself over the water, move your second strike team in
front of the Tiger. Use magnetic mines from your Standard Infantry to kill the
crew, then let the tank sit there until your Engineering Officer can get inside
it. He'll become core along with the Tiger when you capture it. Swap him out
for a standard infantry unit after you've captured it, but don't move it too
far if you want to avoid unpleasant landmine fiascos. You won't really need it
for anything anyway.
You have a choice now for how to use your two strike teams. You still need to
clear out the section of town in the south-western corner of the map, and you
can get there either by crossing the bridge or by using the wharf over by the
depot you captured near the water earlier. The bridge is the easier of the two
options, so send both strike teams over it together and blast your way to the
end of it. If you can avoid taking the flag, do so - just send your untis off
the southern side of the bridge instead of letting them capture it.
Work your way west with one strike team while you leave the other behind to
watch the flag area. Annihilate all of the Allied units and garrisoned
buildings as you work your way to the house in the corner. Use your hoard of
rocket troops to deal with the tanks in front of it, and when there are no more
defenders near it, a core Volksturm Officer will join you. If you're
completely sure there are no more Allied units left on the map, go ahead and
use your other strike team to capture the western bridge point and use the
Tiger to capture the depot on the eastern side of the bridge.
=============================================================================
| |
| 1.32) Morgengraun |
| |
=============================================================================
-------
History November 1944
-------
"Despite the failure of the Allied plan to circumvent German first line
defenses, the war is going bad for the Fatherland - mainly due to the
decisions of an increasingly desperate and irrational Fuhrer.
Uneasy about the morale of its field units, the Wehrmacht has dispatched a
group of veteran officers to evaluate strategic reserves and oversee the
training of Landwehr units in East Prussia."
----------------
Unit Information
----------------
New Core Units Added: Core Units:
1 Volksturm Officer 1 Green Officer Slot
Received units for the mission: What to Bring:
2 Standard Infantry 1 Volksturm Officer
2 Medic
1 Sniper
You could bring your Engineering Officer instead of the Volksturm Officer if
you want, but it really doesn't matter which one you bring.
You can add a sniper to your core by having the Sentry unit that joins you
early in the mission make it to his locker. Simply walk him into the last room
on the north side of the first hallway, and he'll transform. Even better is
that he doesn't count as a casualty when he does it, so you can still get the
high end casualties medal.
----------------------
Production Information
----------------------
Starting Resources: 4000
Called-In Officers: 0
You won't be able to produce any units during this mission.
---------------
Main Objectives
---------------
1) Check the facilities in the area.
Wehrmacht Corporal: "Let's do this quickly - we have two more areas to
check."
- This objective will become obsolete as soon as you meet Major Steiner very
shortly after the mission starts.
2) Get to the explosives by 16:00.
- The time is displayed at the top of the screen. You need to open the big
door to the garage and meet up with the officer near the vehicles before 16:00.
3) Maj. Steiner must survive.
- Shouldn't be much of an issue. Just don't let him get killed.
4) Obtain all 3 codes and open the Garage door.
Major Steiner: "We have the code for these doors, but I doubt if they will
open the safety door of the Garage. We must find the
codecards for that."
- Card A is in the room in the room in the south-western corner of the map by
the end of the train tracks where the train leaves the map. Card B is in the
room directly east of the control panel "puzzle" consoles. Card C is in the
room in the middle of the map on the western side.
-------------------
Optional Objectives
-------------------
- None!
-----------------
Secret Objectives
-----------------
1) Secret cache of relics found.
- First, use the control panels south of the room with the gold in it to open
rotate the grates on the floor until the doors unlock (see the diagrams in the
walkthrough section for how the control panels work). Next, pick up the golden
key from the room on the east side of the northern end of the train tracks.</pre><pre id="faqspan-5">
Finally, head through the hallways to get to the room with the gold piles and
Raiders of the Lost Arc thing in it. Open the door and go inside to complete
this objective.
-----------
Walkthrough
-----------
Begin by moving to the door and attempting to open it, then wait for the SS
Sentry to open it from the other side. Follow him to the little room with
Major Steiner, then continue moving all of your men west through the main
hallway. As you approach the last room on the northern side, your SS Sentry
will ask for a chance to grab his equipment.
SS Sentry: "Give me a second to grab stuff from my locker."
Send him into that room, and he'll become a core sniper unit. Turn north in
the next hallway, then move east towards the odd platform with three control
panels on it. Each time you press one of the panels, the chucks of grating
above the fans will rotate in the following patterns:
Center panel (P1): Western grate will rotate clockwise three positions,
eastern grate will rotate clockwise one position.
West panel (P2): Western grate will rotate clockwise one position, eastern
grate will rotate clockwise two positions.
East panel (P3): Western grate will rotate clockwise one position, eastern
grate will rotate clockwise three positions.
The goal is to get the grates (represented by asterisks) into this pattern,
which will unlock the doors (represented by periods) and let you walk through
the hallway. The gate represented by number signs will require the gold key
before you can open it.
-------------------------------------------------------------------------------
--------------------------------------------- -----------------------------
--- |-------------|...|
| || Gold Room || |
North | |---- ----| |
^ / \ |####| / * \
| ----- --- --- * -----
| | **** **** |
----- * ------------ -----
\ * / / P1 \ \ /
| | | P2 P3 | | |
| | | | | |
|...| | | ---
-------------------------- ----- ---------------------------------------
-------------------------------------------------------------------------------
So with my terrible ASCII diagram in mind, take a look at how the grates are in
your game and compare them with the chart below. When you find the set that
matches your game, press the panels in the order I've given. This is just an
example of a possible sequence - there are tons of different ways you can get
it done.
None needed P2, P1 P1x2, P2x2 P3, P2x3
* *
* *
**** **** **** **** **** **** **** ****
* * * * * *
* * * * * *
P1x2, P2 P2x2, P3 P2x3 P1
* *
* *
**** **** **** **** **** **** **** ****
* * * * * *
* * * * * *
P1x2, P2x3 P3 P2 P1, P2x2
* * * * * *
* * * * * *
**** **** **** **** **** **** **** ****
* *
* *
P2x2 P1, P2x3 P2, P3 P1x2
* * * * * *
* * * * * *
**** **** **** **** **** **** **** ****
* *
* *
You don't have the key for the room with the gold in it yet, so ignore it for
now.
Instead, continue east through the hallway to the room with the red furniture
close to the eastern edge of the map, directly north of your original starting
position. Card B is in there. Head through the passage with the grates that
you just opened, then head east to the next red furniture room. Kill the
soldiers in there, and a non core sniper will join your cause.
UK Sniper: "I guess we're on the same side now. Just tell me what to do."
Head west down this hallway until you reach another red furniture room, where
you'll find Card C. Head for the train tracks now and annihilate everything
nearby (if you care about the Clear Level medal). The room on the east side of
the north end of the train tracks has a gold key in it that you can use to open
the room with the gold in it, so backtrack and take care of that now to
complete the secret objective.
Head all the way to the south end of the train tracks and raid the room there
to find Card A. Now send your men to the garage and open the door, but don't
go all the way inside yet. Also, try to keep your Allied sniper away from the
door, or he'll abandon you.
Here's where things get complicated if you want the Clear Level medal. If you
don't, just go into the garage and end the mission. If you do, you're going to
have to position some of your men at three critical locations, and leave at
least one soldier in the garage to perfectly time your approach to the officer
there to end the mission when there aren't any enemies on the map.
These are the three positions that you'll need to guard:
1) The north-south hallway betwen the Card A room and the SS Sentry's
locker room. Random units will appear at the southern end of the hall
every once in a while.
2) The east-west hallway right outside the door where you liberated the
Allied sniper. Random units will appear at the eastern end of the hall
every once in a while.
3) The tran tracks, which will periodically get a train with various
infantry reinforcements.
Make sure all of those locations are clear at the same time, then approach the
officer in the garage to end the mission.
NOTE: Since you don't start with any core vehicles and you can't get any
during the mission, it doesn't appear to be possible to earn the Core
Unit Gain medal.
=============================================================================
| |
| 1.33) Edelweiss |
| |
=============================================================================
-------
History Early January 1945
-------
"Having underestimated the spirit of the American combat troops, the Germans
are losing the Battle of the Bulge.
With most of its elite armor lost and its ground troops falling into disarray,
Berlin's new priority is to keep a secret - one which may still turn the tide
of the war."
----------------
Unit Information
----------------
New Core Units Added: Core Units:
3 Standard Infantry 1 Green Officer Slot
1 Panzergrenadier 2 Green Infantry Slots
1 Red Infantry Slot
Received units for the mission: What to Bring:
2 Standard Infantry 1 Standard Infantry
1 Sniper
1 Medic
Anything you bring on this mission will die at the end no matter what you do,
so to minimize the damage to your core, I recommend you only bring a single
unit of Standard Infantry. You should get replacements for any core units you
lose when the next mission begins anyway, but they won't have the experience
level that your current ones do.
Additionally, you can add a Luftwaffe Officer to your core by completing the
optional objective. Unfortunately, since all of the units under your command
will die at the end of the mission, you won't be able to keep him.
----------------------
Production Information
----------------------
Starting Resources: 4000
Called-In Officers: 0
You won't be able to produce anything during this mission.
---------------
Main Objectives
---------------
1) Find the 3 debris pieces.
- One piece is under some netting a little north-west of the destroyed
windmill, directly north of the small house where you find the pilot. Another
piece is very close to the shallow water crossing south-west of the train track
bridge. The last piece is at the southern edge of the map in the center. If
you rescue the Luftwaffe Officer by completing the optional objective, he'll
mark the locations on your map.
2) Reach the evacuation point.
- Get your entire group of units to the windmill "evacuation" point. In
reality, there's no way to survive this mission - your units will all magically
die when this objective is complete, and there's nothing you can do about it.
-------------------
Optional Objectives
-------------------
1) Find the German pilot.
German Soldier: "Willkommen Kamerad! Glad to see you're still alive!"
- He's in the house a little to the west of the destroyed windmill. Get to
him, and he'll be added to your core. He'll also mark the debris locations on
your map.
-----------------
Secret Objectives
-----------------
1) Capture a Skink.
- There are two abandoned Skinks a little west of your starting position, just
beyond the bunker there. Grab one of them to complete this objective. Even
though these things are ridiculously weak, you're still better off taking them
both since you're going to be severely lacking in units this mission, and these
will at least offer you protection from snipers.
2) Hold off the Shermans.
German Soldier: "Those sappers were definitely up to something..."
- There's a little set of sandbags on the western side of the train bridge,
and a detonator is sitting in them. Target it with an infantry unit to blow up
the bridge, and you'll complete this secret objective.
-----------
Walkthrough
-----------
NOTE: All of your units will die at the end of this mission no matter what you
do, which is why I recommended you only bring a single unit of Standard
Infantry with you. This mission will be tough with such a small force,
but since there's no way to get a low casualties medal, Clear Level
medal, or Core Unit Gain medal anyway, you can be pretty careless on
this one.
Start by assaulting the bunker near your starting position. Your units will be
weak, so make sure you protect your medic and your sniper as much as possible.
Keep your eyes peeled for enemy snipers, since they should be your first
priority to make sure your medic doesn't get insta-sniped.
Continue moving west along the northern edge of the map, and you'll find two
abandoned Skinks. Normally I'd recommend that you leave these crappy things
behind, but in this situation, they offer your infantry a very good way to stay
protected from sniper bullets, so capture them both.
Depending on how fast you've been, a truck might have already made it through
the road and be moving up towards the windmill. That's fine - take your Skinks
down and assault the guard tower south-west of your original starting position,
using your infantry to assist them from a safe distance (making bazooka troops
your piority to keep the Skinks healthy).
The first piece of the wrecked jet is west of the windmill in the netting, and
when the truck makes it there, it will turn south and drive past the house.
Send your units there and completely ignore the windmill area and the area by
the netting. Since you can't get a Clear Level medal on this mission anyway,
there's no point in trying to fight the large enemy force up there. Instead,
approach the house to liberate the pilot, then destroy the truck as it drives
by.
Turn your attention south and wipe out any survivors near the bridge that you
didn't already kill on your way to the house. See the little thing of sandbags
there? Use the detonator in them to destroy the bridge to complete the second
secret objective, then turn farther south and destroy the next piece of the jet
near the shallow crossing of the river.
Cross the river and head for the third piece of the jet. Keeping in mind that
you don't care about casualties, simply run straight to it, destroy it, and
then run anything you have left up to the wind mill to end the mission.
NOTE: One of the few medals you can still get on this mission is the Bronze
Service Clasp for killing the single Allied officer on the map. He's
in the pile of units defending the northern piece of the jet, so you'll
have to actually go up there and kill him instead of waiting for the
truck to drive by with the piece in it if you really want the medal.
=============================================================================
| |
| 1.34) Walpurgisnacht |
| |
=============================================================================
-------
History Late January 1945
-------
"With their underground research labs and factories working at full capacity,
the Germans are now committing experimental weapons to the struggle against
the Allied bombing campaign.
Easing the pressure is a far cry from victory, but it will buy some of what
the Fatherland needs most to survive - time."
----------------
Unit Information
----------------
*Depending on what you brought with you on the previous suicide mission, you
may get additional new core units here to replace them. For example, if you
brought an Engineering Officer, Sniper, and Medic on the last mission instead
of just a Standard Infantry unit like I suggested, you'll get the Wirbelwind
and Supply Truck now, but instead of the Standard Infantry, you should get a
replacement Engineering Officer, Medic, and Sniper.
New Core Units Added: Core Units:
1 Wirbelwind 1 Green Officer Slot
1 Supply Truck 5 Green Infantry Slots
1 Standard Infantry 3 Green Vehicle Slots
1 Red Officer Slot
1 Red Infantry Slot
1 Red Vehicle Slot
Received units for the mission: What to Bring:
1 Supply Truck 1 Engineering Officer
4 Flak 88s 1 Pz. VI 'Tiger'
2 Rheintochter Missile Units 1 Pz. IV F2
1 Supply Truck
2 Snipers
1 Medic
2 Standard Infantry
The non-core supply truck will actually become core right at the start of the
mission, too.
----------------------
Production Information
----------------------
Starting Resources: 350
Called-In Officers: 0
After capturing it from the Allies:
Barracks (.15 Regeneration Rate)
--------------------------------------------------
Unit Type Cost Production Time
--------------------------------------------------
Standard Infantry 25 25
Medic 40 40
Mortar Team 40 40
Flamethrower 30 30
Sniper 40 40
---------------
Main Objectives
---------------
1) Capture the Barracks.
Col. von Strohm: "The Amis took our Barracks! Get it back so you can
train soldiers - you'll need every single one of them!"
- Easy enough - just send your tanks and infantry up there and shred the few
infantry units that are near the barracks, then take it over.
2) Keep at least two Factories running.
Colonel Strohm: "These Factories are essential for our victory. Defend
them at all costs!"
- Air strikes will hit them constantly, and then when the air strikes end, two
assault groups with some tanks and infantry will also appear on the map and try
to destroy them. If you keep control of both radar towers, you'll know where
each series of bombers is going to appear as well as which factory they're
targeting. Use that information to get at least two Wirbelwinds between the
bombers and their target so you can stop them before they get there. Make sure
you pay attention to the crash zone of each bomber you shoot down though - they
can damage things when they crash.
-------------------
Optional Objectives
-------------------
1) Maintain Radar activity.
- Keep control of at least one radar tower the entire game to accomplish this.
You'll want them both so you can defend against the air strikes properly. It's
not hard to hold them both for the entire mission, either. Simply place some
infantry and a medic at the north-east bridge to stop the Allied infantry raids
there, and place a few Standard Infantry units and a medic west of the southern
radar tower where the footprints lead off of the screen. Those might need a
bit more attention than the bridge guys though, since an M22 will show up with
the infantry each time.
2) Clear the tracks.
- Half way through the air strikes, some infantry and a pair of ambulances
will block the tracks just north of the train bridge. Destroy them before the
three minute time runs out to complete this objective. Note that if you
destroy these units before they actually block the tracks, this objective will
never appear, which will prevent you from completing it.
3) ??? Your guess is as good as mine.
- No freakin idea what the third optional objective is. Unlike previous
missions, it doesn't appear to register on its own. If you figure out what it
is, please share the wealth - I'd love to know, considering how much time I've
wasted trying to figure it out.
-----------------
Secret Objectives
-----------------
1) Keep all Factories operational.
- You have to keep two operational for the main objective, but if you end the
mission with all three operational, you'll complete this secret objective.
2) ??? Your guess is as good as mine.
- Again, no freakin idea what this objective is. If you figure out what it
is, please let me know. Here's a list of some of the things I tested while
trying to figure it out (as well as the third optional objective):
- Letting the Allies capture a radar station doesn't make anything happen.
- Letting the Allies capture both radar stations just makes you lose the first
optional objective.
- The Allies can only destroy the factories (not capture them), so there's no
chance to recapture a stolen one or anything like that.
- Capturing the depot in the center doesn't do anything.
- Occupying all the unmanned Flak 88s doesn't do anything.
- Letting the train retreat just makes you lose the second optional objective.
It doesn't cause any alternate objectives to appear or anything like that.
- Killing the SAS Officer in the trees on the north side of the river doesn't
appear to do anything. It doesn't stop the paratrooper attacks, even if you
kill him right at the start of the mission with your bomber strikes.
- Keeping both Rheintochter Missile platforms intact doesn't do anything.
- The empty tank train cars near the south-east factory don't appear to have
any significance as far as I can tell.
- The Volksturm Officer's Speer Method ability doesn't work on the factories,
so there's no way to give them a production boost or anything (yeah I was
grasping at straws with that one, but hey, I was trying to be thorough).
- I've covered every square inch of the map looking for hidden units and
haven't found any abandoned vehicles, neutral units, or anything. All I
found was the SAS Officer in the trees that I mentioned earlier.
- I've gotten the Clear Level medal, so if there was a particular enemy unit
that needs to be killed, I either would've already killed him, or he's not
spawning for some reason.
- I've completed the mission with zero casualties, including none of the Flak
88s or Rheintochter platforms.
- None of the neutral buildings on the map appear to have any significance,
other than a single Allied unit garrisoning the one at the southern exit of
the train tracks. Doesn't appear to be anything special about him though.
- I don't see any items you can interact with anywhere like the explosives on
the previous mission or the logs on one of the Allied missions.
-----------
Walkthrough
-----------
The premise of this mission is that you have to protect the three factories
until the Allied air raids are over. The planes are annoying, but not very
hard to stop. There will also be constant infantry attacks from the north-east
corner and the south-west corner (which will also have an M22 along with the
infantry). Or if you let the south-west radar tower get captured, the air drop
units will switch from there to the other radar tower.
With that in mind, start by manning your tanks with your infantry units and
sending all of your forces to the barracks. Wipe out the Allied infantry there
and capture it, then train three units of Standard Infantry, three medics, and
then set it to train an infinite stream of Standard Infantry. Man your Tiger
with the Engineering Officer so it will have the luxury of self-repiaring, then
send it to the south-west radar tower. Have it point to the west off the edge
of the screen where the footprints in the snow go off the side of the map.
Send your snipers and the medic to the north-eastern bridge and have them lay
prone in front of it to stop the Allied infantry that will constantly try to
cross it. Make sure you remember to have the medic deploy a first aid station
so he can keep himself healed too. Send the Panzer and the two supply trucks
to the depot in the middle of the map to capture it, then leave them there so
they'll be in a central location to respond to any problems you run into.
As soon as your first three Standard Infantry are ready from the barracks, send
them (and the first trained medic) down to join your Tiger. Their sole purpose
for the rest of the mission will be to make sure that the random infantry and
M22s that appear at the end of the footprints in the snow never manage to take
over that radar tower.
Shortly after you capture the barracks, a Luftwaffe Officer, two units of
Standard Infantry, and four Wirbelwinds will arrive from the street north-west
of the barracks. Send the infantry up to reinforce your men at the north-east
bridge, then split your four Wirbelwinds in every direction - one east, one
north, one south, and keep one near the barracks.
Lieutenant Gruber: "Gruber here! We've been sent to counter the Allied
threat!"
Now you're ready to sit back and deal with the air strikes. As long as you
keep control of both radar towers, you'll get an air craft indicator on the
edge of the map and a circle over the targeted factory every time an enemy raid
comes in. Send the two closest Wirbelwinds between the two symbols to shoot
down all of the planes before they get a chance to bomb their target. Pay
attention to where each plane crashes, though - they'll cause damage when they
hit the ground, and they can destroy your units if you're not paying attention.
Keep your eyes peeled for random dive bomber attacks on your rocket launch pads
and Flak 88s too, and send your repair trucks to them if they get hit. As the
mission goes on, a train will periodically appear and dump a new Wirbelwind for
you south of your barracks, so make sure you use it to improve your coverage of
the map.
While you're fending off air strikes and defending the radar stations, there
are two other minor things you can take care of if you're interested in the
Clear Level medal. First, there's a single Allied soldier garrisoning a
building at the southern exit of the train tracks. Second, there's a SAS
Officer hiding in the trees on the north side of the river, where the little
peninsula sticks out to the south. He can be annoying to get to, but you don't
have much use for your bomber strikes anyway, so if you want to be lazy, just
call one of them in on the tip of the peninsula to locate him, then drop as
many more as you need on him until he's gone.
When the air strikes are half way over, you'll be warned that some Allied units
have blocked the train north of the bridge. You'll have three minutes to go up
there and clear them out of the way. Don't try to be smart and attempt to stop
those units from getting there in the first place, or you'll prevent this
optional objective from showing up at all. Instead, use your two airstrikes to
severely damage them, then send the infantry pile that's been brewing at your
barracks to take care of the survivors.
Continue to fend off air strikes until the game tells you that they're done.
Now the hard part begins. Two ground attacks will come at you, but they don't
always come from the same location, so you'll have to react quickly to them.
Get your Tiger over to join your Panzer IV at the depot before the air strikes
are over so it will be able to respond faster. Pull your Wirbelwinds in closer
to the buildings too, although they're only good as a distraction - they'll get
shreded by the enemy tanks and bazookas if you try to do any serious fighting
with them.
Ideally, you'd use your ridiculous infantry pile from the barracks to defend
the north-western factory if the enemy appears there, and you'd defend the east
and south-east factories with your tanks and Wirbelwinds if the enemy attacks
there. If you're trying to get the high end casualties medal, one thing to pay
extra attention to is enemy flamethrowers - if they get anywhere near one of
your garrisoned buildings or a manned Flak 88, they'll instantly kill whatever
unit you had inside of it.
Stop the two ground assaults, and the mission will end. If you time it
correctly, you can also eliminate the standard infantry rush from the bridge in
the north-east right before this, which will allow you to get the Clear Level
objective too (assuming you already got rid of the soldier in the building at
the south end of the train tracks and the SAS Officer in the trees on the north
side of the river).
NOTE: The only way to get the Core Unit Gain medal on this mission is to bring
one of your tanks or the Wirbelwind so you can occupy it. The Supply
Truck that gets added to your core counts as being core right from the
start.
NOTE: To get the Clear Level medal on this, make sure you deal with the single
soldier garrisoning the building at the southern exit of the train
tracks and the SAS Officer hanging out in the trees on the north end of
the river (in the little peninsula thing that sticks out to the south).
You'll also have to make sure the units that constantly attack from the
north-east and south-west are wiped out right as you destroy the final
unit of the second ground assault.
NOTE: I still haven't figured out what the mission optional objective and
secret objective are, so if you discover them while you're playing, for
the love of god, tell me what they are!
=============================================================================
| |
| 1.35) Adlerschrei |
| |
=============================================================================
-------
History Early March 1945
-------
"Their air superiority challenged by next generation German ordinance, it is
now up to Allied ground forces to bring about the unconditional surrender of
Germany.
With the Rhine at their backs and the Russians beyond, the soldiers of the
Fatherland are to make a stand... and wait for salvation to arrive on
quicksilver wings."
----------------
Unit Information
----------------
New Core Units Added: Core Units:
None 1 Green Officer Slot
4 Green Infantry Slots
2 Green Vehicle Slots
1 Red Officer Slot
1 Red Infantry Slot
1 Red Vehicle Slot
Received units for the mission: What to Bring:
Multiple ground troops, 1 Engineering Officer
artillery, armored units with 1 Standard Infantry
support vehicles, plus production 2 Snipers
and support facilities. 1 Medic
1 Pz. VI 'Tiger'
1 Supply Truck
----------------------
Production Information
----------------------
Starting Resources: 1000
Called-In Officers: 1
Barracks (.15 Regeneration Rate)
--------------------------------------------------
Unit Type Cost Production Time
--------------------------------------------------
Standard Infantry 25 25
Medic 40 40
Sapper 30 30
Mortar Team 40 40
Flamethrower 30 30
Sniper 40 40
Panzergrenadier 40 40
Headquarters (.15 Regeneration Rate)
--------------------------------------------------
Unit Type Cost Production Time
--------------------------------------------------
Panzerwerfer 42 160 160
Hummel 100 100
LeFH Wespe 60 60
Sturmmorser Tiger 150 150
Headquarters (.15 Regeneration Rate)
--------------------------------------------------
Unit Type Cost Production Time
--------------------------------------------------
Wirbelwind 40 40
Hetzer 45 45
Jagdtiger 120 120
Supply Truck 60 60
Headquarters (.15 Regeneration Rate)
--------------------------------------------------
Unit Type Cost Production Time
--------------------------------------------------
Pz. IV F2 40 40
Pz. V 'Panther' 60 60
Pz. VI 'Tiger' 70 70
Pz. VI/B 'Konigstiger' 120 120
Wirbelwind 40 40
Supply Truck 60 60
---------------
Main Objectives
---------------
1) Hold your positions.
- Uhhhh yeah, see my detailed information in the walkthrough section. There
are really six main zones that the Allies will attack, and if you prepare very
well, you can hold them all with minimal (or even no) casualties.
2) Decimate Patton's forces.
- After your new planes arrive, you'll be given a counter on the top of the
screen for how many additional units you need to destroy before the mission
will be over.
3) Capture production buildings.
- If you lost any of them during the battle, take them back.
-------------------
Optional Objectives
-------------------
1) Capture a T28.
German Private: "Stopped dead! Let's have a look inside!"
- There's one on the eastern side of the train station in the north-eastern
corner of the map. It has no crew in it, but it's severely damaged. When you
approach it, Allied units will try to get inside it, and if they do, you won't
be able to get them out of it without destroying it. Therefore, it's a good
idea to make sure you have several snipers with you to make sure none of the
Allied units can live long enough to get inside it. Do yourself a favor and
approach it from the north side to avoid being annoyed by the stupid wall south
of it.
-----------------
Secret Objectives
-----------------
1) Defend the Communications stations.
- Keep control of both of them to complete this mission. If you lose control
of either one of them, 2 extra minutes will be added to the time it takes for
your planes to arrive. Taking them back won't negate that.
-----------
Walkthrough
-----------
This mission is going to be a disaster if you're trying to avoid casualties, so
be ready to spend a great deal of time planning and preparing the battlefield
at the start of the mission. Make ample use of the space bar to pause the game
so you can give orders to units across the entire battlefield. The Allied
assualt will arrive within a few seconds of the start of the mission, so you
don't exactly have much time to make adjustments.
There are six spots on the map that have to be defended.
1) The radar station in the south-east corner of the map.
This should be one of your main concerns, since you need to hold onto the radar
station for the secret objective. Allied infantry will rush up the little hill
to the east, and since they'll have a hoard of flamethrowers and medics, they
can be tough to wipe out. Flamethrowers also make it suicidal to keep infantry
units in your machine gun nests, since they'll be instant casualties if a
flamethrower hits them. To make matters worse, you can't back up and defend in
the flatter area by the nearby headquarters, or the Allied infantry will
capture the radar station on their way up the hill.
Start by removing the two Standard Infantry units from the machine gun nests,
then place all four Standard Infantry units prone on the ground basically right
on top of the northern machine gun next sandbags. They need to stay close
enough to the radar station that Allied units can't capture it, but far enough
west that they still have a firing solution towards the hill east of the other
sandbag pile. Their main goal is going to be to pick off enemy flamethrowers
before they reach your vehicles. Keep the units that don't start at full
strength away from the battle if you want to avoid casualties.
Next, line your Wirbelwinds up just barely south-west of the Standard Infantry
pile so they can spray machine gun bullets down the hill the instant anything
comes on the screen. Get your Tiger and the two Flak 88s lined up there too.
The LeFH has a mortar crew in it for some reason, so dump them out and replace
them with the crew from one of the Flak 88s, then use the nearby 2-man Standard
Infantry unit to man the Flak 88 instead. Position the LeFH and both mortar
crews north-west of your Standard Infantry pile, making sure their target rings
can reach the hill. Keep the medics prone in the middle, and make sure to
deploy their first aid stations.
Build two Panzerwerfers from this headquarters the instant the mission starts.
Their ability to spread damage out over a wide area will provide the most
benefit to you for this defensive position, and they'll be great for helping
your trench defenses later too. As soon as possible later in the mission, get
a supply truck from the headquarters to the west to position itself behind your
defensive line here to keep everything loaded and repaired.
Here's a screenshot of how my initial defensive line looked at this location:
http://thebrink.us/rushforberlin/rfb-adlerschrei-radar-station.png
Another thing you can do to help fend off the initial attack at this location
is to use your tactical air strike on the infantry pile as soon as it stands
still. The strategic air strike will probably take too long to get to the
target for it to really be useful to you though.
2) The radio station in the south-west corner of the map.
This is considerably easier to defend than the radar station. Simply move the
two partial Standard Infantry units out of the way where they'll be safe (next
to the station itself will work), then position the two full units of Standard
Infantry prone facing the gate, about half way from the station. Grab the
sniper from the building on the southern edge of the map and send him to join
the Standard Infantry, then grab a medic from the closest trench to the north
and have him sit prone behind your units, with his first aid station deployed.
Here's a screenshot of how I had this set up:
http://thebrink.us/rushforberlin/rfb-adlerschrei-radio-station.png
All they have to do is defend against standard paratrooper drops, so this
should be plenty to handle it.
3) The eastern side of your north-west base (with the barracks in it).
Infantry and vehicles will attack the barracks base by trying to get in the
small gap between the wall and the water at the northern edge of the map. This
will be a relatively easy spot to defend without casualties, so it's the best
place to use your core units to make sure they don't get lost in the massive
battle in the center of the map.
Send your Tiger, supply truck, snipers, and medic to the eastern wall of that
base, and put the Sturmmorser Tiger between the two guard towers so it can lob
shells over the wall (make sure the supply truck is within range of it to feed
it ammunition). Train an extra medic at the barracks to join them right away,
or send one from the closest trench. There are two loose bazooka troops in the
base and one in a garrisoned building that you should send over to defend with
this group too, and you can push the Flak 88 down the hill to help as well.
Have your Engineering Officer sit inside your Tiger if you brought him along,
just to help keep it healthy.
Resist the urge to use your Standard Infantry, though - they'll have a million
better uses eslewhere. Send the two partial units off to the corner where it's
safe, then send all of the full units south out of your base (including the
ones that start in the bunker and the guard towers.
Here's a screenshot of how my defenses looked early in the mission:
http://thebrink.us/rushforberlin/rfb-adlerschrei-north-base.png
Feel free to train additional snipers and/or bazooka troops to assist this
defensive line too if necessary, and make sure to keep an eye on your supply
truck since you only have one up here for now.
4) The gap in the trenches directly east of the northern supply depot.
5) The gap between the southern and central sections of the east trenches.
6) The gap between the trench and the mountain east of your southern
headquarters, where the main road crosses through the area.
The main problem here is that a massive pile of Allied infantry will rush the
trenches within seconds of the start of the mission, and your untis won't stand
a chance in the positions they're in. If you don't care about casualties,
leave all of your infantry except for the medics in the trenches, and send the
medics behind the depot. Retreat all of your tanks and the Flak 88 to the
depot and form a line facing the gap between the trenches there. Your infantry
will all be wiped out, but they'll buy you enough time to form up a solid
defense, and your tanks will be able to wipe them out without taking any tank
casualties.
Of course if you're trying to get the most out of this game, then you want to
avoid as many casualties as possible in your attempt to earn the high end
casualties medal, so you'll need to take a more cautious approach to this.
Starting with the northern of your three eastern trenches, do the following:
- Send the weak Standard Infantry unit way off to the west somewhere safe.
- Send the medic and the flamethrower to the west side of the depot.
- Send the panzergrenadiers farther west of the depot, with the eventual goal
of sending them all the way south to help defend that headquarters.
- Back the Flak 88 up to a position north of the depot.
- Back the Panzer IV up to a position between the Flak 88 and the depot.
- Back the Panther up to a position touching the northern edge of the depot.
Moving to the central eastern trench, do the following:
- Send the medics, flamethrowers, and Standard Infantry to the west side of
the depot.
- Send the panzergrenadier farther west of the depot, with the eventual goal
of sending him all the way south to help defend that headquarters.
- Back the Panzer IV and the Hetzer up to the south-west corner of the depot.
- Send the Tiger with the Engineering Officer in it to the south-east corner
of the depot.
Moving to the southern eastern trench, do the following:
- Send the two single-man Standard Infantry units somewhere far to the west
where they'll be out of the combat zone.
- Send the flamethrowers and medics to the west side of the depot.
- Send the panzergrenadiers directly south-west to the headquarters to help
defend it.
- Dump the Standard Infantry units out of the two Flak 88 AAs and send them to
the west side of the depot.
- Dump the panzergrenadier out of the house south of this trench and have him
head for the headquarters where you're going to be sending the rest of them.
- Send the two Panthers and the Panzerwerfer to the depot and have them face
east towards the gap in the trench, making sure the Panzerwerfer stays on
the west side where it's safer.
Now focus on the wasteland between the depot and your western trenches:
- Send the stray panzergrenandiers that are just standing out in the open down
to your southern headquarters to join in that defensive position.
- Send the two Hummels by the eastern side of the depot that they start next
to, so their range will extend to the gap in the trenches to the east.
- Have the two King Tigers by your southern headquarters move to the street
and face east. They're going to be on their own for a while defending this
headquarters along with the swarm of panzergrenadiers you're sending here.
Moving to the northern western trench, do the following:
- Send the King Tiger and the Jagdtiger to the east side of the eastern depot.
These are some of the heaviest vehicles that will be there at the start, so
you'll want them in the front of your defensive line to help absorb damage
that might be too harsh for your weaker vehicles to survive.
- Send all of the infantry to the western depot south of this trench. You're
going to form an infantry cloud there to defend against anything that makes
it through the eastern trench defenses (which some infantry are almost
certainly going to do in the initial attack).
Moving to the central western trench, do the following:
- Keep two medics and the Standard Infantry units prone around the four field
guns here to protect them from any stray Allied infantry units that wander
into the area. Make sure to deploy the first aid stations from your medics.
- Send the rest of the infantry south to the western depot.
Moving to the southern western trench, do the following:
- Send the one-man Standard Infantry unit way off to the west somewhere out of
the combat zone where he'll be safe.
- Send the rest of the infantry east to join in the secondary depot defense.
- Send the Jagdtiger and the Panther to the eastern depot to add more to its
defensive line.
- Dump the Standard Infantry unit out of the bunker south of the trench and
have it man the Field Mortar there. Later on, if you can get a spare supply
truck close enough to keep this Field Mortar supplied, try to do so.
Moving on to the western edge of the map on the north end, do the following:
- You should have ten units of Standard Infantry around the barracks area by
the time you've dumped the ones out of the guard towers and bunker. Send
some down to occupy the two empty Panzerwerfers and the Field Mortar near
your core units. Send the Panzerwerwerfers to the western edge of the
eastern depot to help in the main defensive line. They're horribly damaged
and out of shells, but that should get taken care of by the depot and the
supply trucks you're going to be building.
- Send the Maus to the eastern side of the eastern depot. These things are
ridiculously resilient if you can keep their front armor facing the battle,
so try to have it absorb as much damage for the rest of your untis as you
can. Keeping this thing intact is a massive bonus for you since the Tank
Ace inside will eventually start granting a 25% damage bonus to all of the
other vehicles around him.
- Use the rest of your loose Standard Infantry units from the barracks area as
well as the additional ones south of your western headquarters to occupy the
pile of abandoned Tigers, Panzer IVs, and Wirbelwinds. Send the Panzers IVs
and the Wirbelwinds to the western depot for repairs and to aid in its
defense, and send the Tigers to join the defense of the southern
headquarters. You'll need to keep them out of the battle for a little while
until you start getting some supply trucks though.
What to build initially:
- Train a spare medic and some extra snipers at your barracks to assist in
defending the barracks area. Those snipers will also be very useful for
completing the optional objective later on.
- Build 6 supply trucks at your western headquarters and immediately get them
going to key locations (the eastern depot and both field mortars to start
with, then potentially your northern defense force if they need help). With
an ample supply of supply trucks at the eastern depot, you can sit there
forever and defend against hoards of Allied tanks.
- Build at least 3 supply trucks at your southern headquarters and send one up
to your radar station defenses. Leave the other two at this headquarters to
repair your two King Tigers while they defend it. After the supply trucks
are built, build two Jagdtigers to solidify this defensive line.
- Build a Panzerwerfer at your radar station headquarters. Its ability to
deal out wide-spread damage very quickly will greatly improve the speed at
which you can annihilate the infantry attacks on the radar station.
- After those initial builds, build whatever you feel is necessary - King
Tigers and Jagdtigers are always good choices.
So yeah, a lot of time spent preparing the battlefield, but it's the only way
to have a chance at a low-casualties game. Here's a screenshot of what the
initial defenses looked like at my eastern depot:
http://thebrink.us/rushforberlin/rfb-adlerschrei-east-depot.png
If you have trouble with that layout, try avoiding the east side of the depot
entirely, and instead, line your tanks up diagonally from the southern edge of
the depot to the south-western area. This should make it less likely that
multiple Allied tanks will have a firing solution on your defenses at the same
time, since they'll have to move through the gap in the trenches to get close
enough to you.
And a glimpse of the western depot:
http://thebrink.us/rushforberlin/rfb-adlerschrei-west-depot.png
If your initial eastern depot defense is thorough enough, you should only have
to fight off a few stray infantry units at the western depot, and then it'll be
quiet there for the rest of the mission.
And the southern headquarters:
http://thebrink.us/rushforberlin/rfb-adlerschrei-southern-headquarters.png
Only the first attack on the southern headquarters should be a problem, since
you'll have ample reinforcements there after the first two minutes or so. Keep
your eyes peeled for units hitting your King Tigers out of their range, and if
you see that happening, creep your panzergrenadier pile forward with your
medics and vaporize any vehicles you run into.
The hardest part of avoiding mass casualties on this mission is the very first
infantry rush. If you can survive that, you'll have a much easier time for the
rest of the mission. The key is to use your own infantry that I had you move
to the depot to pick off the most threatening Allied infantry, which in general
will be the flamethrowers. As soon as the infantry rush is dealt with, get all
of these infantry (except the medics) away from the depot so your tanks will be
able to maneuver better.
Sit back and keep a careful eye on your defenses as the timer ticks down.
Don't hesitate to use the space bar to pause when a new attack hits so you can
carefully review your defenses and adjust them accordingly. The main thing to
watch out for is when Allied units are hitting your tank lines outside of their
visual range. You'll need to creep one of your heavier tanks a bit closer to
them for a second to get them within sight so you can pulverize them. You can
also use your two air strikes to do that whenever they're charged. It also
isn't a bad idea to eventually send a sniper or two down here to increase your
visual range.
</pre><pre id="faqspan-6">
Another thing to pay careful attention to is the health of your vehicle crews,
not just the health of the vehicles themselves. Make sure you remember to keep
medics and/or first aid stations near all of your vehicles.
When your aircraft arrive and you're sure your defenses are in good shape, the
only other thing to do is to raid the train station in the north-east corner of
the map to complete the optional objective. There's an abandoned T28 tank on
the eastern side of the building that you can capture as long as you stop the
Allied infantry from getting into it first. Bring some snipers and a pair of
medics over there and capture it carefully.
NOTE: It's insanely hard to make an attempt at the Clear Level medal on this
mission, but it can be done. You'll need to wipe out the units around
the train station, and then when you're defending against the Allied
assault, you'll have to move your tank lines to the east little by
little so you can destroy reinforcements the instant they appear on the
edges of the map.
The forces that normally assault your barracks will appear at the
north-eastern bridge, the forces that assault your radar station will
appear on the south-eastern road, and the main tank forces will appear
at the eastern road south of the train tracks, the center of the east
side of the map, and the south-eastern roads. There's also a single
soldier in the building east of the windmill that you'll need to kill.
NOTE: The only way to get the Core Unit Gain medal on this mission is to bring
one of your core tanks or your core Wirbelwind so you can occupy it.
=============================================================================
| |
| 1.36) Wirbelwind |
| |
=============================================================================
NOTE: For some reason the autosaves for this mission are getting labeled as
"German campaign Mission 7", so don't get confused if you're trying to
load a game from an autosave.
-------
History April 1945
-------
"With the southeast ramparts secured and the Zala oil fields recaptured, it is
time to launch a pre-emptive strike on the Russian forces Stalin has amassed
in East Prussia.
Success will restore German control over the Baltic shipping lanes and allow
the Fatherland to face the impending Soviet invasion on more equal terms."
----------------
Unit Information
----------------
New Core Units Added: Core Units:
2 Flamethrowers 1 Green Officer Slot
1 Tank Ace 7 Green Infantry Slots
1 Red Officer Slot
1 Red Infantry Slot
Received units for the mission: What to Bring:
2 T34-85s 1 Volksturm Officer
1 IS-2 2 Snipers
5 Flamethrowers 1 Medic
1 Sniper 2 Panzergrenadiers
1 Supply Tractor 2 Standard Infantry
1 Medic
2 Panzergrenadiers
I highly recommend you bring your experienced Volksturm Officer for this
mission (if you have one) because his Last Reserves ability (that halves the
cost of Panzergrenadiers) will be a massive asset for this mission.
If you feel like filling your red slots, the Tank Ace is a good choice to help
defend your depot since all three of his skills will be quite useful
(especially Dead Eye for easy one shot kills on Russian ISU-152s).
----------------------
Production Information
----------------------
Starting Resources: 2500
Called-In Officers: 2
After you capture them from the Russians:
Barracks (.15 Regeneration Rate)
--------------------------------------------------
Unit Type Cost Production Time
--------------------------------------------------
Standard Infantry 25 25
Medic 40 40
Sapper 30 30
Mortar Team 40 40
Flamethrower 30 30
Sniper 40 40
Panzergrenadier 40 40
Barracks (.15 Regeneration Rate)
--------------------------------------------------
Unit Type Cost Production Time
--------------------------------------------------
Standard Infantry 25 25
Medic 40 40
Barracks (.15 Regeneration Rate)
--------------------------------------------------
Unit Type Cost Production Time
--------------------------------------------------
Standard Infantry 25 25
Medic 40 40
Headquarters (.15 Regeneration Rate)
--------------------------------------------------
Unit Type Cost Production Time
--------------------------------------------------
M17 GMC 35 35
T34-76E 45 45
T34-85 55 55
IS-2 110 110
SU-100 60 60
ISU-152 120 120
Transport 25 25
Supply Tractor 60 60
BM-13 Katyusha 140 140
---------------
Main Objectives
---------------
1) Capture the Russian HQ.
German Private: "Enemy field HQ secured. Let's start making some Russian
equipment for our own use!"
- The headquarters is directly east of your starting position in the fenced
area. Whether you capture it or not, hoards of Russian infantry and tanks will
attack it like crazy starting a few minutes into the mission all the way until
the timer counts down. Building things here isn't a bad idea, but you have to
be careful with it - Russian air strikes will bomb directly in front of the
exit to it, so you need to make sure you don't have a unit drive out of the
headquarters and then get immediately blasted to pieces. Make sure anything
you build gets sent directly to the west where it's safer.
2) Fend off the Russians.
German Private: "Here comes your doom, bastards!"
- Like I said in the previous objective, Russian infantry and tanks will rush
the headquarters (and your depot) like crazy until the timer runs out. You'll
need to defend yourself until then, and you're going to be stuck doing it with
mostly Panzergrenadiers and snipers.
3) Eliminate the Russians.
German Private: "With the Graf Zeppelin deployed, we can use the
Sturmvogels against the Russians as well!"
- Once the Graf Zeppelin arrives, you'll have to go around the map and wipe
out the remaining Russian units on the map. This is a nice, safe time to
complete the optional and secret objectives too if you'd prefer to wait until
now to do them. Oddly though, you don't have to completely wipe every Russian
unit off of the map, so don't be lured into thinking that you can just leave
one random unit somewhere while you do the rest of the objectives.
-------------------
Optional Objectives
-------------------
1) Capture the old Railway Station.
German Private: "These train guns will teach our enemy some manners!"
- Simply reach the train station in the north-west corner of the map to
complete this objective. You can wait until after the Graf Zeppelin arrives if
you're having trouble doing it without casualties. Thankfully the train is not
under your control, so it doesn't become a casualty liability no matter how
early you capture the train station.
2) Eliminate the Partisans.
- The full text of this objective says to eliminate both partisan bunkers, but
what it really means is to capture both partisan barracks. One is on the east
side of the map and one's in the center. The one on the east side is an easy
target since it's poorly defended and you can reach it from the secret tunnel
(see the first secret objective below). This is an excellent way to get large
amounts of medics to your headquarters without the risk of them getting wiped
out when you train them at the barracks close to your starting position.
-----------------
Secret Objectives
-----------------
1) Use the secret tunnel.
German Private: "The tunnel is secured. We can use it freely, sir!"
- There's a well on the south end of the map a little to the east of the
headquarters that you're going to capture, and when you send infantry through
it, they'll pop out right next to the eastern partisan barracks. In the
walkthrough, I suggest using this early in the mission as a great way to safely
get large piles of medics to your headquarters. Plus you'll get the radio
station next to it, which doesn't hurt.
2) Capture the lighthouse!
Grayson: "Don't shoot, don't shoot! I'll cooperate!"
- Get a soldier into the boathouse on the north end of the map, and he'll boat
his way over to the lighthouse to complete this objective. Your reward is a
bombardment ability that you can use periodically, which will help you weaken
some of the piles of Russian vehicles that the scout planes will reveal when
the Graf Zeppelin arrives.
-----------
Walkthrough
-----------
Begin by using your panzergrenadiers and standard infantry to fight off the two
tanks that are attacking your starting position (don't forget to take the extra
unit of Standard Infantry out of the guard tower). Leave your tanks where they
are so they can defend against the stuff that attacks from the north. Some
Russian units may hit your tanks from out of their range, so be ready to move
your infantry up there to help out as soon as the attack from the west is dealt
with.
Your first priority needs to be destroying the two Russian field mortars, one
of which is north-west of your tanks. Don't bother trying to capture it to use
for yourself, or you'll have a hell of a time avoiding casualties. Instead,
use the A button on your keyboard to force-fire at it until it's destroyed.
The second field mortar is directly north of the barracks. Use your infantry
team to raid it, destroy it, and then capture the barracks. Be prepared for a
few tanks and some infantry to briefly counter attack you from the north and
from the headquarters to the south.
Time is utterly critical for a good defense on this mission, so as soon as you
have the barracks, train 2 more medics, 4 more snipers, and set it to build an
infinite number of Panzergrenadiers. As soon as the medics are ready, add them
to your current infantry group and move towards the headquarters. Deal with
the garrisoned buildings on the east side while your Panzergrenadiers take care
of the tanks surrounding the headquarters. When you've captured it, start
building 4 ISU-152s, and make sure to remember to move the deploy point to the
space west of the headquarters at the southern edge of the map. You don't want
units sitting directly north of the headquarters, or air strikes will pulverize
them before you can do anything with them.
Leave two of your medics and all of your Panzergrenadiers at the headquarters,
then quickly send the other two medics and your standard infantry and snipers
east. See the little well on the east side of the last row of buildings? Send
your men through that well, and they'll pop out at a tunnel exit near the
barracks on the east side of the middle of the map, accomplishing one of the
secret objectives in the process.
Wipe out the infantry guarding the barracks and capture it along with the radio
station (don't miss the sniper on the very western tip of this hill, west of
the tunnel exit). As soon as you have control of the barracks, start training
another six medics. Send your assault force back through the tunnel and get
them to join your Panzergrenadiers and other units back at the headquarters.
Make sure any units that came out of your first barracks already get sent down
to the headquarters to join the rest of your forces, and keep your eyes on the
medic pile you're training at the other barracks. You want to get everything
from both of these barracks to form a giant pile in the clearing north-west of
the headquarters so you can sit here and defend it until the timer runs out.
Be careful that you don't have one stray unit come out of the first barracks
and get gunned down before he can make it to the pile by your headquarters. As
soon as you see any sign of a Russian attack, stop training units at that
barracks so you can avoid casualties up there. When the first ISU-152 is ready
at the headquarters, send it to join your other tanks. Form a defensive line
at the depot facing west so those units can defend over there while your
attention is on your infantry pile. Make sure you lend your depot force one of
your medics and one of your snipers too, so you can keep your tank crews healed
and pick off Russian infantry a little easier.
When more ISU-152s are ready, line them up along the southern edge of the map
by your headquarters so they can assist in the defense. When the four you
start building earlier are done, build a couple supply tractors to keep them
supplied, then start cranking out IS-2s for later. Again, remember not to let
them linger directly north of the headquarters, or Russian air strikes will
blast them.
Now sit back and defend your two key locations - the depot to the west, and the
headquarters to the east. Your depot will be more or less self-sufficient, but
if you're concerned about casualties, you'll need to pay attention to the
pointless tank wagons on the train tracks. Those are technically under your
"control", so when they get destroyed, they count as a casualty.
For your infantry pile by the headquarters, simply deploy all of your first aid
stations with your medics, get all of your men into prone stances, and wait for
attacks. Let your snipers and standard infantry fire away at any infantry
targets that come along, and use your Panzergrenadiers to vaporize any tanks as
soon as they're in range. Things will go on this way for quite a while, so pay
attention.
If you enjoy multi-tasking and you want a chance at the Clear Level medal later
in the mission, you can also train a bunch more medics and Standard Infantry
at your eastern barracks to use to raid the lighthouse and railway station.
When you're comfortable with your southern defenses, simply take a big pile of
infantry (at least 8 units of Standard Infantry if you want to guarantee you
can avoid casualties and at least 4 medics) directly north along the eastern
edge of the map.
Turn west when you hit the water, annihilate the partisans guarding the
boathouse, and send a unit into it. He'll ride a boat to the lighthouse, so
just let him chat with the guy there until you get credit for the secret
objective. This will also give you a bombardment ability that you can use to
help weaken the hoards of Russian units still lingering on the map.
Move west along the edge of the water, carefully fighting any units you run
into. If any vehicles catch you, you're pretty screwed, so make sure you hug
the shoreline. Thankfully there's nothing actually guarding the train station,
so your men can capture it without a fight. When you do, an armored train will
eventually show up and start wandering on the tracks, firing at any Russians
that it sees.
Meanwhile, when the timer finally reaches zero, the Graf Zeppelin will arrive,
giving you a constant scout plane presence and allowing random air strikes of
your own to help wipe out the remaining Russians. If you've been continuing to
build IS-2s and some supply tractors, you can begin moving around outside the
map whenever you feel like it. Don't forget to capture the remaining Russian
barracks in the middle to complete the other optional objective.
Don't get sloppy with your defenses while you're roaming the map. Massive
groups of Russian vehicles, including heavy artillery and numerous Katyushas,
will still show up and can easily overwhelm your headquarters. Use your
bombardment and air strike abilities wisely to help weaken forces whenever your
scount planes reveal them to you. You can also wipe out huge chunks of tanks
when they first come on the map if you position a cluster of Panzergrenadiers
on the ridge where your eastern barracks is sitting. They'll appear on the
eastern edge of the map in the shadow of that hill, so they're easy targets.
You don't actually have to destroy ALL of the Russian units on the map to end
the mission, which can make the Clear Level medal very difficult to achieve.
The more of the dispersed infantry you can deal with before the Graf Zeppelin
arrives, the better your chances will be. You'll definitely want to get going
right away. Try to clear out as many of the stationary piles that the scout
planes reveal as possible, then deal with the huge reinforcement waves last.
That's pretty much your only shot at it.
NOTE: Since you can't bring any core vehicles with you on this mission and
there aren't any opportunities to earn any during the mission, there's
no way to earn the Core Unit Gain medal.
=============================================================================
| |
| 1.37) Oderbruch |
| |
=============================================================================
NOTE: For some reason the autosaves for this mission are getting labeled as
"German campaign Mission 8", so don't get confused if you're trying to
load a game from an autosave.
-------
History May 1945
-------
"The time of conciliation is near: Stalin's horde of 3,000 tanks and over 2
million men under his stooge Zhukov is about to cross the Oderbruch and invade
the Fatherland.
Germany's future now lies with those determined to stop the crimson tide: the
brave descendants of Arminus and Lutzow manning the defensive line atop the
strategic Seelow Heights."
----------------
Unit Information
----------------
New Core Units Added: Core Units:
1 Pz. VII 'Maus' 2 Green Officer Slots
1 Pz. VI/B 'Konigstiger' 7 Green Infantry Slots
1 Luftwaffe Officer 4 Green Vehicle Slots
1 Red Officer Slot
2 Red Infantry Slots
2 Red Vehicle Slots
Received units for the mission: What to Bring:
Multiple ground troops, 2 Volksturm Officers
armored units with support 1 Pz. VII 'Maus'
vehicles plus production and 1 Pz. VI/B 'Konigstiger'
support facilities. 2 Supply Trucks
2 Snipers
1 Medic
2 Standard Infantry
I don't suggest bringing the full compliment of green infantry slots since they
really won't be of much use to you, so you'll just be throwing away points.
The reason I suggest bringing the two Volksturm Officers is because their Speer
Method ability will allow you to instantly produce two Maus tanks at the start
of the mission (or at least one if your second officer isn't quite experienced
enough yet), and they'll be able to continuously use that ability throughout
the mission to greatly increase the speed that you're able to mass produce
heavy tanks and Sturmmorser Tigers.
The Tank Ace is rather useful too if you feel like filling the red officer
slot. Deploy him in the middle of your tank line to maximize the usefulness of
his attack bonus.
----------------------
Production Information
----------------------
Starting Resources: 3000
Called-In Officers: 4
After you capture them from the Russians:
Barracks (.15 Regeneration Rate)
--------------------------------------------------
Unit Type Cost Production Time
--------------------------------------------------
Standard Infantry 25 25
Medic 40 40
Sapper 30 30
Mortar Team 40 40
Flamethrower 30 30
Sniper 40 40
Fallschirmjager 25 25
Panzergrenadier 40 40
Factory (.15 Regeneration Rate)
--------------------------------------------------
Unit Type Cost Production Time
--------------------------------------------------
Wirbelwind 40 40
BMW Motorcycle 100 100
Pz. VI 'Tiger' 70 70
Jagdtiger 120 120
Sturmmorser Tiger 150 150
Pz. VII 'Maus' 150 150
Halftrack Transport 35 35
Supply Truck 60 60
Panzerwerfer 42 160 160
Headquarters (.15 Regeneration Rate)
--------------------------------------------------
Unit Type Cost Production Time
--------------------------------------------------
Recon Vehicle 110 110
Hetzer 45 45
Pz. IV F2 40 40
Wirbelwind 40 40
Standard Infantry 25 25
Panzergrenadier 40 40
---------------
Main Objectives
---------------
1) Hold out as long as you can.
- When the mission has reached 25 minutes (from when it started, so it could
be the 30 minute mark if you filled all five red core slots), this objective
will be complete.
2) Capture all enemy buildings.
German commander: "The Russians are getting low on reinforcements! Now is
the time to launch our counterattack!"
- You have to cross the river and capture the barracks, factory, and both
depots to complete this objective. Do yourself a favor and take the south-east
depot last. A pile of Russian soldiers will appear next to it a few seconds
after you capture it, so you can eliminate that counter attack this way.
-------------------
Optional Objectives
-------------------
1) Kill the Russian commander.
German commander: "A Russian Infiltration unit has ambushed our camp!
Stop them before they acquire vital intel on our
positions!"
- Somewhere around 18 minutes into the mission, a huge wave of Russian
infantry will cross the water on the south side and make a mad dash towards
your barracks, usually crossing over the hill instead of following the roads
like the previous infantry rushes. An artillery blast also hits your barracks
during this time, so don't leave anything sitting in front of it. Kill the
Russian officer that comes with this attack, and you'll get credit for this
optional objective.
-----------------
Secret Objectives
-----------------
1) Destroy all searchlights.
German commander: "Those Russian planes are really pounding us - we have
to figure out a way to get rid of them!"
- When you assault the Russian buildings on their side of the river, make sure
you destroy all of the search lights to get credit for this objective. While
it might seem like a good idea to try and pick them all off with artillery
bombardments or something so you can avoid getting within range of the Russian
artillery, it'll take you a ridiculous amount of time to do it that way. Plus
like the commander's quote mentions, it's a huge penalty for you to not be able
to use scout planes anymore once these are destroyed. For that reason alone,
you definitely don't want to attempt destroying these until after the bulk of
the Russian assault is finished and the second main objective becomes active.
-----------
Walkthrough
-----------
This is another daunting mission like the fifth German mission was if you're
trying to earn the high end casualties medal. Luckily you start with better
units this time, and you have fewer places to defend. It's still going to
require some skilled use of the space bar on your keyboard to pause the game in
the beginning while you give mass amounts of orders to all of your units, since
the Russians will begin attacking within a few seconds of the start of the
mission.
Start with the units around the two field mortars closest to the river. It's a
suicide mission to try and hold onto these, so abandoned everything. Send all
of the infantry straight west to your barracks, except for the medics - send
them to your factory instead. Send all of the vehicles to your factory too.
Meanwhile, over at your barracks, abandon the machine gun nests and guard
towers, then send your tanks and supply truck along with all of the infantry to
the road south of your closest field mortars. The goal here is for them to
face east, allowing your snipers to get an early view of the hoards of Russian
infantry that are going to cross the water over here and try to hit your
factory from underneath.
Start training additional snipers and medics from the barracks, making sure to
set a waypoint from the barracks to have your new units go directly to where
you just set up your forces under the field mortar hill. Later in the mission,
a random artillery barrage will pulverize the area directly in front of the
barracks, so you definitely don't want to have any units lingering near it.
Leave the Wirbelwind and supply truck by your solitary field gun, but
consolidate your infantry, the other two Wirbelwinds, and the two Panzerwerfers
into a pile just north-east of your two fenced-in field mortars (send the
Panther over the bridge to join your main defense force). The goal here is to
form a defensive position on the hilltop so you can fire down towards the road
when the Russians cross the water. The trick for the first few minutes of the
mission will be keeping your supply truck moving between reloading the field
mortars and reloading/repairing your Panzerwerfers.
Finally, the disaster over by your headquarters and factory needs some serious
cleanup work. Start by manning any core vehicles that you brought with you,
then retreat any remaining infantry to the bridge where they'll be out of the
way. Send your Wirbelwinds over there too - they're too weak to risk leaving
them on the front line. So is the Panzer IV near the northern edge of the map,
so I usually park it on the land bridge south of your factory just in case
any minor stuff makes it that far past your southern defenses.
You're going to want to strategically retreat all of your heavy vehicles now,
lining them up about three tank lengths east of your factory, and having them
all face due east. Stretch them from the water all the way to the tree north
of your depot, keeping them as tightly together as possible. Line your
Panzerwerfers and Sturmmorser Tigers up behind them, then spread your supply
trucks out the best you can to cover everything. Use your medics wisely to
deploy first aid stations, too - you only have a few until you can get some
sent up from your barracks, so be smart with them.
Visibility of the fields to the east will be crucial for this mission, or giant
piles of enemy mortar crews and other disasterous assault forces will either
hit you from out of your range or come into sight so late that you won't be
able to do much damage to them until they're right on top of you. With that in
mind, there are two great things you can do to improve your visual range. The
first option (but dangerous as far as casualties are concerned) is to use
snipers, which you can line up carefully along with your medics. These will be
a huge help for defending against the infantry hoards, too.
The other massively useful strategy is to build several recon vehicles from
your headquarters and keep a constant stream of scout planes flying over the
battlefield. This will be immensely useful, so I strongly recommend it. If
you were able to bring at least one Volkstrum Officer with you (or even better,
two of them), you can use their Speer Method ability throughout this mission to
instantly produce Maus tanks or Sturmmorser Tigers from the factory. My
suggestion would be to get two Maus tanks the first time, then build two
supply trucks while the ability is charging, then build two Sturmmorsers the
next time. These things will be a major help in annihilating the infantry
hoards, especially mortar teams that're hitting you from a distance.
Here are some screenshots of my defenses a few minutes into the mission, just
to give you an idea of what it looked like:
http://thebrink.us/rushforberlin/rfb-oderbruch-1.png
http://thebrink.us/rushforberlin/rfb-oderbruch-2.png
http://thebrink.us/rushforberlin/rfb-oderbruch-3.png
Now you're pretty much on your own. Keep your scout planes in the air, keep
your supply trucks and medics well-positioned, and don't forget to pay
attention to your southern defenses. After the mission has been going for 25
minutes, you should get credit for the first main objective and be given the
second one. The majority of the Russian attacks should halt shortly after
that, allowing you to head for the river and take their barracks, factory, and
both supply depots.
Keep in mind that they have some seriously heavy artillery on their side of the
river, so you can't really bring infantry or weak vehicles over there if you
want to avoid casualties. Jagtigers are your best option, since they're fast
enough to be useful but still heavy enough to take a beating. Maus tanks tend
to be so clunky that they're hard to use, but you can still bring them along
too. The key is to use your scout planes and artillery strikes to deal with
the Russian field mortars when possible, and to hit as much stuff as you can
with Sturmmorser shells from a distance.
Do yourself a favor and capture the south-east supply depot last, which will
allow you to avoid the infantry counter attack that would normally appear on
the side of the screen after you capture it. Make sure you remember to clear
the map of enemy units first if you want to get the Clear Level medal though.
Also keep in mind that you'll need to re-occupy the two field mortars that you
abandoned at the very start of the mission if you want to avoid having them
count as casualties.
Campaign ending: "Congratulations! Today, 5th June 1945, the United Nations
and Germany have signed the peace accord which restores
the national borders of Europe to their 1930 state, and
officially ends all hostilities on the continent. I wish to
congratulate you, kamerads, for your heroic efforts which
saved the Fatherland from total defeat. Now is the time to
reconcile the past and re-integrate our people into the
great family of nations."
=============================================================================
::::::::::::::::::::::::::::::::
1.40) French Campaign
::::::::::::::::::::::::::::::::
=============================================================================
| |
| 1.41) The Battle of Glieres |
| |
=============================================================================
-------
History March 1944
-------
"Among the countless stories of heroism and sacrifice born during the German
occupation of France, there are many worth being retold and remembered.
Legends like that of the insurgents of Haute Savoie - a few hundred brave
soldiers and civilians against whom the Germans mobilized an army of three
thousand strong."
----------------
Unit Information
----------------
Received units for the mission:
3 Maquisard Teams
1 Standard Infantry
Core Units:
4 Green Infantry Slots
1 Red Infantry Slot
(Starting Core:)
3 Medics
1 Mortar Team
3 Snipers
What to Bring:
2 Medics
2 Snipers
----------------------
Production Information
----------------------
Starting Resources: 0
Called-In Officers: 0
You won't be able to produce any additional units during this mission.
---------------
Main Objectives
---------------
1) Rendezvous with Captain Anjot.
French Maquisard: "Let's move out and meet up with Captain Anjot! He
needs all of us, so don't get yourself killed!"
- Reach the house with the objective symbol to complete this objective. It's
a good idea to take care of capturing the howitzer and causing the landslide
first though, since they're easier to do if you get them done before the German
attack starts (which will be a few seconds after meeting the captain).
2) Repel the German attacks until dusk.
Captain Anjot: "Take your positions! This is gonna be a helluva fight!"
- German infantry (and eventually some vehicles) will rush the trenches from
the north and the west. It's easiest to move your PaK 50s and LeFH to the
house, then back your entire infantry pile up to it too. That way all of your
men can fire in any direction, and your medics can cover everyone at the same
time. Just keep your eyes peeled for eneny snipers and mortar teams that might
fire at you from out of your visual range.
It's also helpful to drop explosive charges on the north and south edge of the
western trench in case you need them later to take care of a sniper that's out
of your view. Plus you can get really lucky and top a German tank with the
north one sometimes if you're fast enough.
3) Captain Anjot must survive.
- If he dies prior to the second main objective being complete, you'll lose
the mission.
4) Leave the area.
Captain Anjot: "Dusk, at last! Get your men off the plateau - there is
nothing more you can do!"
- Simply retreat to the edge of the map following the line on it. Some
paratroopers will attempt to stop you, but that's about it. You don't even
have to retreat all of your men, so you can safely leave your Pak 50s and LeFH
occupied without having to abandon them and have them count as casualties.
-------------------
Optional Objectives
-------------------
1) Block the Western passage.
Captain Anjot: "We must find a way to slow down the German Infantry
advance!"
- An explosive charge between the hills at the top of the road in the
north-west corner will take care of this objective. Just drop it where the
flashing objective symbol is, then detonate it. Note that this can be done
prior to the objective becoming active, which is much easier to do. This
should be your first stop as soon as the mission starts.
2) Get ammunition for your guns.
Captain Anjot: "We're running low on ammo! I hope the Brits airdrop those
supplies in soon."
- Once your two PaK 50s have low enough ammo levels (looks like their combined
ammo count has to reach about 50 shells), a supply crate will be marked on the
map somewhere. Get an infantry unit close enough to it, and the ammo will be
instantly resupplied for your PaK 50s and the LeFH. Keep in mind that it's
possible to have this objective never appear if you abandon the PaK 50s or move
them too far away from the combat zone so they never fire enough of their
original ammo. It's still possible to trigger this objective even after the
German assault is over though - even if you have to force-fire on your own
units to do it.
-----------------
Secret Objectives
-----------------
1) Secure the hidden artillery piece.
- Slightly north-east of the church east of your trench locations, you can
take an abandoned LeFH. Push it to the house where the captain is waiting, and
you'll get some good use out of it during the German attacks.
2) Find the hiding Maquisards.
Captain Anjot: "Who's in there? Come out and join the fight, cowards!"
- As soon as you have control of Captain Anjot, send him to the church to the
east. He'll convince some infantry to come out of the church and join the
fight.
-----------
Walkthrough
-----------
Begin by turning north and approaching the road that heads down the hills. A
sniper will come running up the road and join you. Before you go anywhere,
use your Maquisard Teams to drop explosives on the road. You can crumble some
rocks off of the hill on the east side near the top, which will give you credit
for one of the optional objectives.
Head east along the north end of the map and proceed all the way to the corner.
Kill the German officer up here, then head south towards the church. There's
an abandoned LeFH in the trees that you can capture, so man it with a
Maquisard Team and start pusing it towards the house where Captain Anjot is
waiting. You can't do anything with the men in the church yet, so ignore them
for now and send all of your units to Captain Anjot.
When you meet the captain, he and his men will come under your control.
Immediately send him to the church, and he'll convince the men there to come
out and join the fight. The easiest way to defend against the German attacks
is to keep all three of your guns just barely south of the house, and make your
entire infantry pile go prone slightly north-west of it. From here they'll be
able to defend against attacks from the north and west, and you keep them all
healed with your medics.
Keep your eyes peeled for enemy sipers and mortar teams that might hit you from
outside of your range. All you need to do is survive until the timer runs out,
and then you can retreat along the path marked on the map to end the mission.
In order to get the other optional objective to appear though, you'll need to
make sure your PaK 50s fire enough shells (it looked to me like the objective
will trigger when their combined ammo count is around 50 shells). Eventually a
supply crate will be dropped to a random spot on the map, and you'll have to
get an infantry unit to it in order to complete the other optional objective.
If it appears in the north-east corner, you can send a single unit up there to
grab it with relatively no risk, but if it appears anywhere else, you'll
probably want to wait until the German assault is done before you send any
units to it if you want to avoid risking casaulties.
NOTE: If you want the Clear Level medal, you'll have to spend some time
clearing out the surviving German units after the initial ten minute
timer runs out. Reinforcements will stop after that, so it's not hard
to eliminate the remaining stragglers.
NOTE: Since you can't bring any vehicles with you at the start of the mission
and there aren't any opportunities to add any to your core during the
mission, it doesn't appear possible to earn the Core Unit Gain medal.
=============================================================================
| |
| 1.42) Beggars' War |
| |
=============================================================================
-------
History June 1944
-------
"With D-Day drawing near, British SOE agents and their Resistance associates
double their efforts to disrupt enemy communication and hinder troop movements
throughout occupied France.
The German armored division hiding in the Beze forest is an ideal target for a
well-planned hit-and-run operation."
----------------
Unit Information
----------------
New Core Units Added: Core Units:
3 Maquisard Teams 2 Green Officer Slots
2 Maquisard Leaders 3 Green Infantry Slots
Received units for the mission: What to Bring:
2 Snipers 2 Maquisard Leaders
1 Medic 1 Medic
2 Snipers
----------------------
Production Information
----------------------
Starting Resources: 4000
Called-In Officers: 0
You will not be able to build any additional units during this mission.
---------------
Main Objectives
---------------
1) Destroy 50% of the enemy armor.
- You'll need to destroy 20 tanks to complete this objective. The explosive
charges that your Maquisard Leaders can deploy are ridiculously devastating, so
you can easily destroy two vehicles at a time with a single charge (or even
more if they're in a square).
2) Leave the area by the Western Road.
- Simply get a single one of your units to the objective symbol on the road on
the west side ofthe map when you're ready to end the mission.
-------------------
Optional Objectives
-------------------
1) Capture the Radio Station.
SOE Agent: "Excellent! That should delay their reinforcements for a while
until we can finish our mission."
- It's in the north-east corner of the map, all the way on the other side from
where you start. In order to get credit for this objective, you have to
capture the radio station before any German soldiers set off an alarm, which
means you need to make sure you kill any infantry you encounter as quickly as
possible. The trickiest one is the officer standing directly next to the alarm
post by the radio station. You'll want to make sure all of your men can fire
at him at the same time the instant he's visible, or he'll immediately hit the
alarm.
-----------------
Secret Objectives
-----------------
1) Destroy 75% of the enemy armor.
- Continue blowing up the remaining German tanks after you've reached your 50%
mark until you get credit for this objective.
-----------
Walkthrough
-----------
Start by heading for the road and eliminating the soldier there. Wait for the
tank to drive by, then use one of your officers to plant an explosive charge on
the street. When the tank returns on its patrol, detonate the charge to
destroy it (the charges from the officers are way more powerful than typical
explosive charges).
Head east across the road, carefully killing any infantry you encounter so they
won't make it to the alarm posts. Take out the guard towers too, and when the
road heads south to the barracks compound, kill the guards there too. Every
time you encounter a watchtower, you should consider the infantry under it to
be your first priority rather than the tower itself - the soldiers on foot will
run for the alarm posts, but the ones in the towers can't sound the alarm.
Work your way all the way east, wiping out all the soldiers you encounter so
you'll have an easy time with the Clear Level medal later. Head north when you
reach the end of the road, then make your way to the path that heads up to the
radio station. Watch out for German patrols in the trees - they can be hard to
see sometimes. Run up the hill to the radio station, but make sure all of your
soldiers are in a tight group when you reach the station. There's a German
officer standing right next to it, and he'll sound the alarm if you don't kill
him the instant you see him (and you'll fail the optional objective if you let
the alarm go off before you capture the radio station).
NOTE: If the alarm does get set off and you don't care about medals or extra
objectives, you can still complete the mission. You'll just fail the
optional objective if the alarm gets set off before you capture the
radio station, and you'll get a 15 minute timer before reinforcements
arrive (or 25 if you successfully captured the radio station before
triggering the alarm). You'll have no chance at a Clear Level medal if
you set the alarm off, though.
Now that the radio station is captured, you can head down to the middle area of
the map and start clearing out additional infantry and watchtowers. The safe
way to clean everything out is to take care of the infantry first, then worry
about blowing up the tanks. Work your way through the area systematically and
wipe everything out. If you can do it without triggering the alarm, you'll be
able to get the Clear Level medal. If you triggered the alarm though, you're
screwed on that.
Either way, send at least one unit to the objective marker on the road on the
west side of the map to end the mission when you're ready.
NOTE: Since you don't have any core vehicles and you can't get any during this
mission, there's no way to get the Core Unit Gain medal.
NOTE: The only way to get the high end medal for killing enemy officers on
this map is by setting off the alarm, since a seemingly endless stream
of Tank Aces will appear after that. The down side is that setting off
the alarm also ruins your chance at the Clear Level medal.
=============================================================================
| |
| 1.43) Lances at Dawn |
| |
=============================================================================
-------
History July 1944
-------
"Following the success of the Allied landing in Normandy, the Fuhrer ordered
the mass deployment of V2 cruise missiles against London.
It is up to the French Resistance to sabotage the major launching facility of
watten before it unleashes its ordinance on an unsuspecting British capital."
----------------
Unit Information
----------------
NOTE: Even if you've completed the previous two units with no casualties, some
of your core units will be gone at the start of this mission.
New Core Units Added: Core Units:
1 Chasseurs Alpines 3 Green Officer Slots
1 Maquisard Team 1 Red Infantry Slot
Received units for the mission: What to Bring:
1 Maquisard Leader 2 Snipers
1 Airborne Infantry 1 Chasseurs Alpines
2 Medics
1 Sniper
1 SAS Officer
----------------------
Production Information
----------------------
Starting Resources: 4000
Called-In Officers: 0
You won't be able to produce any additional units during this mission.
---------------
Main Objectives
---------------
1) Neturalize the anti-aircraft defenses.
- There are four Flak 88s and four missile batteries marked on the map that
you'll have to destroy to complete this objective.
2) Ignite the signal flares.
- Simply walk an infantry unit over each of the flashing objective symbols
around the main building to complete this objective.
3) Empty the fuel barrels into the channel.
US Officer: "The Lancasters are damn late. We need to find another way to
mark the target area. Remember those fuel barrels along the
channel? Go and empty their contents into the water - a
burning channel should be easy to spot from above!"
- There are three flashing objective symbols near the water (west, east, and
south). Look for a single barrel near them, and have an infantry unit target
it to complete this objective.
4) Go to the evacuation point.
- Get a single unit to the south-western edge of the map where the flashing
objective symbol is, and you'll end the mission.
-------------------
Optional Objectives
-------------------
1) Capture the Railway Station.
- It's on the western side of the map. Capture it to complete this objective.
It doesn't really do anything for you though.
2) Destroy the Eastern bridge.
- Endless groups of infantry and a recon vehicle will enter the map from the
road on the east side during this entire mission. Detonate the bridge closest
to their entry point using your Maquisard Leader's explosive charge to complete
this objective. (It won't stop the reinforcements, though.)
3) Prevent further launches.
- You'll be given two objective symbols, one in the north-west corner and one
in the north-east corner. Shortly after that, two fuel trucks will enter the
map from the middle of the northern side. Simply destroy them both before they
reach the flashing objective markers to complete this optional objective.
-----------------
Secret Objectives
-----------------
1) The German uniforms will allow you to infiltrate the Facility in disguise.
</pre><pre id="faqspan-7">
- There's a tobacco lodge on the north end of the map near the middle, right
above the main V2 building. Get an infantry unit in there, and they'll become
disguised as an enemy unit.
-----------
Walkthrough
-----------
NOTE: Don't forget that your SAS Officer is capable of calling in paratrooper
reinforcements periodically. Make sure you take advantage of that, and
this mission will be a breeze.
Move east along the southern edge of the map, killing anything you see along
the way. Enemy reinforcements are going to start entering the map from the
eastern edge of the road where the bridge is, so get there as fast as you can.
You're going to have to fight them back while also dealing with the garrisoned
buildings on the other side of the bridge. Your ultimate goal is to detonate
the bridge using your Maquisard Leader's explosive charge ability. Note that
this won't stop the reinforcements, though - you'll still have to deal with
them at some point.
Head west, annihiliating German infantry units and garrisoned structures as you
work your way to the railroad station on the western edge of the map. Capture
it to complete one of the optional objectives. While you're over here, look
for a lone building at the northern edge of the map. There's a German officer
in there that you'll need to kill if you want any chance at the Clear Level
medal.
When you're ready, enter the main part of the map and continue clearing out
German infantry and defenses, including the Flak 88s and missile batteries.
Keep your eyes open for another officer inside a building in the north-eastern
corner of the map too if you're interested in attempting the Clear Level medal.
When all four Flak 88s and all four missile batteries are destroyed, you'll get
four objective symbols around the main V2 building. Clear out the inside of it
if you haven't already (you can enter it from the north end), then walk your
infantry onto each of the four symbols to plant flares there. After that, you
should be given three more objective symbols around the outside edges of the
map near the water. Go to the barrels near these symbols and target them with
an infantry unit to complete the next main objective.
At some point, the camera will zoom to a V2 launch pad in the middle of the
map, and you'll be given an optional objective to stop the other ones from
firing. Two fuel trucks will enter the map from the north end in the middle,
near the north side of the main V2 building. Get your infantry up there and
destroy them both before they can get to the two flashing objective symbols.
While you're up there, look for the tobacco lodge building and put a unit of
your infantry in there to find some German uniforms, which will complete the
secret objective.
With all of your objectives complete, the only thing left to do is to exit the
map at the objective symbol in the south-west corner. The problem is that if
you want to get the Clear Level objective, you're going to have to deal with
the endless stream of reinforcements that are still coming into the map from
the road in the south-east corner (a single recon vehicle and some infantry,
which will respawn as soon as you annihilate the previous group).
Leave one of your officers a short distance from the exit point (as short as
possible without accidentally triggering the end of the mission), then send
everything else over to the road where the German reinforcements are appearing.
Your only chance at the Clear Level medal is if you can destroy the German
reinforcements right at the same time as you move your officer onto the exit
symbol, which can take a ridiculous amount of luck.
NOTE: Since you don't have any core vehicles and you can't get any during this
mission, there's no way to get the Core Unit Gain medal.
=============================================================================
| |
| 1.44) Liberation of Paris |
| |
=============================================================================
-------
History August 1944
-------
"Flanked by multiple Allied armies, the Germans are in full retreat from French
soil. Cautious as ever, General Eisenhower is awaiting further developments
outside Paris.
For the French, it is a matter of pride to get to their capital first -
despite the fact that it is in uproar and full of General De Gaulle's
enemies."
----------------
Unit Information
----------------
NOTE: Even if you've completed the previous two units with no casualties, most
of your core units will be gone at the start of this mission.
New Core Units Added: Core Units:
1 Maquisard Team 4 Green Infantry Slots
Received units for the mission: What to Bring:
1 Ranger Officer 2 Medics
1 Maquisard Team 2 Maquisard Teams
----------------------
Production Information
----------------------
Starting Resources: 0
Called-In Officers: 0
After you capture them from the Russians:
You won't be able to build any additional units during this mission.
---------------
Main Objectives
---------------
1) Secure the route to Notre Dame.
- This is the flashing objective symbol in the middle of the map near the
north side. Before you go there though, you'll want to move around the map and
take care of some of the optional and secret objectives.
2) Protect General De Gaulle.
Colonel Rol: "I hate De Gaulle's guts, but I do not wish him dead. I
ordered my men to help you protect him. They will hide
among the civilians, revealing themselves as necessary.
Good luck!"
- When General De Gaulle's convoy arrives, you have to keep him safe. If his
car gets destroyed, you lose.
-------------------
Optional Objectives
-------------------
1) Rescue Colonel Rol.
- He's way up in the north-east corner of the map. Kill the enemy officer and
troops on the north side of the buildings, and a cutscene will trigger the
completion of this optional objective.
2) Recruit 7 Maquisard groups.
French soldier: "Merci! Without you we would all be dead by now. Let's
join forces and clean the Boche filth off the streets!"
- Counting the forces directly south of your starting position, there are
actually ten units of Maquisard Teams that you can collect on this map
(although two of them are likely to get killed directly south of your starting
position before you can save them). Gather any seven of them to complete this
objective. Completing the second secret objective will help you with this
objective since it will reveal the location of the remaining units.
3) Disarm the German time bombs.
Maquisard: "We saw an explosion, Mon Commandant. The Germans must have
planted explosives to cover their retreat and wreak as much
havoc as possible. We must do something about it!"
- There will be five houses marked on your minimap that you'll have to send
your Ranger Officer into to disarm the time bombs. If you fail to do this
before De Gaulle's convoy reaches the rendezvous, you'll fail this objective.
-----------------
Secret Objectives
-----------------
1) Prevent the louting of the Louvre.
Partisan citizen: "I saw some suspicious characters lurking nearby.
Maybe we should have a look..."
- Simply kill the German officer and infantry in front of it to complete this
objective. It's in the south-west corner of the map.
2) Meet the Maquisard Commander.
Maquisard Commander: "My men are ready to protect De Gaulle with their
lives. They are scattered throughout the city - I
will mark their positions on your map."
- He's south of the giant tower on the west side of the map. If you find him,
he'll mark the location of all of the remaining Maquisard Teams on the map for
you, which will help you with that main objective.
-----------
Walkthrough
-----------
Head immediately south and fight off the enemy infantry untis that are
attacking the AI-controlled allies in the street. Any that survive the attack
will join your control, and count for the 7 you need to collect for the
optional objective.
Head west over the bridge, then turn directly north towards the statue with
the medical supplies next to it to collect another infantry squad. Return to
the bridge and head west to find the Louvre. Wipe out the officer and infantry
in front of it to complete the secret objective. Occupying the recon car that
the looter abandons is a double edged sword - it's nice to have for its speed,
firepower, and ability to help you absorb damage, but it'll run out of gas
eventually, and you'll have to keep a unit stuck in it for the rest of the
mission to avoid having it count as a casualty.
Turn north after securing the Louvre and wipe out the enemies in the street and
in the building on the corner, then turn west across the top of the Louvre.
Grab the next unit of Maquisard along the western edge of the map here, then
head north to the giant tower to meet the Maquisard Leader for the second
secret objective. He'll make the remaining Maquisard units show up on your map
for you, which will make it easier for you to plan the rest of your route.
Head east from the tower and cross the next bridge, heading for the first of
the flashing objective symbols that indicate time bombs in houses. Send your
Ranger Officer into the middle house on the north end of the street to disarm
it, and use your infantry to clear out the enemy infantry units to the south
on the street (if you care about the Clear Level medal). Get your Ranger
Officer out of the building when he's done with the bomb, then send your units
farther east. Note that if you had the officer assigned to a group hotkey,
he'll lose it when he comes out of the building, so make sure you don't leave
him behind on accident.
Head farther east over the next bridge, making sure to kill the enemy infantry
on the north and south sides of the buildings as you go (again, only if you
care about the Clear Level medal). There's another bomb in the middle house on
the north side of the street after you cross this bridge, so have your Ranger
Officer disarm it.
Now it's time to split your forces in half so you can cover both sides of the
river for the remaining objectives. Otherwise time becomes an issue. Send
half your men, your officer, and one medic north and then west over the next
bridge, then send the other half of your men and the other medic south down the
road. The group crossing the bridge is headed all the way to the west side of
the map so your officer can get to the next bomb house. Don't miss the unit of
Maquisard in the cluster of buildings in the middle of the map while you're
crossing by them.
The unit heading south needs to wipe out some infantry units first (for the
Clear Level medal), then turn east towards the water fountain with the medical
supplies next to it. Head north up that street to deal with more units, and
then they need to head all the way to the north-east corner of the map to free
the Colonel. Kill the officer and infantry up there, then grab the unit of
Maquisard south of them. This entire group of units can head for the meeting
point on De Gaulle's convoy route now.
Back to the unit you sent west, it needs to head to the north-west corner of
the map to deal with the bomb house there and to pick up another Maquisard
group. Send everyone east across the bridge on the north side of the map, grab
the Maquisard unit there, and then head south towards the meeting point. Grab
the unit of Maquisard near the meeting point on the way (you might already have
grabbed seven, but you can still pick up the extra unit).
Wait for the convoy to meet you at the rendezvous. Fight off the enemy snipers
and infantry when they attack, then head east along the convoy's new route and
clear out the garrisoned houses along the route. Keep your infantry away from
the AI-controlled tank - a bomb truck will ram it at some point. When it does,
the convoy will stop, and you'll need to fight off three more bomb trucks to
end the mission. Just keep your units close to De Gaulle's car and move in the
direction of each truck as it approaches.
NOTE: Since you don't have any core vehicles and you can't get any during this
mission, there's no way to get the Core Unit Gain medal.
Campaign ending: "Congratulations! The enemy which held paris has
capitulated, and france goes home to Paris. She goes home
bloody but very resolute. She goes home wiser from the
tremendous lesson she has learnt, but more sure than ever
before of her duties and her rights. We must march on
towards victory, fraternally and hand in hand. Viva la
France!"
=============================================================================
::::::::::::::::::::::::::::::::
2.00) Units
::::::::::::::::::::::::::::::::
=============================================================================
As a brief warning for some of the data in the following sections, keep in mind
that not all units can be built in every mission, and that some can't be built
at all (you can just encounter them during missions). Also note that I found
some oddities between cost/range/sight/damage values between units in missions
compared to their values in multiplayer. I assume that's related to the
missions using original values, but the multiplayer using newer values that
were introduced when Rush for the Bomb was added to the game.
Since I used the missions and the multiplayer to collect the data for this
section, I can't guarantee that I didn't accidentally include a mix and match
of data on some items. I tried to always use mission data when possible to be
consistent, but there might still be a few errors that snuck in.
=============================================================================
| |
| 2.10) French Units |
| |
=============================================================================
| ---------------------------------- |
| | 2.11) French Infantry | |
| ---------------------------------- |
=============================================================================
The French units in this game aren't as robust as the other combatants, and you
won't be able to build any of them. I'm including the details of their unique
variants of infantry units for the sake of completionism.
-----------------
Chasseurs Alpines
-----------------
"Light infantry unit well accustomed to extreme weather conditions."
Damage: 10
Range: 35
Sight Range: 40
Reload Time: 2 Seconds
Damage Per Second: 5
Type: Bullet
Ammo: Unlimited
Armor: None
Hit Points: 500
Special: Magentic Mine (Active, 60 second recharge)
"Powerful proximity charge to be used against enemy armor. May also
kill crews."
These are just the French version of Standard Infantry. Their magnetic mines
do extra damage to vehicles and can kill the crew inside if enough of them are
thrown.
--------------------------
Maquisard Leader (Officer)
--------------------------
"Resistance leader. Demolitions expert."
Damage: 30
Range: 35
Sight Range: 45
Reload Time: 2 Seconds
Damage Per Second: 15
Type: Bullet
Ammo: Unlimited
Armor: None
Hit Points: 400
Special 1: Green Ghosts (Passive)
"Nearby friendly infantry units move silently and are harder to
detect."
Special 2: Perfect Communication (Passive)
"Gives an extra level to nearby infantry units. Units can reach
level 4 (Elite) this way."
Special 3: High Explosives (Active, 30 second recharge)
"Places high explosives which can be selected and detonated later."
The high explosives skill is a stronger version of the explosive charges that
paratroopers and Maquisard Teams have (2000 base damage compared to 500 on the
Maquisard Team version of the skill). It's utterly devastating against
buildings and vehicles. Once placed on the ground, they'll stay there until
the player detonates them, they get destroyed, or the unit drops another one,
which will make the first one disappear. Unlike first aid stations from
medics, these can't be repaired by supply trucks when they're damaged.
--------------
Maquisard Team
--------------
"Resistance fighters. Masters of infiltration and sabotage."
Damage: 10
Range: 35
Sight Range: 40
Reload Time: 2 Seconds
Damage Per Second: 5
Type: Bullet
Ammo: Unlimited
Armor: None
Hit Points: 500
Special: Explosives (Active, 60 second recharge)
"Places explosives which can be selected and detonated later."
The explosive charges can be dropped on the ground and detonated manually from
anywhere, just like paratroopers. They're deadly against infantry (500 base
damage), and they'll damage and disable most vehicles. Once placed on the
ground, they'll stay there until the player detonates them, they get destroyed
(700 hit points), or the unit drops another one, which will make the first one
disappear. Unlike first aid stations from medics, these can't be repaired by
supply trucks when they're damaged.
=============================================================================
| |
| 2.10) German Units |
| |
=============================================================================
| ---------------------------------- |
| | 2.11) German Infantry | |
| ---------------------------------- |
=============================================================================
--------------------------
Engineer Officer (Officer)
--------------------------
"General support unit to keep combat vehicles in top shape."
Cost: 400
Damage: 30
Range: 28
Sight Range: 45
Reload Time: 2 Seconds
Damage Per Second: 15
Type: Bullet
Ammo: Unlimited
Armor: None
Hit Points: 400
Special 1: Field Repairs (Passive)
"The officer is capable of repairing his vehicle (for armored units
only.)"
Special 2: Acquisition (Passive)
"Collect a small amount of resources from destroyed enemy
vehicles."
Special 3: Control Goliath (Active, 25 second duration, 75 second recharge)
"Produces a remote controlled tankette filled with explosives. It
will move towards the designated target and detonate."
The ability to repair his own vehicle can make this officer a life saver
sometimes, and his control goliath ability is amusing and deadly to both tanks
and infantry.
---------------
Fallschirmjager
---------------
"Elite infantry unit with limited firepower."
Cost: 25
Damage: 15
Range: 28
Sight Range: 40
Reload Time: 2 Seconds
Damage Per Second: 7.5
Type: Bullet
Ammo: Unlimited
Armor: None
Hit Points: 500
Special: Explosives (Active, 60 second recharge)
"Places explosives which can be selected and detonated later."
The explosive charges can be placed on the ground and then detonated manually
from anywhere if you click on them like they're a normal unit. The explosions
are lethal against most infantry (500 base damage) and will damage and disable
most vehicles. Once planted on the ground, the explosives will stay there
until they're either detonated by the player or destroyed (700 hit points), or
until the unit attempts to drop another one, which will make the previous one
disappear. Unlike first aid stations from medics, these can't be repaired by a
supply truck when they're damaged.
------------------------
Feldkommandant (Officer)
------------------------
"Veteran combat officer."
Cost: 400
Damage: 30
Range: 28
Sight Range: 45
Reload Time: 2 Seconds
Damage Per Second: 15
Type: Bullet
Ammo: Unlimited
Armor: None
Hit Points: 400
Special 1: Piercing Rounds (Passive)
"The standard attack of the officer's vehicle will substantially
decrease the enemy's armor value."
Special 2: German Efficiency (Passive)
"Damaged factories all over the map will produce at maximum
efficiency."
Special 3: Abwehr Intel (Active, 30 second duration, 180 second recharge)
"Enemy officers are marked on the minimap for a limited period of
time."
The first ability is similar to how flamethrowers damage a vehicle's armor,
which can allow you to drop heavy vehicles a lot faster. Other than that, this
officer's usefulness is pretty limited.
------------
Flamethrower
------------
"Infantry support unit. Lethal against buildings and vehicles."
Cost: 30
Damage: 90
Range: 18
Sight Range: 40
Reload Time: 5 Seconds
Damage Per Second: 18
Type: Fire
Ammo: Unlimited
Armor: None
Hit Points: 250
Special: High Pressure Fuel Tank (Active, 60 second recharge)
"Extra damage against targets within buildings/vehicles for a
limited time period."
These are excellent at getting infantry out of garrisoned structures,
especially if you can approach the structure from a view that it can't fire at
you much. The high pressure fuel tank ability also makes these insanely good
at capturing enemy vehicles without damaging them too much.
Fire damage on vehicles will also reduce their armor, even all the way down to
zero if you hit them enough. This can make flamethrowers extremely useful when
fighting heavy tanks, but unfortunately because of their low hit point values
and speed, they tend to cost you a lot of casualties.
---------------------------
Luftwaffe Officer (Officer)
---------------------------
"Seasoned officer armed with ground-to-air missile weapon."
Cost: 400
Damage: 120
Range: 30
Sight Range: 45
Reload Time: 5 Seconds
Damage Per Second: 25
Type: AT
Ammo: Unlimited
Armor: None
Hit Points: 400
Special 1: Air Suppression (Passive)
"Nearby enemy units are in constant fear and receive 1 level
penalty."
Special 2: Expert Aircrews (Passive)
"All airplanes belonging to the officer are harder to shoot down."
Special 3: Air Superiority (Active, 30 second duration, 180 second recharge)
"All enemy aerial activity is negated for a limited period of
time."
Maybe it's just the result of my playstyle, but I personally find this to be
one of the less useful officers. Admittedly, they are great for bringing along
on assaults just for the -1 enemy level penalty.
-----
Medic
-----
"General support unit. Provides first aid."
Cost: 40
Damage: 10
Range: 35
Sight Range: 40
Reload Time: 2 Seconds
Damage Per Second: 5
Type: Bullet
Ammo: Unlimited
Armor: None
Hit Points: 250
Special: First Aid Station (Active, 150 second recharge)
"The medic creates a field hospital which heals nearby friendly units
(including himself) until destroyed."
A staple of your infantry forces as well as your vehicle forces, since even a
single medic can drastically increase the survivability factor of your men.
The first aid station ability will basically allow your medic to be in two
places at once - he can drop the first aid station on the ground, then go
somewhere else to heal stuff in his own range radius.
The first aid station has the same range as the medic, and it'll sit on the
ground forever unless the medic uses the skill again (which will make the old
first aid station disappear) or it gets destroyed (it has 200 hit points). An
interesting side note - you can repair a first aid station with a supply truck,
making them the far safer choice for keeping defensive vehicle pile crews
healed instead of leaving the medic himself exposed next to them.
To maximize the medic's combat effectiveness when using him as a support unit
with assault infantry, don't keep him as a member of your main group. Instead,
keep him as a separate group and target your first group with him, which will
make him follow them and heal them instead of trying to participate in the
actual combat.
-----------
Mortar Team
-----------
"Medium range infantry support unit. Lethal against enemy troops and
vehicles."
Cost: 40
Damage: 100
Range: 50
Sight Range: 40
Reload Time: 5 Seconds
Damage Per Second: 20
Type: HE (ballistic)
Ammo: Unlimited
Armor: None
Hit Points: 500
Special: None
A standard mortar unit. Great for hitting stuff from over walls and buildings,
but since their range isn't much better than normal infantry and tanks, they
can struggle to be very useful against vehicles. In general, you're probably
better off using bazooka troops, especially since the mortar shells are in the
air for so long that moving targets can easily avoid most of the damage.
---------------
Panzergrenadier
---------------
"Heavy infantry unit trained to destroy enemy armor."
Cost: 40 Armor
Damage: 100
Range: 30 10
Sight Range: 40
Reload Time: 5 Seconds 10 [10] 10
Damage Per Second: 20
Type: AT 10
Ammo: Unlimited
Hit Points: 250
Special: Tank Barrier (Active, 60 second recharge)
"Creates a concrete block to slow down enemy vehicles. Can be
destroyed."
A group of several of these can be utterly devastating against vehicles,
especially when accompanied by some medics to keep them healed and some snipers
to make sure enemy infantry can't get close enough to bother them. This is one
of the few types of infantry with any armor rating.
The tank barrier ability will deploy a little concrete barricade. They have 70
armor rating on all sides, but only 50 hit points, so they don't exactly slow
tanks down very much. Unlike first aid stations and explosives, this unit can
deploy an infinite amount of tank barriers at the same time without the
previous one disappearing.
------
Sapper
------
"Infantry support unit trained to handle explosives."
Cost: 30
Damage: 10
Range: 20
Sight Range: 40
Reload Time: 1 Second
Damage Per Second: 10
Type: Bullet
Ammo: Unlimited
Armor: None
Hit Points: 250
Special: Landmine (Active, 30 second recharge)
"Lays a mine invisible to enemy units (except for Sappers) and
damages vehicles uppon contact."
These guys can drop a landmine on the ground, which will both damage and
disable most vehicles when they run over it. They can also see enemy landmines
on the ground within their sight range, allowing you to detonate them with any
unit just by firing at them. Unlike the explosive charges that some units can
drop on the ground, the Sapper can have more than one landmine on the ground at
the same time.
------
Sniper
------
"Special infantry unit. Provides long range precision fire."
Cost: 40
Damage: 90
Range: 55
Sight Range: 55
Reload Time: 5 Seconds
Damage Per Second: 18
Type: Bullet
Ammo: Unlimited
Armor: None
Hit Points: 200
Special: Fast Relocation (Active, 90 second recharge)
"Allows change of position instantly to avoid enemy fire."
These are a staple of your assault force, and when you get a group of them
together with some medics and standard infantry to absorb some damage, they can
make a devastating force. The fast relocation skill will let you teleport to
terrain in the sniper's range, allowing you get away from combat much faster if
you wind up in a situation where you're going to lose your sniper. Don't
forget that you can pause the game with the space bar to make more effective
use of this ability when needed.
-----------------
Standard Infantry
-----------------
"Infantry combat unit. The backbone of the German Armed Forces."
Cost: 25
Damage: 10
Range: 35
Sight Range: 40
Reload Time: 2 Seconds
Damage Per Second: 5
Type: Bullet
Ammo: Unlimited
Armor: None
Hit Points: 500
Special: Magentic Mine (Active, 60 second recharge)
"Powerful proximity charge to be used against enemy armor. May also
kill crews."
This is your basic infantry unit. They also substitute as vehicle crews when
necessary. Several magnetic mine hits on a strong vehicle will usually kill
the crew, potentially allowing you to capture it.
------------------
Tank Ace (Officer)
------------------
"Veteran commander. Use in vehicles to maximize weapon damage."
Cost: 400
Damage: 30
Range: 28
Sight Range: 45
Reload Time: 2 Seconds
Damage Per Second: 15
Type: Bullet
Ammo: Unlimited
Armor: None
Hit Points: 400
Special 1: Reinforced Plating (Passive)
"The front armor rating of the unit recieves 95% damage reduction
if it was lower to start with (for armored units only)."
Special 2: Gunnery Training (Passive)
"Nearby combat vehicles receive a 25% damage bonus."
Special 3: Dead Eye (Active, 90 second recharge)
"The next shot will be lethal (for armored units only)."
Definitely a great officer to have around when you've got large scale vehicle
combat going on. The reinforced plating skill is awkwardly worded, but what
it's trying to say is that any tank the officer gets into will have its front
armor rating boosted to a maximum of 95, meaning if you put him in a vehicle
that already had 95 armor rating on the front, this bonus won't do anything.
The gunnery training ability will give a 25% damage bonus to all tanks within
the officer's range (tanks only, not artillery or other vehicles). This can
make for an exceptionally deadly defensive line if you put a Tank Ace in a
vehicle in the middle of it, or it can make for an exceptionally deadly assault
force if you keep careful track of where your tank ace is.
The dead eye skill is just unfair to be honest. It's an instant kill on any
vehicle it targets. Make sure to target a full-strength vehicle to get the
most out of this ability.
---------------------------
Volksturm Officer (Officer)
---------------------------
"General support unit. Provides logistical aid."
Cost: 400
Damage: 30
Range: 28
Sight Range: 45
Reload Time: 2 Seconds
Damage Per Second: 15
Type: Bullet
Ammo: Unlimited
Armor: None
Hit Points: 400
Special 1: Respected Leader (Passive)
"The morale of nearby friendly units cannot go below normal under
any circumstances."
Special 2: Last Reserves (Passive)
"Lowers the production cost of Panzergrenadier (anti-tank) infantry
units by 50%."
Special 3: Speer Method (Active, 180 second recharge)
"All units in the production queue of nearby Factories are produced
immediately."
This officer's Last Reserves and Speer Method ability make him one of the most
utilitarian officers in the game, especially during missions where you might
be able to have more than one of them on the map at the same time.
=============================================================================
| ---------------------------------- |
| | 2.12) German Vehicles | |
| ---------------------------------- |
=============================================================================
--------------
BMW Motorcycle
--------------
"Lightning fast recon vehicle."
Cost: 100 Armor
Damage: 30
Range: 32 0
Sight Range: 60
Reload Time: 3 Seconds 0 [ 0] 0
Damage Per Second: 10
Type: Bullet 0
Ammo: Unlimited
Hit Points: 200
Special 1: Recon Pass (Active, 90 second recharge)
"Calls in a recon plane which gives sight range as it passes by.
Enemy AA defenses may destroy the plane."
Special 2: Tactical Airstrike (Active, 120 second recharge)
"Calls in a tactical bomber to the designated target anywhere on
the map. Enemy AA defenses will limit effectiveness."
Special 3: Strategic Airstrike (Active, 120 second recharge)
"Calls heavy bombardment to the target area within sight range.
Enemy AA defenses will limit effectiveness."
These function the same as normal recon vehicles, they're just a weaker version
(no armor, less hit points). They are slightly faster, though.
Excellent for extending the visual range of your assault units or defensive
positions. The scout planes are also excellent for both of those purposes,
since you can reveal defenses from outside of their range or reveal enemy units
that are hitting you from outside the range of your defenses. The airstrikes
can also be quite useful, especially in high numbers. Note that despite the
description on the tactical airstrike though, you can only call in tactical and
strategic airstrikes on targets that are within the recon vehicle's sight.
------------
Field Mortar
------------
"Medium siege mortar that delivers long range barrages."
Cost: N/A Armor
Damage: 350
Range: 200 25
Sight Range: 40
Reload Time: 12 Seconds 0 [ 0] 0
Damage Per Second: 29
Type: HE (Ballistic) 0
Ammo: 15
Hit Points: 550
Special: None
These can't be built, but you'll have them during certain missions. They're
incredibly devastating, especially on infantry because of their massive blast
radius. The only down side is that you can't move them, and you have to keep a
supply truck next to them at all times because of their pitiful ammo count.
Beware of flamethrowers - they'll pretty much insta-kill the crew if they get
close enough to fire at you.
-------
Flak 88
-------
"Versatile 88 mm gun. Lethal against ground targets."
Cost: N/A Armor
Damage: 180
Range: 65 25
Sight Range: 40
Reload Time: 8 Seconds 0 [ 0] 0
Damage Per Second: 22
Type: AT 0
Ammo: 30
Hit Points: 400
Special: None
These can't be built, but you'll have them during certain missions. They can
be pushed like field guns, so they're not stationary like field mortars are.
Beware of flamethrowers - they'll pretty much insta-kill the crew if they get
close enough to fire at you.
----------
Flak 88 AA
----------
"Anti-aircraft equivalent of the versatile 88 mm gun."
Cost: N/A Armor
Damage: 40
Range: 45 0
Sight Range: 50
Reload Time: 8 Seconds 0 [ 0] 0
Damage Per Second: 5
Type: HE (Ballistic) 0
Ammo: 30
Hit Points: 400
Special: None
These can't be built, but you'll have them during certain missions. These are
technically structures rather than units, which means you can occupy and desert
them without having it count as a casualty if you leave it abandoned. Beware
of flamethrowers - they'll pretty much insta-kill the crew if they get close
enough to fire at you.
-------------------
Halftrack Transport
-------------------
"Armored all-terrain transport."
Cost: 35 Armor
Damage: 30
Range: 32 15
Sight Range: 40
Reload Time: 3 Seconds 10 [ 0] 10
Damage Per Second: 10
Type: Bullet 5
Ammo: Unlimited
Hit Points: 350
Special: None
These don't really do much. You can put two infantry units in them and drive
them around if you want, but that's about it. If you have a medic as a
passenger, he won't be able to use his healing ability until you eject him from
the vehicle.
------
Hetzer
------
"Light and versatile tank hunter."
Cost: 45 Armor
Damage: 120
Range: 45 45
Sight Range: 32
Reload Time: 7 Seconds 25 [15] 25
Damage Per Second: 17
Type: AT 20
Ammo: 30
Hit Points: 350
Special: None
Nothing too special about these things. In general they're only effective
against small vehicles since they don't have the firepower or armor to survive
very long against heavier targets.
------
Hummel
------
"Highly mobile self-propelled artillery unit."
Cost: 100 Armor
Damage: 200
Range: 80 20
Sight Range: 40
Reload Time: 10 Seconds 15 [ 0] 15
Damage Per Second: 20
Type: HE (Ballistic) 10
Ammo: 10
Hit Points: 450
Special: None
Obviously Sturmmorser Tigers are better, but at 2/3rds of the cost, these are
still a pretty nice alternative. A pack of them together can be utterly
devastating against infantry rushes. They do suffer from the typical artillery
problem though - the faster your target, the less effective these will be.
---------
Jagdtiger
---------
"Heavy tank destroyer based on the fearsome Tiger."
Cost: 120 Armor
Damage: 200
Range: 45 95
Sight Range: 32
Reload Time: 9 Seconds 50 [30] 50
Damage Per Second: 22
Type: AT 45
Ammo: 20
Hit Points: 500
Special: None
These things can be ridiculously hard to kill when you run into one with weak
Allied vehicles. They can dish out some massive damage, and if you can't get
to their sides or get behind it, the front armor can allow it to take a major
beating. Their only disadvantage compared to the King Tiger is that they don't
have a turret, so the tank itself has to move to aim. (They also have slightly
lower side and rear armor, even though the front armor is better than the King
Tiger's.)
-----------
Kubel Wagen
-----------
"Reliable all-terrain recon vehicle."
Cost: N/A Armor
Damage: N/A
Range: N/A 0
Sight Range: 40
Reload Time: N/A 0 [ 0] 0
Damage Per Second: 25
Type: N/A 0
Ammo: N/A
Hit Points: 200
Special: None
These can't be built, and they're relatively rare on any missions. They work
like any other kind of transport, which means you can put two infantry units in
them and drive around if you really want to. The infantry inside them can't do
anything, so they're pretty pointless really.
-------
LeFH 18
-------
"Medium field cannon that gives direct fire support."
Cost: N/A Armor
Damage: 130
Range: 120 25
Sight Range: 40
Reload Time: 9 Seconds 0 [ 0] 0
Damage Per Second: 14
Type: HE (Ballistic) 0
Ammo: 25
Hit Points: 400
Special: None
These can't be built, but you'll start with them on some missions. The crews
that man them can push them on the ground, allowing you to relocate them. If
you can keep these behind your defenses, they can be deadly due to their high
damage and excellent range, especially against infantry targets due to their
blast radius. The crews are extremely exposed to all forms of attack though,
and flamethrowers will pretty much insta-kill you. The armor won't exactly
allow you to withstand much of a vehicle attack, either.
----------
LeFH Wespe
----------
"Self-propelled artillery unit designed to support infantry."
Cost: 60 Armor
Damage: 130
Range: 70 15
Sight Range: 40
Reload Time: 10 Seconds 10 [ 5] 10
Damage Per Second: 13
Type: HE (Ballistic) 5
Ammo: 20
Hit Points: 350
Special: None
Still pretty effective against infantry groups, but because these are so much
weaker than Hummels or Sturmmorser Tigers, you have to be a lot more careful
with them when enemy vehicles are anywhere nearby.
----------
Opel Blitz
----------
"Highly reliable road transport vehicle."
Cost: N/A Armor
Damage: N/A
Range: N/A 15
Sight Range: 40
Reload Time: N/A 10 [ 0] 10
Damage Per Second: N/A
Type: N/A 5
Ammo: N/A
Hit Points: 350
Special: None
These can't be built, and the only place I can really remember seeing them is
on the fourth German mission when a pair of them block the railroad tracks.
------
PaK 50
------
"Anti-tank gun with limited firepower."
Cost: N/A Armor
Damage: 120
Range: 55 15
Sight Range: 40
Reload Time: 6 Seconds 0 [ 0] 0
Damage Per Second: 20
Type: AT 0
Ammo: 35
Hit Points: 400
Special: None
These can't be built, but you'll have them on some missions. The infantry crew
that mans them can push them, allowing you to relocate them. If you can keep
them behind a defensive position, they can assist you a little, but if they get
anywhere near the front line, they're totally screwed due to their lack of
armor and the high exposure of the crew to machine gun fire and flamethrowers.
---------------
Panzerwerfer 42
---------------
"Mobile rocket launching system with limited accuracy."
Cost: 160 Armor
Damage: 600
Range: 80 20
Sight Range: 40
Reload Time: 12 Seconds 15 [ 5] 15
Damage Per Second: 50
Type: AT 10
Ammo: 30
Hit Points: 350
Special: None
The long range on these and the widespread damage they can do makes them great
against infantry piles, especially if you have several of them lined up behind
your tanks. The do good damage against vehicles, too. You'll need to keep
supply trucks handy for them though, since they'll burn through their ammo
supply in no time at all.
---------
Pz. IV F2
---------
"Late revision of the definitive German medium tank."
Cost: 40 Armor
Damage: 80
Range: 45 35
Sight Range: 32
Reload Time: 7 Seconds 25 [10] 25
Damage Per Second: 11
Type: AT 15
Ammo: 40
Hit Points: 350
Special: None
The lightest German tank in the game. Nothing too interesting about them
really. They'll be massively outclassed by Pershings or IS-2s. The only good
things they have going for them is that they're fast and they're cheap to
produce. If you're looking to mass produce cheap vehicles though, you should
probably go with Hetzers instead, since they have better armor and firepower
for a tiny bit more resources.
---------------
Pz. V 'Panther'
---------------
"Well balanced medium tank."
Cost: 60 Armor
Damage: 100
Range: 45 60
Sight Range: 32
Reload Time: 7 Seconds 35 [15] 35
Damage Per Second: 14
Type: AT 30
Ammo: 40
Hit Points: 400
Special: None
A good step up from the Panzer IV, but since Panzer VI tanks are only 10
resources more expensive, they're generally a much better value than Panthers.
--------------
Pz. VI 'Tiger'
--------------
"Heavy battle tank designed to suppress enemy armor."
Cost: 70 Armor
Damage: 150
Range: 45 65
Sight Range: 32
Reload Time: 9 Seconds 50 [20] 50
Damage Per Second: 15
Type: AT 45
Ammo: 25
Hit Points: 500
Special: None
These are solid tanks. Jagdtigers and King Tigers are still obviously better,
but considering how much less these cost, it's not a bad tradeoff at all.
----------------------
Pz. VI/B 'Konigstiger'
----------------------
"Major overhaul of the mighty Tiger."
Cost: 120 Armor
Damage: 200
Range: 45 85
Sight Range: 32
Reload Time: 9 Seconds 55 [25] 55
Damage Per Second: 22
Type: AT 50
Ammo: 25
Hit Points: 500
Special: None
Definitely something you don't want to encounter in groups. These are the best
option when mass producing tanks. The Maus is tempting since it's so heavily
armored, but they're so ridiculously slow compared to these that it's not even
funny.
--------------
Pz. VII 'Maus'
--------------
"Next generation heavy tank with extremely strong front plating."
Cost: 150 Armor
Damage: 200
Range: 45 95
Sight Range: 32
Reload Time: 9 Seconds 85 [35] 85
Damage Per Second: 11
Type: AT 65
Ammo: 20
Hit Points: 600
Special: None
Even one of these on the battlefield during a mission can be a major pain in
the ass to deal with. Like their description says, they have insanely strong
front armor, but the sides and rear are also ridiculously well armored. Mortar
shells and airstrikes can do some decent damage to them because of the somewhat
weaker top armor - in fact, mortar shells to the top will often kill the crew
relatively quickly with little damage to the tank itself.
While these make for some especially effective defensive units, they're a bit
impractical for assault units due to their insanely slow speed, low mobility,
and lack of shell capacity.
-------------
Recon Vehicle
-------------
"Armored all-terrain recon vehicle."
Cost: 110 Armor
Damage: 30
Range: 32 15
Sight Range: 60
Reload Time: 3 Seconds 10 [ 0] 10
Damage Per Second: 10
Type: Bullet 5
Ammo: Unlimited
Hit Points: 250
Special 1: Recon Pass (Active, 90 second recharge)
"Calls in a recon plane which gives sight range as it passes by.
Enemy AA defenses may destroy the plane."
Special 2: Tactical Airstrike (Active, 120 second recharge)
"Calls in a tactical bomber to the designated target anywhere on
the map. Enemy AA defenses will limit effectiveness."
Special 3: Strategic Airstrike (Active, 120 second recharge)
"Calls heavy bombardment to the target area within sight range.
Enemy AA defenses will limit effectiveness."
Excellent for extending the visual range of your assault units or defensive
positions. The scout planes are also excellent for both of those purposes,
since you can reveal defenses from outside of their range or reveal enemy units
that are hitting you from outside the range of your defenses. The airstrikes
can also be quite useful, especially in high numbers. Note that despite the
description on the tactical airstrike though, you can only call in tactical and
strategic airstrikes on targets that are within the recon vehicle's sight.
-----------------
Sturmmorser Tiger
-----------------
"Heavy tank destroyer. Also provides ranged fire support."
Cost: 150 Armor
Damage: 300
Range: 100 85
Sight Range: 32
Reload Time: 12 Seconds 50 [15] 50
Damage Per Second: 25
Type: HE (Ballistic) 45
Ammo: 10
Hit Points: 450
Special: None
These things are a force to be reckoned with, whether you're attacking them
with infantry or with tanks. Their heavy armor makes them very resilient, and
their insane range and destructive area damage can allow you to slaughter</pre><pre id="faqspan-8">
enemy infantry from long distances, even when they're moving. It can be hard
to deal significant damage to moving vehicles from a distance, but stationary
vehicles will be shredded in no time.
------------
Supply Truck
------------
"Sturdy field supply vehicle."
Cost: 60 Armor
Damage: N/A
Range: N/A 15
Sight Range: 40
Reload Time: N/A 10 [ 0] 10
Damage Per Second: N/A
Type: N/A 5
Ammo: N/A
Hit Points: 300
Special 1: Repair
"Replenishes all nearby friendly vehicles (infinite)."
Special 2: Extra Ammo
"Replenishes the ammunition supply of nearby friendly infantry
units (infinite)."
Special 3: First Aid
"Replenishes the health of nearby friendly infantry units
(infinite)."
These will repair damaged vehicles and reload vehicles (not infantry like their
description says, seeing as infantry don't have ammo in the first place).
Unlike the Codename: Panzers series, these don't have a limited amount of
supplies this time, so you don't have to worry about them running out.
The third ability is only relevant when you have a Mobile Infantry Officer,
which isn't likely considering that's an Allied officer.
----------
Wirbelwind
----------
"Highly mobile fire support unit that can fend off enemy aircraft."
Cost: 40 Armor
Damage: 30
Range: 50 55
Sight Range: 50
Reload Time: 0 Seconds 25 [ 0] 25
Damage Per Second: 30
Type: Bullet 15
Ammo: Unlimited
Hit Points: 350
Special: None
Excellent at anti-aircraft, but pretty much beyond useless at anything else.
You'd think a vehicle that basically sprays ridiculous clouds of machine gun
ammo would be extremely effective against infantry, but it's actually a total
joke against infantry unless you have several of them together in a group.
=============================================================================
| |
| 2.20) Russian Units |
| |
=============================================================================
| ---------------------------------- |
| | 2.21) Russian Infantry | |
| ---------------------------------- |
=============================================================================
---------------------------
Artillery Officer (Officer)
---------------------------
"General support unit. Provides fire superiority."
Cost: 400
Damage: 30
Range: 28
Sight Range: 45
Reload Time: 2 Seconds
Damage Per Second: 15
Type: Bullet
Ammo: Unlimited
Armor: None
Hit Points: 400
Special 1: Eagle Eye (Passive)
"Gives 25% bonus attack range to the artillery unit that contains
the officer."
Special 2: Artillery Observer (Passive)
"Nearby friendly artillery units receive a 25% bonus to their
damage."
Special 3: Artillery Barrage (Active, 180 second recharge)
"Covers the target area within sight range with heavy artillery
fire. There is no way to avoid the shells except moving away."
Having one of these around will make your combat groups extra deadly if you
have some Katyushas and/or ISU-152s around to make good use of the damage
bonus. The artillery barrage ability can only be used on targets within normal
sight range of the officer, which makes it far less useful that it could be.
It does still work great for hitting piles of incoming units though if you're
holding a defensive position.
------------
Flamethrower
------------
"Infantry support unit. Lethal against buildings and vehicles."
Cost: 30
Damage: 90
Range: 18
Sight Range: 40
Reload Time: 5 Seconds
Damage Per Second: 18
Type: Fire
Ammo: Unlimited
Armor: None
Hit Points: 250
Special: High Pressure Fuel Tank (Active, 60 second recharge)
"Extra damage against targets within buildings/vehicles for a
limited time period."
These are excellent at getting infantry out of garrisoned structures,
especially if you can approach the structure from a view that it can't fire at
you much. The high pressure fuel tank ability also makes these insanely good
at capturing enemy vehicles without damaging them too much.
Fire damage on vehicles will also reduce their armor, even all the way down to
zero if you hit them enough. This can make flamethrowers extremely useful when
fighting heavy tanks, but unfortunately because of their low hit point values
and speed, they tend to cost you a lot of casualties.
-----
Medic
-----
"General support unit. Provides first aid."
Cost: 40
Damage: 10
Range: 35
Sight Range: 40
Reload Time: 2 Seconds
Damage Per Second: 5
Type: Bullet
Ammo: Unlimited
Armor: None
Hit Points: 250
Special: First Aid Station (Active, 150 second recharge)
"The medic creates a field hospital which heals nearby friendly units
(including himself) until destroyed."
A staple of your infantry forces as well as your vehicle forces, since even a
single medic can drastically increase the survivability factor of your men.
The first aid station ability will basically allow your medic to be in two
places at once - he can drop the first aid station on the ground, then go
somewhere else to heal stuff in his own range radius.
The first aid station has the same range as the medic, and it'll sit on the
ground forever unless the medic uses the skill again (which will make the old
first aid station disappear) or it gets destroyed (it has 200 hit points). An
interesting side note - you can repair a first aid station with a supply truck,
making them the far safer choice for keeping defensive vehicle pile crews
healed instead of leaving the medic himself exposed next to them.
To maximize the medic's combat effectiveness when using him as a support unit
with assault infantry, don't keep him as a member of your main group. Instead,
keep him as a separate group and target your first group with him, which will
make him follow them and heal them instead of trying to participate in the
actual combat.
---------------------------------------
Military Intelligence Officer (Officer)
---------------------------------------
"Gathers information about the enemy."
Cost: 400
Damage: 30
Range: 28
Sight Range: 45
Reload Time: 2 Seconds
Damage Per Second: 15
Type: Bullet
Ammo: Unlimited
Armor: None
Hit Points: 400
Special 1: Fireproof Armor (Passive)
"The officer's vehicle will not take armor damage from fire type
weapons."
Special 2: Bolshevik Motivation (Passive)
"Increased unit limit."
Special 3: Motor Pool Boost (Active, 15 second duration, 120 second recharge)
"Nearby armored units receive a temporary level bonus (may reach
elite rank)."
Fireproof armor would be way more useful if it affected all nearby vehicles
instead of just the officer's vehicle. The short duration on the motor pool
boost ability kinda sucks too. If you don't know what the unit limit is for
the second special ability, you've probably never played the multiplayer parts
of the game. In skirmishes, you have a hard cap on the number of units you're
allowed to have.
-----------
Mortar Team
-----------
"Medium range infantry support unit. Lethal against enemy troops and
vehicles."
Cost: 40
Damage: 100
Range: 50
Sight Range: 40
Reload Time: 5 Seconds
Damage Per Second: 20
Type: HE (ballistic)
Ammo: Unlimited
Armor: None
Hit Points: 500
Special: None
A standard mortar unit. Great for hitting stuff from over walls and buildings,
but since their range isn't much better than normal infantry and tanks, they
can struggle to be very useful against vehicles. In general, you're probably
better off using bazooka troops, especially since the mortar shells are in the
air for so long that moving targets can easily avoid most of the damage.
------------------------
Partisan Elder (Officer)
------------------------
"Aging Partisan with a great deal of tactical knowledge."
Cost: 400
Damage: 30
Range: 28
Sight Range: 45
Reload Time: 2 Seconds
Damage Per Second: 15
Type: Bullet
Ammo: Unlimited
Armor: None
Hit Points: 400
Special 1: Stahanovist Loader (Passive)
"The officer is capable of refilling his vehicle (for armored units
only.)"
Special 2: Charismatic Leader (Passive)
"All Partisans on the map receive +1 level bonus. Units can reach
level 4 (Elite) this way."
Special 3: Partisan Activity (Active, 240 second recharge)
"Calls all nearby Partisans into action against seriously damaged
enemy vehicles."
The ability to constantly regenerate ammo in his vehicle isn't quite as useful
as the German Engineering Officer's ability to constantly repair his own
vehicle, but it can still come in handy. When combined with a strategic bomber
strike and/or an artillery strike, or even just a Katyusha bombardment, the
Partisan Activty ability can really help clean out concentrated enemy vehicles
that've been weakened. The manual says it'll destroy enemy vehicles that're
below 25% health.
--------------
Partisan Squad
--------------
"Irregular combat team. Masters of infiltration and sabotage."
Cost: N/A
Damage: 15
Range: 28
Sight Range: 40
Reload Time: 2 Seconds
Damage Per Second: 7.5
Type: Bullet
Ammo: Unlimited
Armor: None
Hit Points: 500
Special: Explosives (Active, 60 second recharge)
"Places explosives which can be selected and detonated later."
These can't be built, but you'll have them on lots of Russian missions.
The explosive charges can be placed on the ground and then detonated manually
from anywhere if you click on them like they're a normal unit. The explosions
are lethal against most infantry (500 base damage) and will damage and disable
most vehicles. Once planted on the ground, the explosives will stay there
until they're either detonated by the player or destroyed (700 hit points), or
until the unit attempts to drop another one, which will make the previous one
disappear. Unlike first aid stations from medics, these can't be repaired by a
supply truck when they're damaged.
--------------
Penal Infantry
--------------
"Auxilary infantry unit of questionable quality."
Cost: 15
Damage: 8
Range: 35
Sight Range: 40
Reload Time: 2 Seconds
Damage Per Second: 4
Type: Bullet
Ammo: Unlimited
Armor: None
Hit Points: 400
Special: None
A total joke for the most part, but since their firepower issue isn't an issue
when they're inside a vehicle, these can be substituted as vehicle crews with
relatively no penalty. Still, the only reason to ever use these is for laughs.
---------------------------
Political Officer (Officer)
---------------------------
"Party Supervisor. Upholds the morale of frontline troops."
Cost: 400
Damage: 30
Range: 28
Sight Range: 45
Reload Time: 2 Seconds
Damage Per Second: 55
Type: Bullet
Ammo: Unlimited
Armor: None
Hit Points: 400
Special 1: Double Portion of Vodka (Passive)
"Improves the morale of nearby friendly units. They may still
receive morale damage, but it will regenerate faster."
Special 2: Scavenging (Passive)
"The officer gathers considerable amounts of resources from enemy
buildings captured nearby."
Special 3: Propaganda (Active, 120 second recharge)
"Spreads propaganda leaflets all over the map. The morale of enemy
units will suffer considerably."
The propaganda ability has a secondary usefulness since it will cause a plane
to fly around the map, revealing the shroud like a scout.
------
Sapper
------
"Infantry support unit trained to handle explosives."
Cost: 30
Damage: 10
Range: 20
Sight Range: 40
Reload Time: 1 Second
Damage Per Second: 10
Type: Bullet
Ammo: Unlimited
Armor: None
Hit Points: 250
Special: Landmine (Active, 30 second recharge)
"Lays a mine invisible to enemy units (except for Sappers) and
damages vehicles uppon contact."
These guys can drop a landmine on the ground, which will both damage and
disable most vehicles when they run over it. They can also see enemy landmines
on the ground within their sight range, allowing you to detonate them with any
unit just by firing at them. Unlike the explosive charges that some units can
drop on the ground, the Sapper can have more than one landmine on the ground at
the same time.
--------------
Shock Infantry
--------------
"Heavy combat unit used to penetrate enemy defenses."
Cost: 40 Armor
Damage: 30
Range: 28 20
Sight Range: 40
Reload Time: 2 Seconds 20 [20] 20
Damage Per Second: 15
Type: Bullet 20
Ammo: Unlimited
Hit Points: 300
Special: Satchel Dog (Active, 60 second recharge)
"Deploys a highly trained dog which plants an explosive kit on
targeted enemy units before returning."
The explosives that the satchel dogs carry will disable vehicles like the
explosive charges that paratroopers and Maquisard units use. Unfortunately
these "highly trained" dogs seem to have missed a few training sessions related
to identifying friendly vehicles versus enemy vehicles. They have a nasty
habit of blowing up unoccupied vehicles automatically if you haven't already
"marked your territory" (meaning a friendly infantry unit was the last thing to
occupy the vehicle - if an enemy infantry unit was the last thing in it or if
was never occupied at all, the dogs treat it as hostile).
------
Sniper
------
"Special infantry unit. Provides long range precision fire."
Cost: 40
Damage: 90
Range: 55
Sight Range: 55
Reload Time: 5 Seconds
Damage Per Second: 18
Type: Bullet
Ammo: Unlimited
Armor: None
Hit Points: 200
Special: Fast Relocation (Active, 90 second recharge)
"Allows change of position instantly to avoid enemy fire."
These are a staple of your assault force, and when you get a group of them
together with some medics and standard infantry to absorb some damage, they can
make a devastating force. The fast relocation skill will let you teleport to
terrain in the sniper's range, allowing you get away from combat much faster if
you wind up in a situation where you're going to lose your sniper. Don't
forget that you can pause the game with the space bar to make more effective
use of this ability when needed.
----------------------
Squad Leader (Officer)
----------------------
"Veteran officer with considerable experience."
Cost: 400
Damage: 30
Range: 28
Sight Range: 45
Reload Time: 2 Seconds
Damage Per Second: 15
Type: Bullet
Ammo: Unlimited
Armor: None
Hit Points: 400
Special 1: Expert Crew (Passive)
"All crew members do their best. Incoming damage is reduced and
the crew will escape if the tank is about to be destroyed (for
armored units only)."
Special 2: Commando Tactics (Passive)
"Friendly units near the officer capture enemy buildings more
efficiently."
Special 3: Red Zeal (Active, 30 second duration, 180 second recharge)
"Nearby friendly infantry units become invulnerable for a limited
time period."
The Expert Crew ability is obviously a nice feature if you can keep your lead
vehicle with the officer in it to help absorb extra damage. More importantly,
the Red Zeal ability can be an absolute lifesaver, and can allow you to get
away with some ridiculous infantry attacks.
-----------------
Standard Infantry
-----------------
"Infantry combat unit. The backbone of the German Armed Forces."
Cost: 25
Damage: 10
Range: 35
Sight Range: 40
Reload Time: 2 Seconds
Damage Per Second: 5
Type: Bullet
Ammo: Unlimited
Armor: None
Hit Points: 500
Special: Magentic Mine (Active, 60 second recharge)
"Powerful proximity charge to be used against enemy armor. May also
kill crews."
This is your basic infantry unit. They also substitute as vehicle crews when
necessary. Several magnetic mine hits on a strong vehicle will usually kill
the crew, potentially allowing you to capture it.
=============================================================================
| ---------------------------------- |
| | 2.22) Russian Vehicles | |
| ---------------------------------- |
=============================================================================
-----------
Bantam Jeep
-----------
"Sturdy all-terrain command/recon car."
Cost: 30 Armor
Damage: N/A
Range: N/A 0
Sight Range: 40
Reload Time: N/A 0 [ 0] 0
Damage Per Second: N/A
Type: N/A 0
Ammo: N/A
Hit Points: 200
Special: None
Comes with a unit of standard infantry in it. Since it's unarmed, the only
thing you can do with it is use it as a scout. Even that's a bit suicidal
though, since it has extremely low hit points and zero armor.
--------------
BM-13 Katyusha
--------------
"The Soviet secret weapon - loud, frightening and very effective."
Cost: 140 Armor
Damage: 600
Range: 80 10
Sight Range: 40
Reload Time: 12 Seconds 10 [ 0] 10
Damage Per Second: 50
Type: AT 5
Ammo: 30
Hit Points: 350
Special: None
Wide area damage. They're effective against vehicles and infantry, especially
when you have several of them firing at the same time. You'll need to keep
supply trucks with them at all times though. Otherwise they only get three
rocket barrages before they're out of ammo.
-------------------
Halftrack Transport
-------------------
"Armored all-terrain transport."
Cost: 35 Armor
Damage: 30
Range: 32 15
Sight Range: 40
Reload Time: 3 Seconds 10 [ 0] 10
Damage Per Second: 10
Type: Bullet 5
Ammo: Unlimited
Hit Points: 350
Special: None
Like supply trucks and some other vehicles, this one doesn't have to have a
standard infantry unit to crew it. It always has a driver and a gunner. You
can use it to transport two infantry units at the same time. Since they can't
fire out of it while being transported though, it's not a very good idea,
especially since the halftrack's speed isn't all that much better than the
speed of typical infantry units.
----
IS-2
----
"Heavy tank named after the Boss. Eats Panthers for breakfast."
Cost: 110 Armor
Damage: 200
Range: 50 80
Sight Range: 50
Reload Time: 9 Seconds 65 [20] 65
Damage Per Second: 22
Type: ST 50
Ammo: 25
Hit Points: 500
Special: None
These outclass Panthers, Tigers, and are right on par with King Tigers. Since
T34-85s are half the cost though, you still might want to mass produce them
instead of IS-2s as long as you don't mind casualties and don't have a unit cap
that you're trying to avoid.
-------
ISU-152
-------
"Self-propelled gun built on the IS-2 chassis."
Cost: 120 Armor
Damage: 200
Range: 80 65
Sight Range: 32
Reload Time: 10 Seconds 55 [20] 55
Damage Per Second: 20
Type: HE (Ballistic) 40
Ammo: 15
Hit Points: 450
Special: None
Their extremely large blast radius is deadly against infantry targets, and
their range is excellent. If you can get an artillery officer nearby or in the
vehicle itself so you can get the range and damage bonuses, these things are
ridiculous. They have decent armor too, and for some reason their machine guns
seem especially effective against infantry compared to the machine guns on a
lot of other vehicles. That might just be my imagination though.
-------
M17 GMC
-------
"Halftrack with MG."
Cost: 35 Armor
Damage: 30
Range: 50 15
Sight Range: 50
Reload Time: 0 Seconds 10 [ 0] 10
Damage Per Second: 30
Type: Bullet 5
Ammo: Unlimited
Hit Points: 350
Special: None
The Russian equivilent to a Wirbelwind or a Skink. Its main use to you is
anti-aircraft. For some reason its machine gun spray will be laughably
effective on infantry targets.
---------
Recon Car
---------
"Lightly armored recon vehicle."
Cost: 110 Armor
Damage: 30
Range: 32 15
Sight Range: 60
Reload Time: 3 Seconds 10 [ 0] 10
Damage Per Second: 10
Type: Bullet 5
Ammo: Unlimited
Hit Points: 250
Special 1: Recon Pass (Active, 90 second recharge)
"Calls in a recon plane which gives sight range as it passes by.
Enemy AA defenses may destroy the plane."
Special 2: Tactical Airstrike (Active, 120 second recharge)
"Calls in a tactical bomber to the designated target anywhere on
the map. Enemy AA defenses will limit effectiveness."
Special 3: Strategic Airstrike (Active, 120 second recharge)
"Calls heavy bombardment to the target area within sight range.
Enemy AA defenses will limit effectiveness."
Excellent for extending the visual range of your assault units or defensive
positions. The scout planes are also excellent for both of those purposes,
since you can reveal defenses from outside of their range or reveal enemy units
that are hitting you from outside the range of your defenses. The airstrikes
can also be quite useful, especially in high numbers. Note that despite the
description on the tactical airstrike though, you can only call in tactical and
strategic airstrikes on targets that are within the recon vehicle's sight.
------
SU-100
------
"Medium self-propelled gun. Cheap and durable."
Cost: 60 Armor
Damage: 200
Range: 45 55
Sight Range: 32
Reload Time: 9 Seconds 30 [20] 30
Damage Per Second: 22
Type: AT 30
Ammo: 25
Hit Points: 400
Special: None
Pretty typical anti-tank gun. Much better fire power than the T34-85 versus
armored targets, and not much of an armor penalty compared to the T34-85
either, so the extra 5 cost is probably worth it for you in most scenarios.
------
SU-122
------
"Heavy self-propelled gun. Durable and effective."
Cost: 70 Armor
Damage: 150
Range: 70 35
Sight Range: 32
Reload Time: 10 Seconds 30 [15] 30
Damage Per Second: 15
Type: HE (Ballistic) 30
Ammo: 20
Hit Points: 350
Special: None
Their longer firing range makes them great for taking out defenses, or for
supporting your defensive line. In groups, they can shred infantry rushes
thanks to the radius that their shells will damage targets on the ground.
ISU-152s have even better range and better fire power, but since they cost 120
compared to 110 for an SU-122, you still might be better off mass producing
SU-122s as long as you have the room to maneuver large groups of units and the
supply trucks to keep them all supplied.
--------------
Supply Tractor
--------------
"Heavy supply vehicle."
Cost: 60 Armor
Damage: N/A
Range: N/A 15
Sight Range: 40
Reload Time: N/A 10 [ 0] 10
Damage Per Second: N/A
Type: N/A 5
Ammo: N/A
Hit Points: 300
Special 1: Repair
"Replenishes all nearby friendly vehicles (infinite)."
Special 2: Extra Ammo
"Replenishes the ammunition supply of nearby friendly infantry
units (infinite)."
Special 3: First Aid
"Replenishes the health of nearby friendly infantry units
(infinite)."
These will repair damaged vehicles and reload vehicles (not infantry like their
description says, seeing as infantry don't have ammo in the first place).
Unlike the Codename: Panzers series, these don't have a limited amount of
supplies this time, so you don't have to worry about them running out.
The third ability is only relevant when you have a Mobile Infantry Officer,
which isn't likely considering that's not a Russian officer.
---
T28
---
"Self-propelled heavy artillery piece designed to intimidate German armor."
Cost: 135 Armor
Damage: 270
Range: 45 95
Sight Range: 32
Reload Time: 9 Seconds 80 [35] 80
Damage Per Second: 30
Type: AT 60
Ammo: 20
Hit Points: 600
Special: None
Even better fire power than the German Maus, although slightly less armor.
They can sit and take a ridiculous beating from just about anything. One of
them can easily wipe out multiple King Tigers on its own as long as you keep
the front armor facing the enemy.
-------
T34-76E
-------
"Early version of the well balanced medium tank."
Cost: 45 Armor
Damage: 80
Range: 45 45
Sight Range: 32
Reload Time: 7 Seconds 35 [15] 35
Damage Per Second: 11
Type: AT 30
Ammo: 40
Hit Points: 350
Special: None
A little too light to be a very good match against many targets, but they can
still do well in high numbers. You're better off coughing up the extra 10
resources for the T34-85 version though, or better yet, coughing up the extra
15 resources for an SU-100.
------
T34-85
------
"Late version of the well balanced medium tank."
Cost: 55 Armor
Damage: 100
Range: 45 50
Sight Range: 32
Reload Time: 7 Seconds 40 [15] 40
Damage Per Second: 14
Type: AT 35
Ammo: 40
Hit Points: 400
Special: None
They drastically outclass any of the German or Allied low level tanks. At half
the cost of an IS-2, they'll generally be a better choice if you don't mind
higher casualties (and you're not up against a unit cap).
---------
Transport
---------
"Tracked heavy transport."
Cost: 25 Armor
Damage: N/A
Range: N/A 15
Sight Range: 40
Reload Time: N/A 10 [ 0] 10
Damage Per Second: N/A
Type: N/A 5
Ammo: N/A
Hit Points: 350
Special: None
I have no idea what the point is in these. They can't carry infantry units,
they aren't armed, and they don't have the ability repair or resupply your
other vehicles.
=============================================================================
| |
| 2.30) Western Allies Units |
| |
=============================================================================
| ---------------------------------- |
| | 2.31) Western Allies Infantry | |
| ---------------------------------- |
=============================================================================
-----------------
Airborne Infantry
-----------------
"Well trained infantry unit. Ideal for covert operations."
Cost: 25
Damage: 15
Range: 28
Sight Range: 40
Reload Time: 2 Seconds
Damage Per Second: 7.5
Type: Bullet
Ammo: Unlimited
Armor: None
Hit Points: 500
Special: Explosives (Active, 60 second recharge)
"Places explosives which can be selected and detonated later."
The explosive charges can be placed on the ground and then detonated manually
from anywhere if you click on them like they're a normal unit. The explosions
are lethal against most infantry (500 base damage) and will damage and disable
most vehicles. Once planted on the ground, the explosives will stay there
until they're either detonated by the player or destroyed (700 hit points), or
until the unit attempts to drop another one, which will make the previous one
disappear. Unlike first aid stations from medics, these can't be repaired by a
supply truck when they're damaged.
-------
Bazooka
-------
"Heavy infantry unit trained to destroy enemy armor."
Cost: 40
Damage: 100
Range: 30
Sight Range: 40
Reload Time: 5 Seconds
Damage Per Second: 12
Type: AT
Ammo: Unlimited
Armor: None
Hit Points: 250
Special: Tank Barrier (Active, 60 second recharge)
"Creates a concrete block to slow down enemy vehicles. Can be
destroyed."
A group of several of these can be utterly devastating against vehicles,
especially when accompanied by some medics to keep them healed and some snipers
to make sure enemy infantry can't get close enough to bother them.
The tank barrier ability will deploy a little concrete barricade. They have 70
armor rating on all sides, but only 50 hit points, so they don't exactly slow
tanks down very much. Unlike first aid stations and explosives, this unit can
deploy an infinite amount of tank barriers at the same time without the
previous one disappearing.
-----------------------
Comms Officer (Officer)
-----------------------
"General support unit. Provides vital intelligence."
Cost: 400
Damage: 30
Range: 28
Sight Range: 45
Reload Time: 2 Seconds
Damage Per Second: 15
Type: Bullet
Ammo: Unlimited
Armor: None
Hit Points: 400
Special 1: Binoculars (Passive)
"25% sight range bonus for the officer's vehicle."
Special 2: Wireless Contact (Passive)
"Nearby friendly buildings can use their special skills faster
(rapid cooldown)."
Special 3: Photo Recon (Active, 15 second duration, 180 second recharge)
"Gives full recon data about the whole map (no Fog of War for a
limited period of time)."
The photo recon ability is one of the most useful abilities you can have,
especially when you're attempting to get the Clear Level medals during the
missions.
------------
Flamethrower
------------
"Infantry support unit. Very effective against buildings/armor."
Cost: 30
Damage: 90
Range: 18
Sight Range: 40
Reload Time: 5 Seconds
Damage Per Second: 18
Type: Fire
Ammo: Unlimited
Armor: None
Hit Points: 250
Special: High Pressure Fuel Tank (Active, 60 second recharge)
"Extra damage against targets within buildings/vehicles for a
limited time period."
These are excellent at getting infantry out of garrisoned structures,
especially if you can approach the structure from a view that it can't fire at
you much. The high pressure fuel tank ability also makes these insanely good
at capturing enemy vehicles without damaging them too much.
Fire damage on vehicles will also reduce their armor, even all the way down to
zero if you hit them enough. This can make flamethrowers extremely useful when
fighting heavy tanks, but unfortunately because of their low hit point values
and speed, they tend to cost you a lot of casualties.
-----
Medic
-----
"General support unit. Provides first aid."
Cost: 40
Damage: 10
Range: 35
Sight Range: 40
Reload Time: 2 Seconds
Damage Per Second: 5
Type: Bullet
Ammo: Unlimited
Armor: None
Hit Points: 250
Special: First Aid Station (Active, 150 second recharge)
"The medic creates a field hospital which heals nearby friendly units
(including himself) until destroyed."
A staple of your infantry forces as well as your vehicle forces, since even a
single medic can drastically increase the survivability factor of your men.
The first aid station ability will basically allow your medic to be in two
places at once - he can drop the first aid station on the ground, then go
somewhere else to heal stuff in his own range radius.
The first aid station has the same range as the medic, and it'll sit on the
ground forever unless the medic uses the skill again (which will make the old
first aid station disappear) or it gets destroyed (it has 200 hit points). An
interesting side note - you can repair a first aid station with a supply truck,
making them the far safer choice for keeping defensive vehicle pile crews
healed instead of leaving the medic himself exposed next to them.
To maximize the medic's combat effectiveness when using him as a support unit
with assault infantry, don't keep him as a member of your main group. Instead,
keep him as a separate group and target your first group with him, which will
make him follow them and heal them instead of trying to participate in the
actual combat.
---------------------------------
Mobile Infantry Officer (Officer)
---------------------------------
"Veteran combat officer."
Cost: 400
Damage: 30
Range: 28
Sight Range: 45
Reload Time: 2 Seconds
Damage Per Second: 15
Type: Bullet
Ammo: Unlimited
Armor: None
Hit Points: 400
Special 1: Triangulation (Passive)
"All artillery type units of the player have 100% accuracy."
Special 2: Mobile Medics (Passive)
"All support vehicles are able to heal infantry units as well (even
allied units)."
Special 3: Masterful Leadership (Active, 15 second duration, 120 second
recharge)
"Gives a massive boost to all nearby armored units."
The second ability will make your repair trucks function like medics, allowing
you not to worry so much about keeping medics around to heal your tank crews.
The third ability will give all nearby vehicles a firepower and armor bonus for
a few seconds (generally ten armor per side and twenty attack power).
-----------
Mortar Team
-----------
"Medium range infantry support unit. Lethal against enemy troops and
vehicles."
Cost: 40
Damage: 100
Range: 50
Sight Range: 40
Reload Time: 5 Seconds
Damage Per Second: 20
Type: HE (ballistic)
Ammo: Unlimited
Armor: None
Hit Points: 500
Special: None
A standard mortar unit. Great for hitting stuff from over walls and buildings,
but since their range isn't much better than normal infantry and tanks, they
can struggle to be very useful against vehicles. In general, you're probably
better off using bazooka troops, especially since the mortar shells are in the
air for so long that moving targets can easily avoid most of the damage.
------------------------
Ranger Officer (Officer)
------------------------
"Elite infantry officer and close combat expert."
Cost: 400
Damage: 30
Range: 28
Sight Range: 45
Reload Time: 2 Seconds
Damage Per Second: 15
Type: Bullet
Ammo: Unlimited
Armor: None
Hit Points: 400
Special 1: Respected Leader (Passive)
"The morale of nearby friendly units cannot go below normal under
any circumstances."
Special 2: Perfect Communication (Passive)
"Gives an extra level to nearby infantry units. Units can reach
level 4 (Elite) this way."
Special 3: Lightning Strike (Active, 90 second recharge)
"If an enemy vehicle can be entered, the officer does it instantly,
killing the enemy crew inside."
The morale and level boosts make this officer especially effective to have
around when you're fighting with big piles of infantry. More importantly, the
Lightning Strike ability is one of the most ridiculously cheap and useful
abilities in the game. It will be a huge help in missions where you need to
capture enemy vehicles to achieve an objective, and it can be a total bitch of
a move in multiplayer.
------
Sapper
------
"General support unit trained to deal with mines."
Cost: 30
Damage: 10
Range: 20
Sight Range: 40
Reload Time: 1 Second
Damage Per Second: 10
Type: Bullet
Ammo: Unlimited
Armor: None
Hit Points: 250
Special: Landmine (Active, 30 second recharge)
"Lays a mine invisible to enemy units (except for Sappers) and
damages vehicles uppon contact."
These guys can drop a landmine on the ground, which will both damage and
disable most vehicles when they run over it. They can also see enemy landmines
on the ground within their sight range, allowing you to detonate them with any
unit just by firing at them. Unlike the explosive charges that some units can
drop on the ground, the Sapper can have more than one landmine on the ground at
the same time.
---------------------
SAS Officer (Officer)
---------------------
"Covert ops officer for special assignments."
Cost: 400
Damage: 30
Range: 28
Sight Range: 45
Reload Time: 2 Seconds
Damage Per Second: 15
Type: Bullet
Ammo: Unlimited
Armor: None
Hit Points: 400
Special 1: Sabotage (Passive)
"Nearby enemy production facilities receive a 50% penalty to all
activities."
Special 2: Elite Paratroopers (Passive)
"All Allied paratroopers on the map receive +1 level bonus.
Airborne units can reach level 4 (elite) this way."
Special 3: Major Paradrop (Active, 180 second recharge)
"Deploys 2 squads of Airborne Infantry to the designated area.
Enemy AA defenses may destroy the inbound plane."
The paradrop ability makes this officer immensely valuable on most of the
Allied missions, and it can be a major help in multiplayer too since you can
use the paradrop ability to capture targets all the way across the map very
early in the game.
------
Sniper
------
"Infantry combat unit with precision fire capability."
Cost: 40
Damage: 90
Range: 55
Sight Range: 55
Reload Time: 5 Seconds
Damage Per Second: 18
Type: Bullet
Ammo: Unlimited
Armor: None
Hit Points: 200
Special: Fast Relocation (Active, 90 second recharge)
"Allows change of position instantly to avoid enemy fire."
These are a staple of your assault force, and when you get a group of them
together with some medics and standard infantry to absorb some damage, they can
make a devastating force. The fast relocation skill will let you teleport to
terrain in the sniper's range, allowing you get away from combat much faster if
you wind up in a situation where you're going to lose your sniper. Don't
forget that you can pause the game with the space bar to make more effective
use of this ability when needed.
-----------------
Standard Infantry
-----------------
"Standard infantry unit. The very best of the West."
Cost: 25
Damage: 10
Range: 35
Sight Range: 40
Reload Time: 2 Seconds
Damage Per Second: 5
Type: Bullet
Ammo: Unlimited
Armor: None
Hit Points: 500
Special: Magentic Mine (Active, 60 second recharge)
"Powerful proximity charge to be used against enemy armor. May also
kill crews."
This is your basic infantry unit. They also substitute as vehicle crews when
necessary. Several magnetic mine hits on a strong vehicle will usually kill
the crew, potentially allowing you to capture it.
------------------------
Supply Officer (Officer)
------------------------
"General support unit. Provides replenishment."
Cost: 400
Damage: 30
Range: 28
Sight Range: 45
Reload Time: 2 Seconds
Damage Per Second: 15
Type: Bullet
Ammo: Unlimited
Armor: None
Hit Points: 400
Special 1: Personal Influence (Passive)
"Lowers the production costs of supply trucks by 25%."
Special 2: Production Rationalization (Passive)
"Nearby friendly Factories receive an extra 15% speed bonus for
production."
Special 3: Supply Drop (Active, 180 second recharge)
"Drops a supply/repair container in a designated area. Enemy AA
defenses will hinder success. Enemy units may capture the
container."
The speed boost to factories is a nice thing to have, especially since it
actually affects your barracks too. The supply crate might be useful every
once in a while, but since it's a one-time pick up each time you use it, it's
not nearly as useful as having a supply truck sitting around.
=============================================================================
| ---------------------------------- |
| | 2.32) Western Allies Vehicles | |
| ---------------------------------- |
=============================================================================
-----------
A34 'Comet'
-----------
"A very effective all-purpose cruiser tank."
Cost: 65 Armor
Damage: 140
Range: 45 65
Sight Range: 32
Reload Time: 7 Seconds 55 [50] 55
Damage Per Second: 20
Type: AT 50
Ammo: 40
Hit Points: 500
Special: None
These are decent medium tanks, but Pershings are still better considering how
small the cost difference is. These do have absurdly strong top armor though
for some reason, even compared to Pershings.
-----------
Bantam Jeep
-----------
"Sturdy all-terrain command/recon car."
Cost: 30 Armor
Damage: N/A
Range: N/A 0
Sight Range: 40
Reload Time: N/A 0 [ 0] 0
Damage Per Second: N/A
Type: N/A 0
Ammo: N/A
Hit Points: 200
Special: None
Comes with a unit of standard infantry in it. Since it's unarmed, the only
thing you can do with it is use it as a scout. Even that's a bit suicidal
though, since it has extremely low hit points and zero armor.
---------------------
Churchill 'Crocodile'
---------------------
"Flamethrower variant. Used to saturate buildings/fortifications."
Cost: 95 Armor
Damage: 200
Range: 30 80
Sight Range: 24
Reload Time: 6 Seconds 60 [20] 60
Damage Per Second: 33
Type: Fire 40
Ammo: Unlimited
Hit Points: 500
Special: None
They're utterly lethal against garrisoned structures, and since fire damage can
reduce a vehicle's armor to zero, they can be quite useful for eliminating
heavy tanks even when you don't have any heavy vehicles of your own.
-----------
Decoy Truck
-----------
"Special transport designed to 'mimic' friendly armor."
Cost: 20 Armor
Damage: N/A
Range: N/A 10
Sight Range: 40
Reload Time: N/A 0 [ 0] 0
Damage Per Second: N/A
Type: N/A 0
Ammo: N/A
Hit Points: 250
Special 1: Decoy Sherman (Active)
"Transforms the truck into a fake M4 Sherman. Enemy units will
identify it as such from a distance."
Special 2: Decoy Priest (Active)
"Transofrms the truck into a fake M7 Priest. Enemy untis will
identify it as such from a distance."
Special 3: Decoy M26 (Active)
"Transforms the truck into a fake M26 Pershing. Enemy units will
identify it as such from a distance."
You can set these to any of the three decoys. To switch decoys, use the first
decoy again to revert to your normal state, which will unlock the other two
decoy buttons again.
---------------
Dodge Transport
---------------
"Softskin utility vehicle."
Cost: 30 Armor
Damage: N/A
Range: N/A 15
Sight Range: 30
Reload Time: N/A 10 [ 0] 10
Damage Per Second: N/A
Type: N/A 5
Ammo: N/A
Hit Points: 350
Special: None
Can be used to transport two infantry units at a time, but that's a bout it.
With such low armor and hit points, it's not exactly a safe way to move
infantry around since they can actually survive more damage outside of the
vehicle than they an inside it. Plus they can fire back if they're outside of
the vehicle, but they're helpless if they're inside it.
--------------
M26 'Pershing'
--------------
"Medium tank designed to combat enemy armor."
Cost: 85 Armor
Damage: 180
Range: 45 70
Sight Range: 32
Reload Time: 9 Seconds 50 [20] 50
Damage Per Second: 20
Type: AT 40
Ammo: 25
Hit Points: 500
Special: None
This is probably the Allied tank that you'll use the most, since the selection
is pretty slim. They're not bad, but they're at a definite disadvantage to
King Tigers and Maus tanks, not to mention tank hunters.
-------------
M36 'Slugger'
-------------
"Medium tank hunter with average firepower."
Cost: 65 Armor
Damage: 180
Range: 45 55
Sight Range: 40
Reload Time: 9 Seconds 25 [15] 25
Damage Per Second: 20
Type: AT 20
Ammo: 25
Hit Points: 400
Special: None
Comparable firepower to the Pershing, but for much less cost. Unfortunately
with the low armor, these things won't last long against heavier targets. You
likely won't find much use for them unless you can't build Pershings for some
reason.
-------------------
M4 Sherman Calliope
-------------------
"Self-propelled mobile rocket system."
Cost: 55 Armor
Damage: 600
Range: 80 50
Sight Range: 32
Reload Time: 12 Seconds 35 [15] 35
Damage Per Second: 50
Type: AT 35
Ammo: 30
Hit Points: 400
Special: None
Several of these in a pack can absolutely slaughter just about anything, but
sometimes the spread on their rockets can make them less effective than you'd
like. They'll burn through their limited ammo supply like crazy, so you'll
have to keep a supply truck around them at all times.
--------------------
M4 Sherman 'Firefly'
--------------------
"Mass produced medium tank designed to support infantry."
Cost: 55 Armor
Damage: 100
Range: 45 50
Sight Range: 32
Reload Time: 7 Seconds 35 [15] 35
Damage Per Second: 14
Type: AT 35
Ammo: 40
Hit Points: 400
Special: None
The default Allied tank. Severely outclassed by most other vehicles, and since
the cost gap between these and Pershing tanks isn't as big as the gap is for
low level German/Russian tanks and their heavier counterparts, there's not much
of a reason for you to build these instead of Pershings unless you're really
strapped for time.
------------------
M4 Sherman 'Skink'
------------------
"Anti-aircraft equivalent of the M4. Lethal within its limited range."
Cost: 40 Armor
Damage: 30
Range: 50 50
Sight Range: 50
Reload Time: 0 Seconds 35 [15] 35
Damage Per Second: 30
Type: Bullet 35
Ammo: Unlimited
Hit Points: 350
Special: None
</pre><pre id="faqspan-9">
Deadly against airborne targets, but inexplicably ineffective against infantry
on the ground for some reason.
-----------
M7 'Priest'
-----------
"Self-propelled gun that provides ranged fire support."
Cost: 70 Armor
Damage: 150
Range: 80 40
Sight Range: 40
Reload Time: 10 Seconds 25 [ 0] 25
Damage Per Second: 15
Type: HE (Ballistic) 15
Ammo: 20
Hit Points: 350
Special: None
The blast radius from their shells will help you annihilate infantry rushes,
especially if you have several of these sitting behind the relative safety of
some Pershings. Their long range will be immensely helpful for dealing with
defensive positions, too.
-------------
Recon Vehicle
-------------
"Lightly armored all-terrain recon vehicle."
Cost: 110 Armor
Damage: 30
Range: 32 10
Sight Range: 60
Reload Time: 3 Seconds 10 [ 0] 10
Damage Per Second: 10
Type: Bullet 5
Ammo: Unlimited
Hit Points: 170 (sort of... they'll always have 240 with their level 3 boost)
Special 1: Recon Pass (Active, 90 second recharge)
"Calls in a recon plane which gives sight range as it passes by.
Enemy AA defenses may destroy the plane."
Special 2: Tactical Airstrike (Active, 120 second recharge)
"Calls in a tactical bomber to the designated target anywhere on
the map. Enemy AA defenses will limit effectiveness."
Special 3: Strategic Airstrike (Active, 120 second recharge)
"Calls heavy bombardment to the target area within sight range.
Enemy AA defenses will limit effectiveness."
Excellent for extending the visual range of your assault units or defensive
positions. The scout planes are also excellent for both of those purposes,
since you can reveal defenses from outside of their range or reveal enemy units
that are hitting you from outside the range of your defenses. The airstrikes
can also be quite useful, especially in high numbers. Note that despite the
description on the tactical airstrike though, you can only call in tactical and
strategic airstrikes on targets that are within the recon vehicle's sight.
------------
Supply Truck
------------
"Softskin supply vehicle."
Cost: 60 Armor
Damage: N/A
Range: N/A 15
Sight Range: 40
Reload Time: N/A 10 [ 0] 10
Damage Per Second: N/A
Type: N/A 5
Ammo: N/A
Hit Points: 300
Special 1: Repair
"Replenishes all nearby friendly vehicles (infinite)."
Special 2: Extra Ammo
"Replenishes the ammunition supply of nearby friendly infantry
units (infinite)."
Special 3: First Aid
"Replenishes the health of nearby friendly infantry units
(infinite)."
These will repair damaged vehicles and reload vehicles (not infantry like their
description says, seeing as infantry don't have ammo in the first place).
Unlike the Codename: Panzers series, these don't have a limited amount of
supplies this time, so you don't have to worry about them running out.
The third ability won't be unlocked unless you have a Mobile Infantry Officer,
in which case your supply trucks will start service as mobile first aid
stations in addition to their normal reload and repair functionalities.
=============================================================================
| ---------------------------------- |
| | 3.00) Cheats | |
| ---------------------------------- |
=============================================================================
The developers were nice enough to include some fairly standard cheat codes
should you feel the need to use them.
While playing a mission, press the Enter key to open the "Team Chat" box. Type
one of the following phrases into the box and press Enter again to activate the
cheat. Entering the code a second time will deactivate it.
chucknorrishim - Your units will kill basically anything in one shot, even
allied targets if you force-fire on them. The only thing that
tends to withstand it is garrisoned units.
gimmechucknorris - Your current resource amount will be set to the maximum
allowed amount for that particular mission.
iamchucknorris - Instantly win the current mission. You won't get credit for
completing any objectives, but you will get credit for any
medals you normally would've gotten had you ended the mission
legitimately.
lethimbechucknorris - All selected units will gain one level of experience.
openforchucknorris - All missions will be unlocked.
tobechucknorris - Your units will be invincible, even if you force-fire on
yourself with the one hit kill cheat activated. Note that
certain other misfortunes can also still kill units despite
this cheat being active, like being on some train tracks at
the wrong time.
=============================================================================
| ---------------------------------- |
| | 4.00) Easter Eggs | |
| ---------------------------------- |
=============================================================================
What, the lame Chuck Norris cheat codes weren't enough for you? Well then,
perhaps you'd enjoy yet another overly-done internet fad:
-------------------------------
Rush for Berlin meets Zero Wing
-------------------------------
- The infamous text of Zero Wing gets a nod from the Rush for Berlin staff in
the fifth Russian mission (The Boys of Belgrade). To see a hidden "set up us
the bomb," occupy the large car in the south-east corner of the map near the
group of German sappers. To see a hidden "you have no chance to survive make
your time," destroy the German tank in the northern corner of the town square
and kill the commander as he attempts to flee. To see a hidden "all your base
are belong to us," occupy the German headquarters in the north-east corner of
the map.
Too lazy to try it yourself? Here:
http://thebrink.us/setup.jpg
http://thebrink.us/makeyourtime.jpg
http://thebrink.us/belong.jpg
Know of any other easter eggs in Rush for Berlin? Please share, and I'll
gladly list them here.
=============================================================================
| -------------------------- |
| | 5.00) End | |
| -------------------------- |
=============================================================================
===============================================================================
5.01) Version History
===============================================================================
---------------
July 27th, 2006
---------------
- Posted an early version of the guide (version 0.20) containing the controls,
notes, codes, and easter eggs as well as the walkthrough for the first six
Russian missions.
--------------
June 9th, 2014
--------------
- It's been a LONG time, but I'm hell bent on finishing this guide in 2014.
Even though this update (version 0.21) only contains one more mission than the
previous version, anyone that remembers the guide in its old condition will
notice that I've added a lot more information this time. More general notes,
info about the medals, little quotes from inside the missions... I plan to do
this for all of the missions as I move forward with this guide.
---------------
June 16th, 2014
---------------
- As promised, I've been continuing to work on this, and I've completed the
entire Western Allies campaign now (calling this version 0.40). A few of these
missions had some insanely annoying glitches that I had to analyze for how to
earn as many medals as possible on each map, so it kind of slowed my progress
down a bit. With any luck, I hope to have the German campaign done and
uploaded to GameFAQs next week.
---------------
June 23rd, 2014
---------------
- Added the first five German missions. I got bogged down horribly trying to
figure out what the missing objectives are for the fourth German mission
(Walpurgisnacht), and now I'm convinced the mission might just be glitched. If
anyone happens to know any info about it, please share the wealth. I also had
to burn ungodly amounts of time perfecting mission five (Adlerschrei) in my
quest for maximum medal earning, so I didn't make it through the entire German
campaign like I had hoped. I'm calling this version 0.55, and with any luck,
I'll manage to get the remaining two German missions and the four French
missions added by the end of June 2014.
---------------
June 30th, 2014
---------------
- Added the remaining German missions and all of the French missions. I'm
calling this version 0.90 for now. I've included most of the German units in
the unit section, but I'm still working on collecting info for the rest of them
and I still have to go through and gather all of the Russian and Western Allies
unit info. Then I'll finally consider this guide to be done... and I can move
on to Rush for the Bomb!
--------------
July 4th, 2014
--------------
- There, the unit lists are complete now too. I don't know what my timeline
will be for Rush for the Bomb, but look for a separate guide from me for that
game on GameFAQs in the future.
===============================================================================
5.02) Closing
===============================================================================
As always, any comments or questions are always welcome. Just send me an email
at
[email protected] or post on my message boards:
http://thebrink.us/boards
Copyright 2006-2014 - Staley, Deuce ex Defcon. Any site that wishes to host
any of my guides is free to do so, provided you don't edit the content in any
way, shape, or form, and provided you contact me prior to posting the guide(s),
as I like to know where they're being used.
I cannot guarantee any site other than GameFAQs will always have the most
current form of my guides, so if there's ever any doubt, always check GameFAQs.
Because they have previously taken copies of my guides and replaced the name of
the site they were written for with the name of their own site, CheatCC.com
specifically does NOT have permission to host or link to any of my work - past,
present, or future.
===============================================================================
DEUCE EX DEFCON
===============================================================================
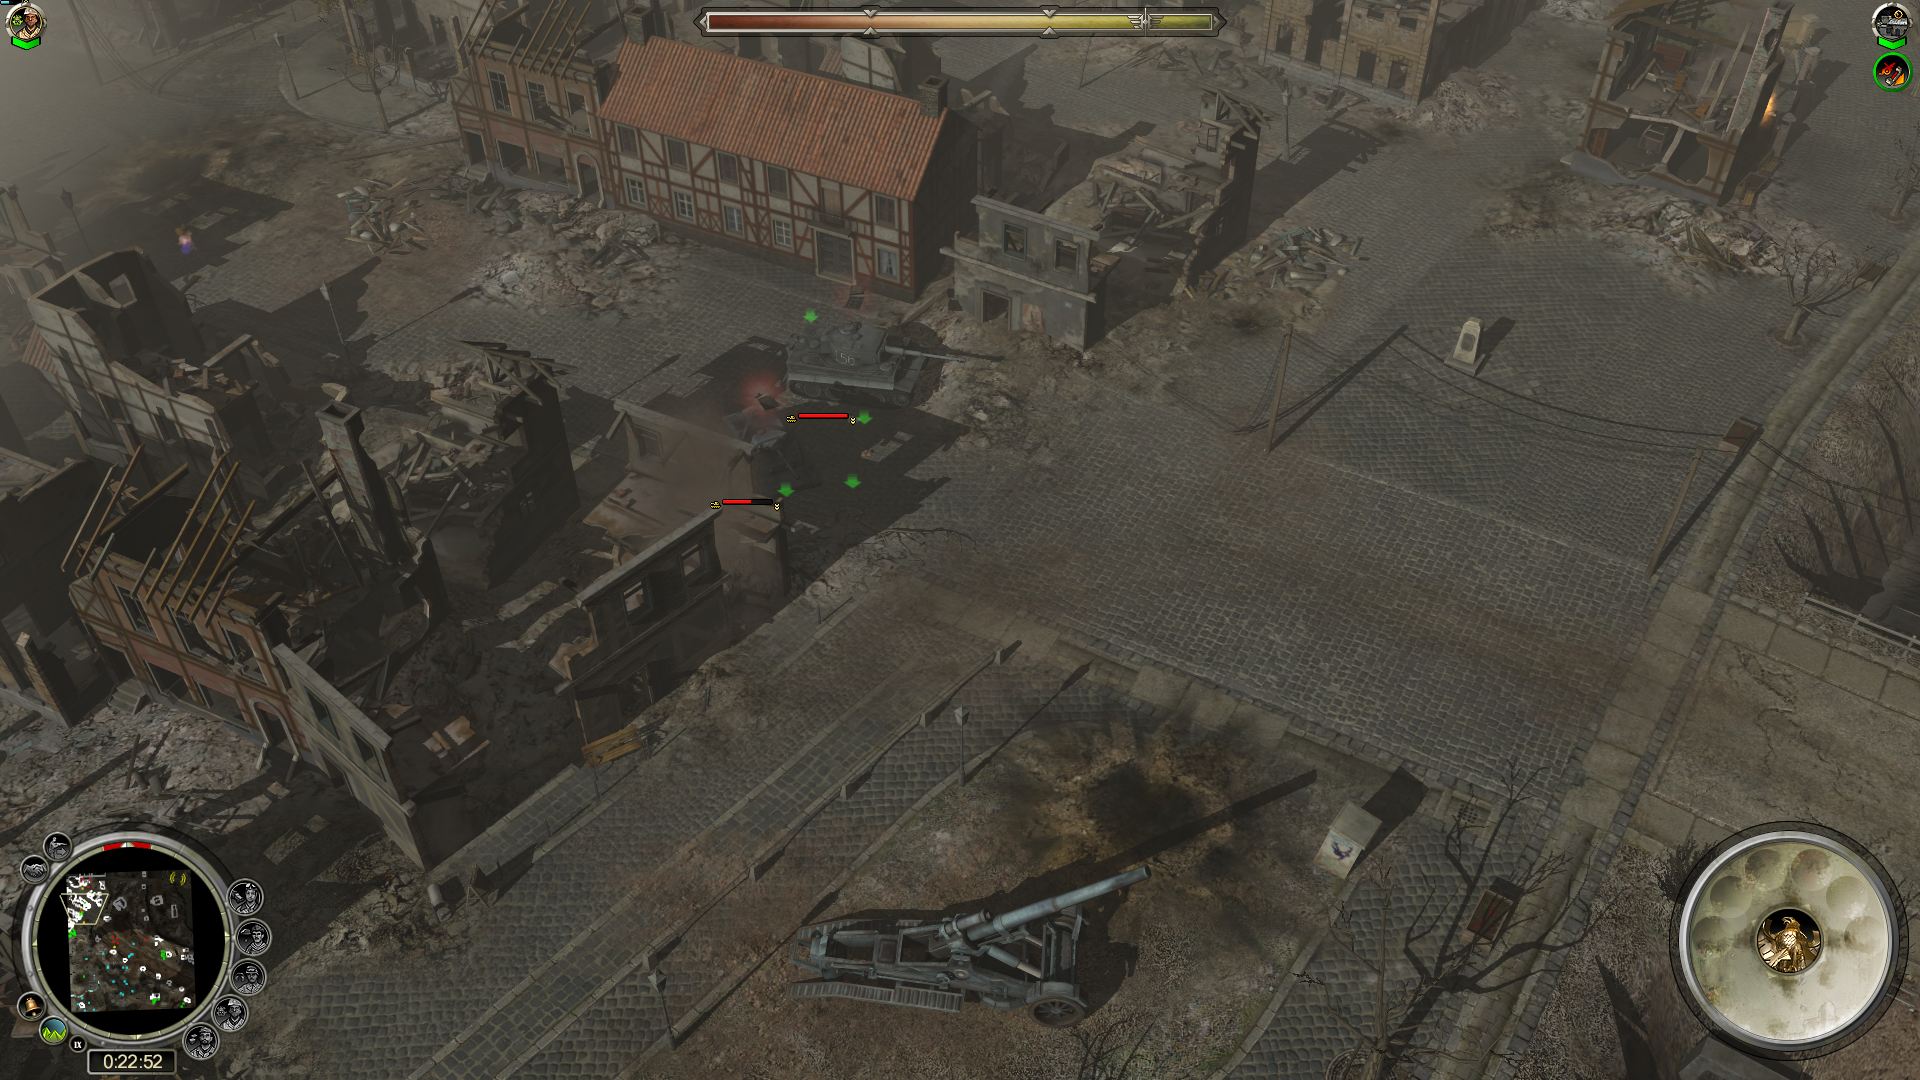
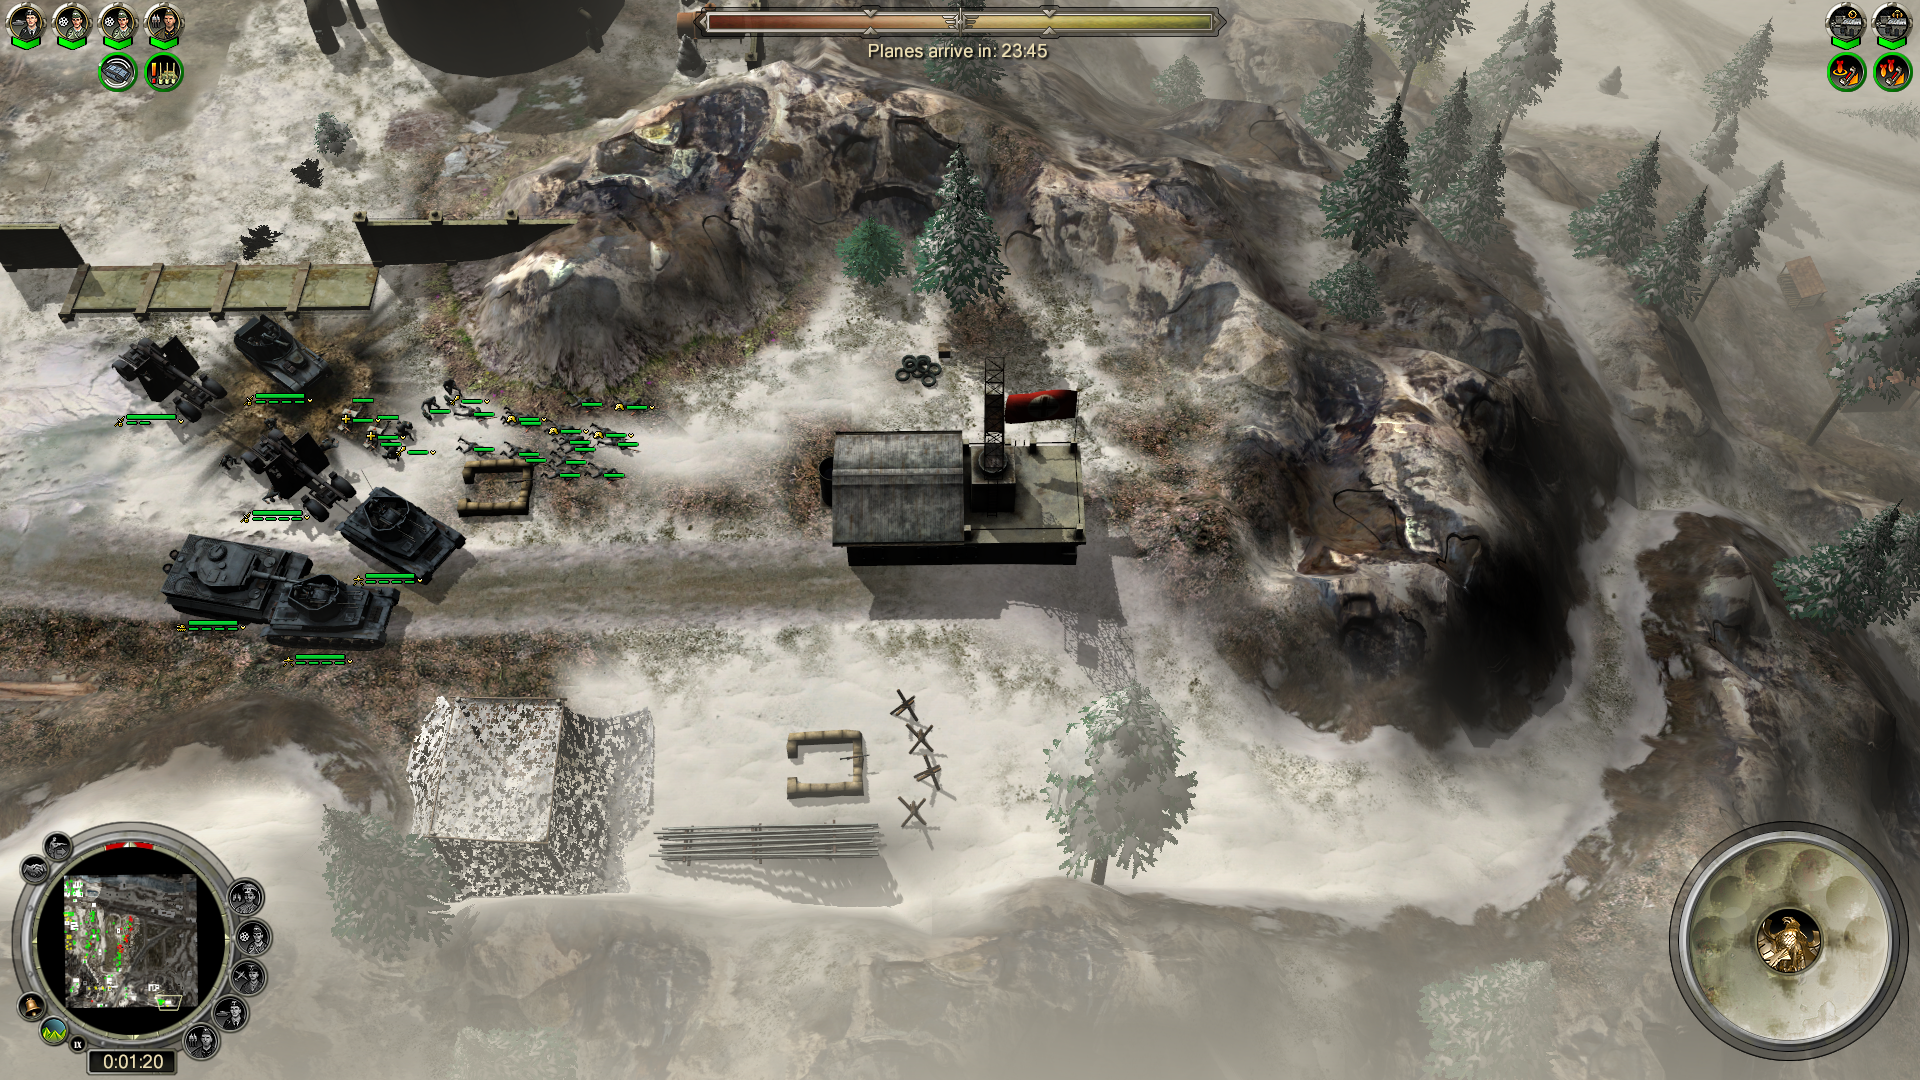
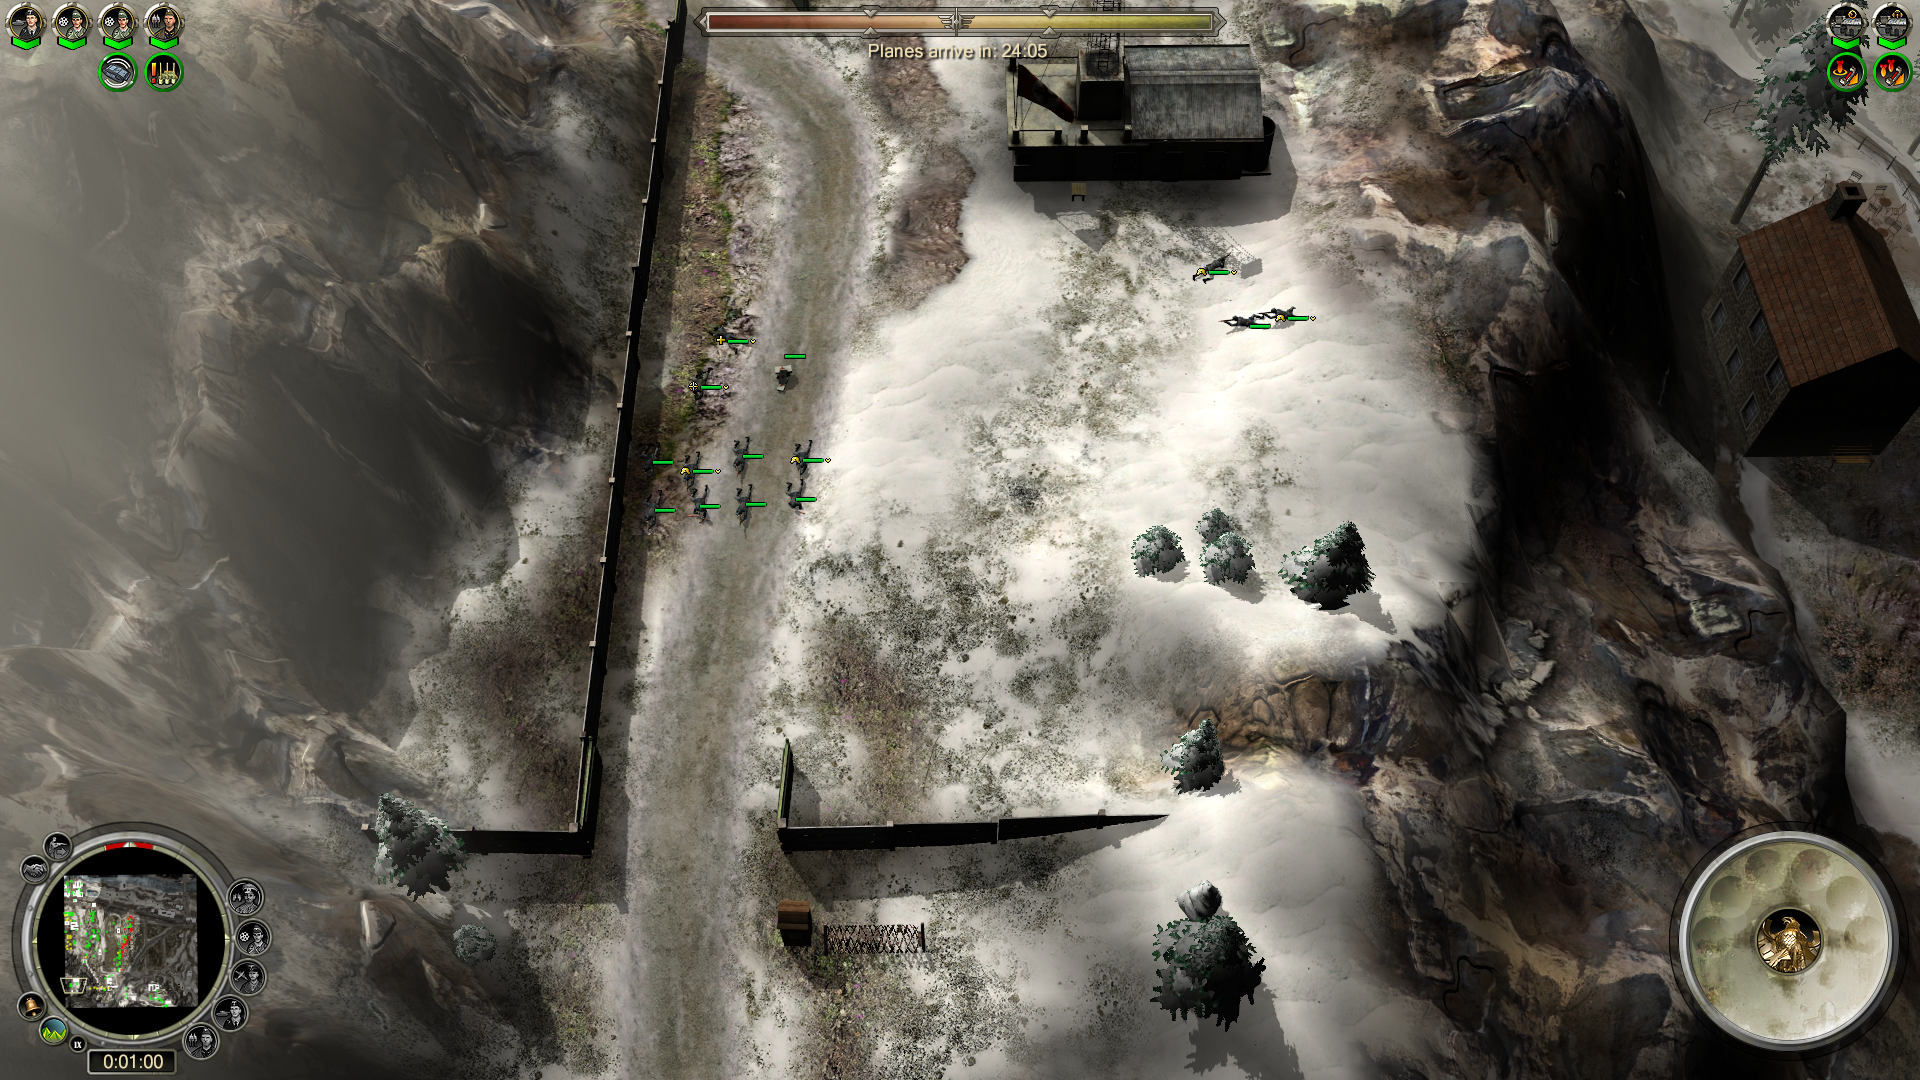
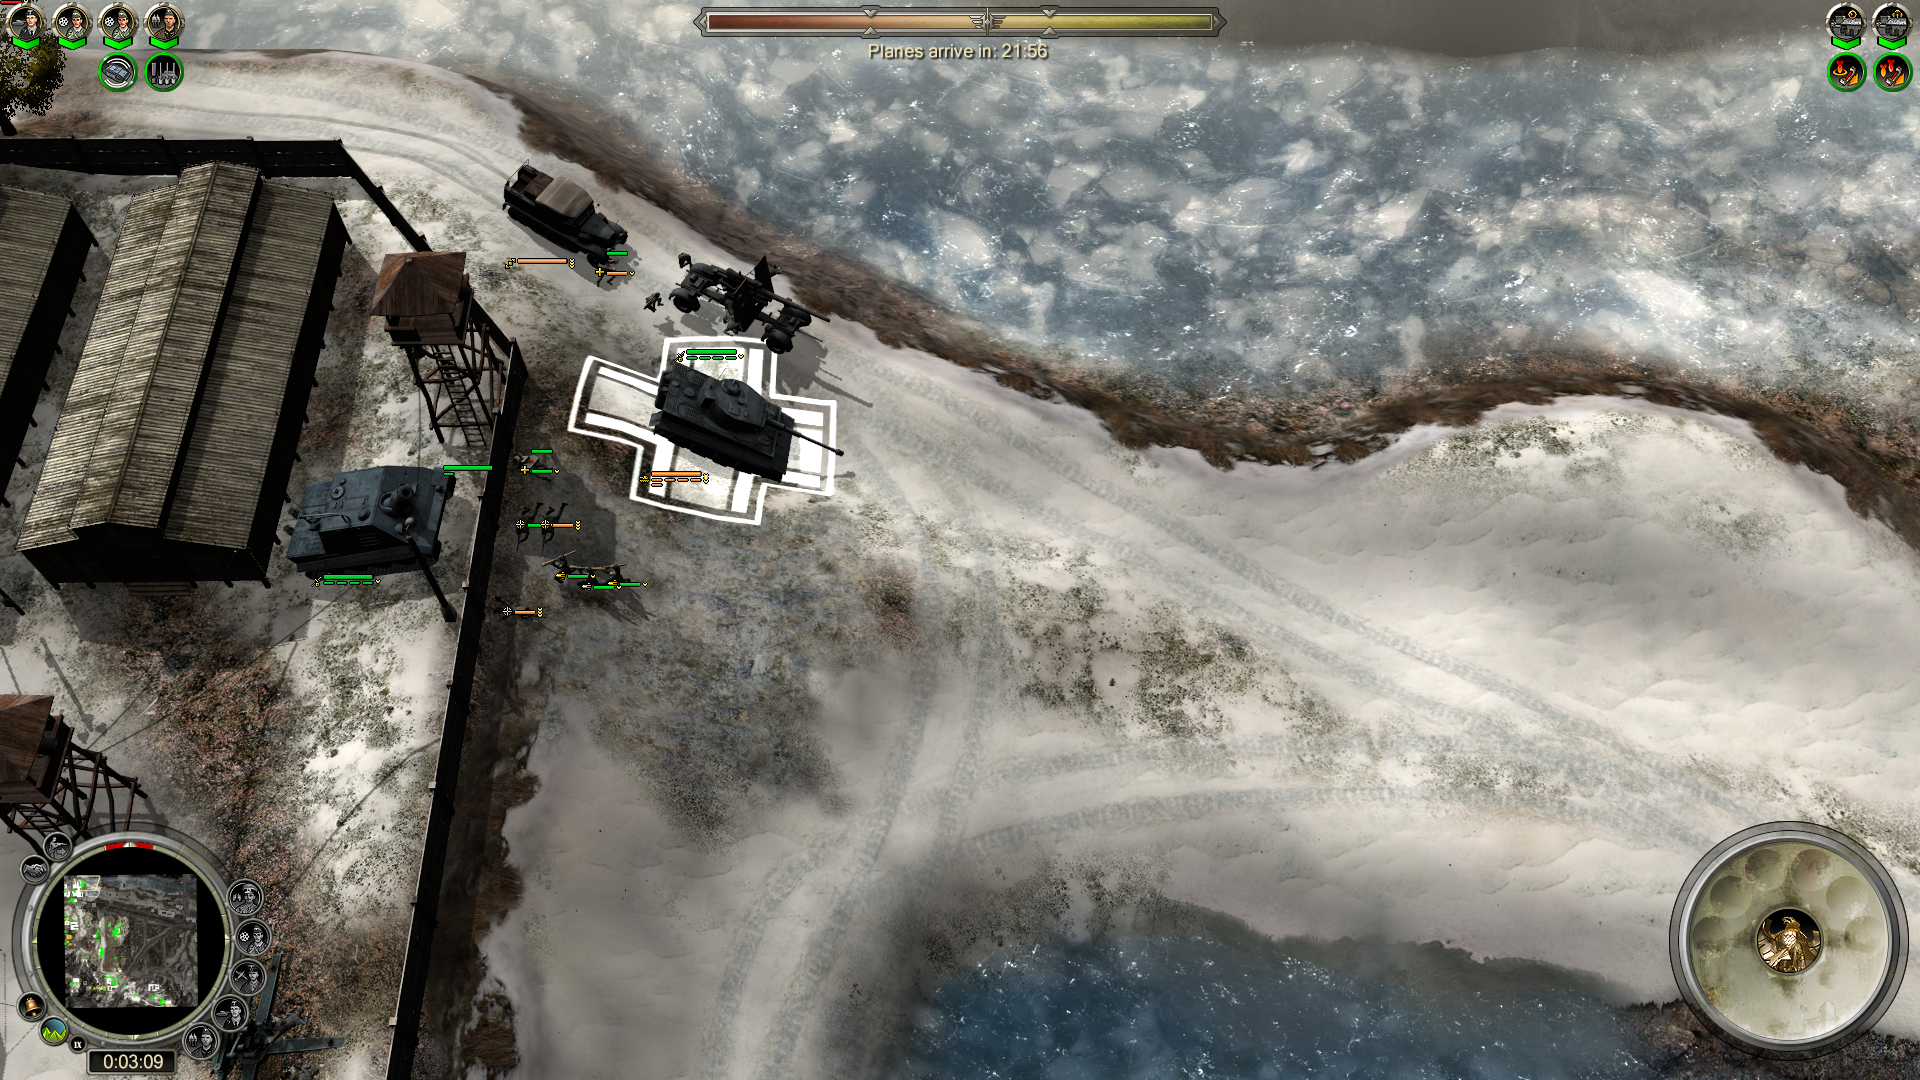
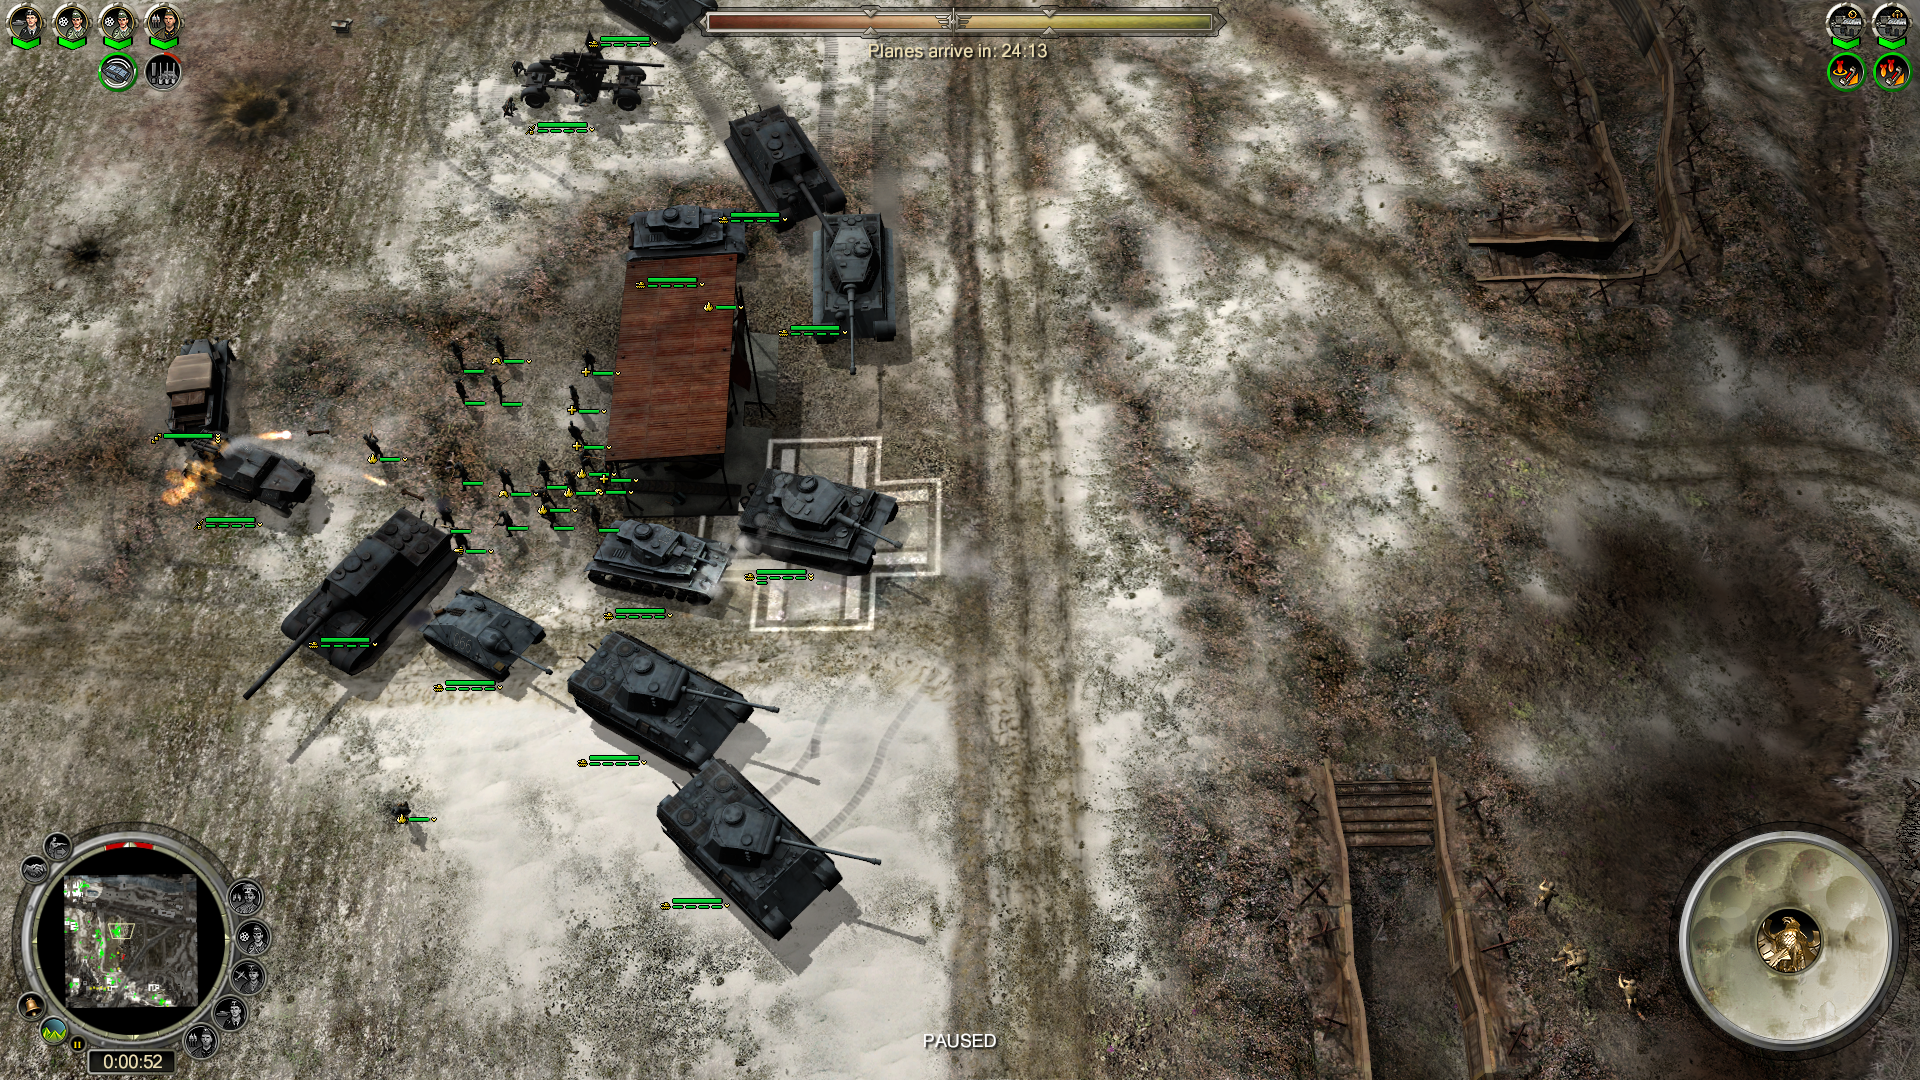
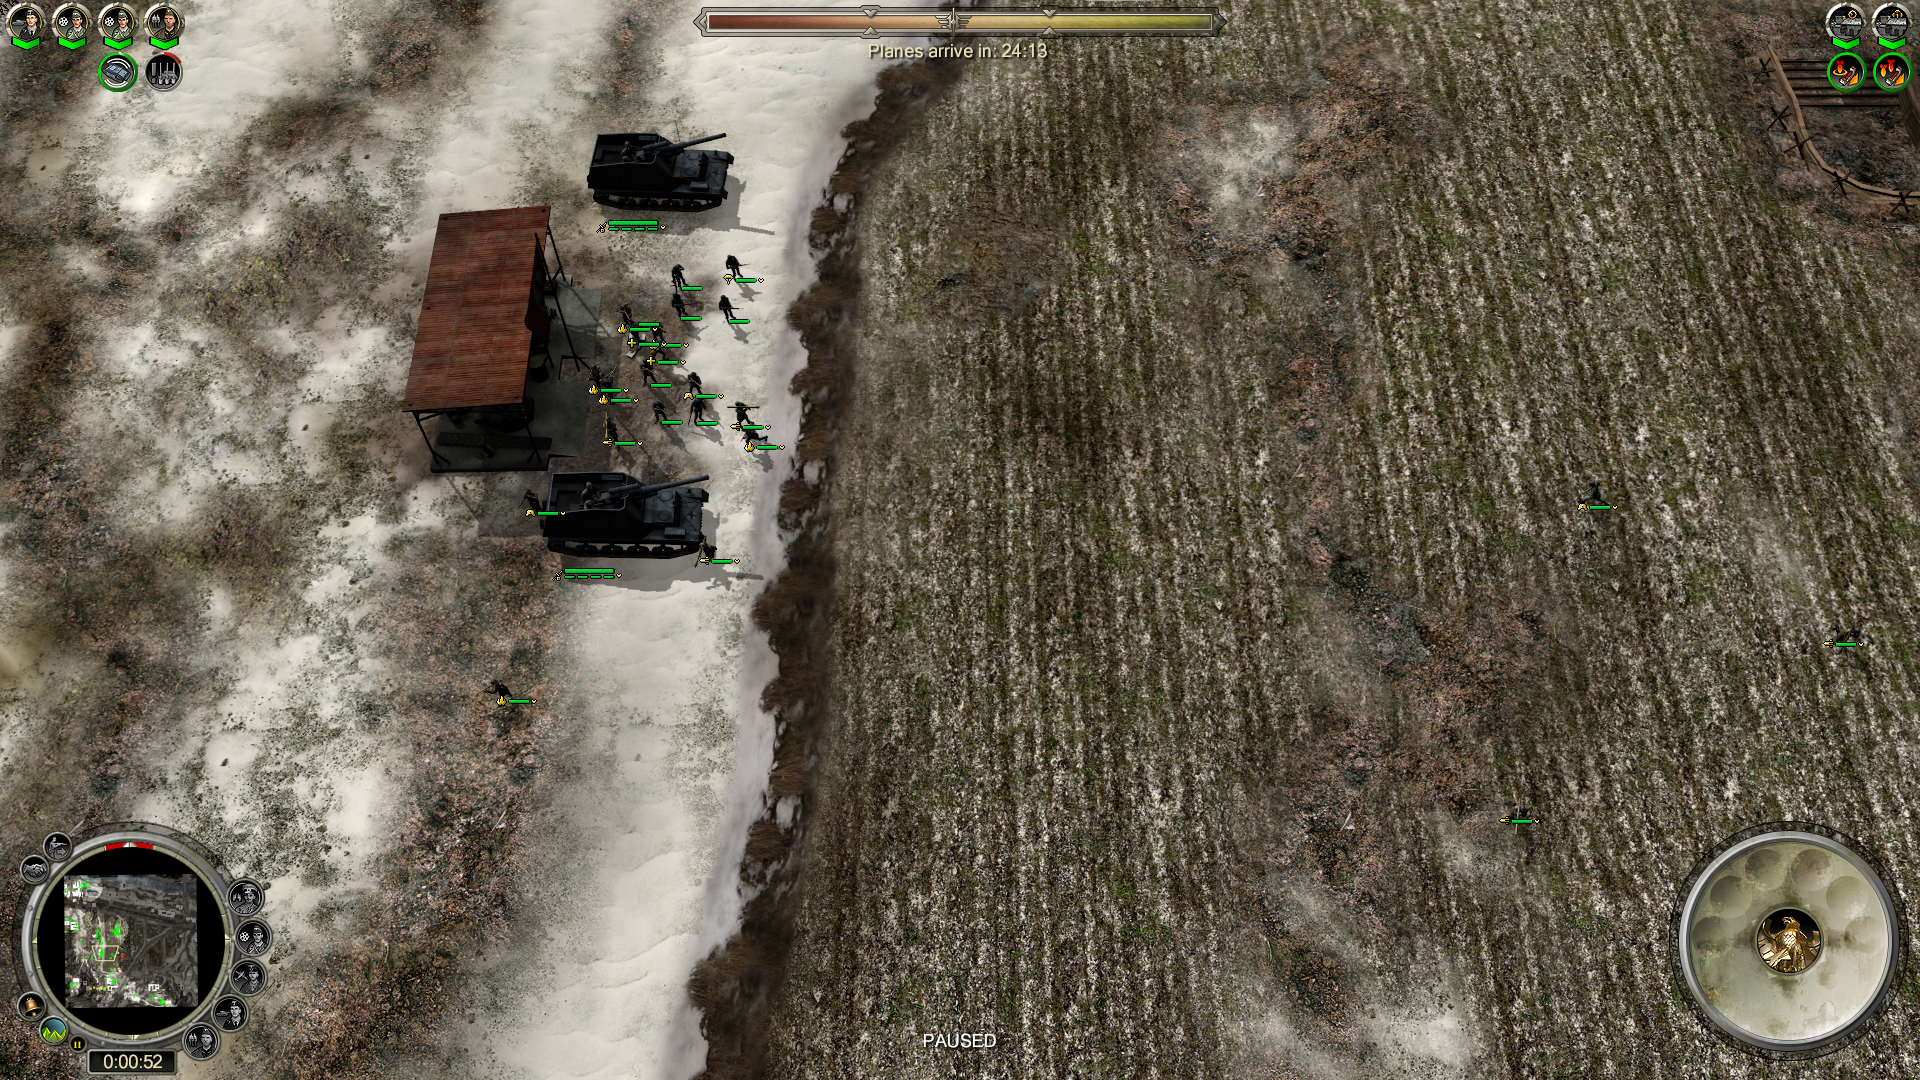
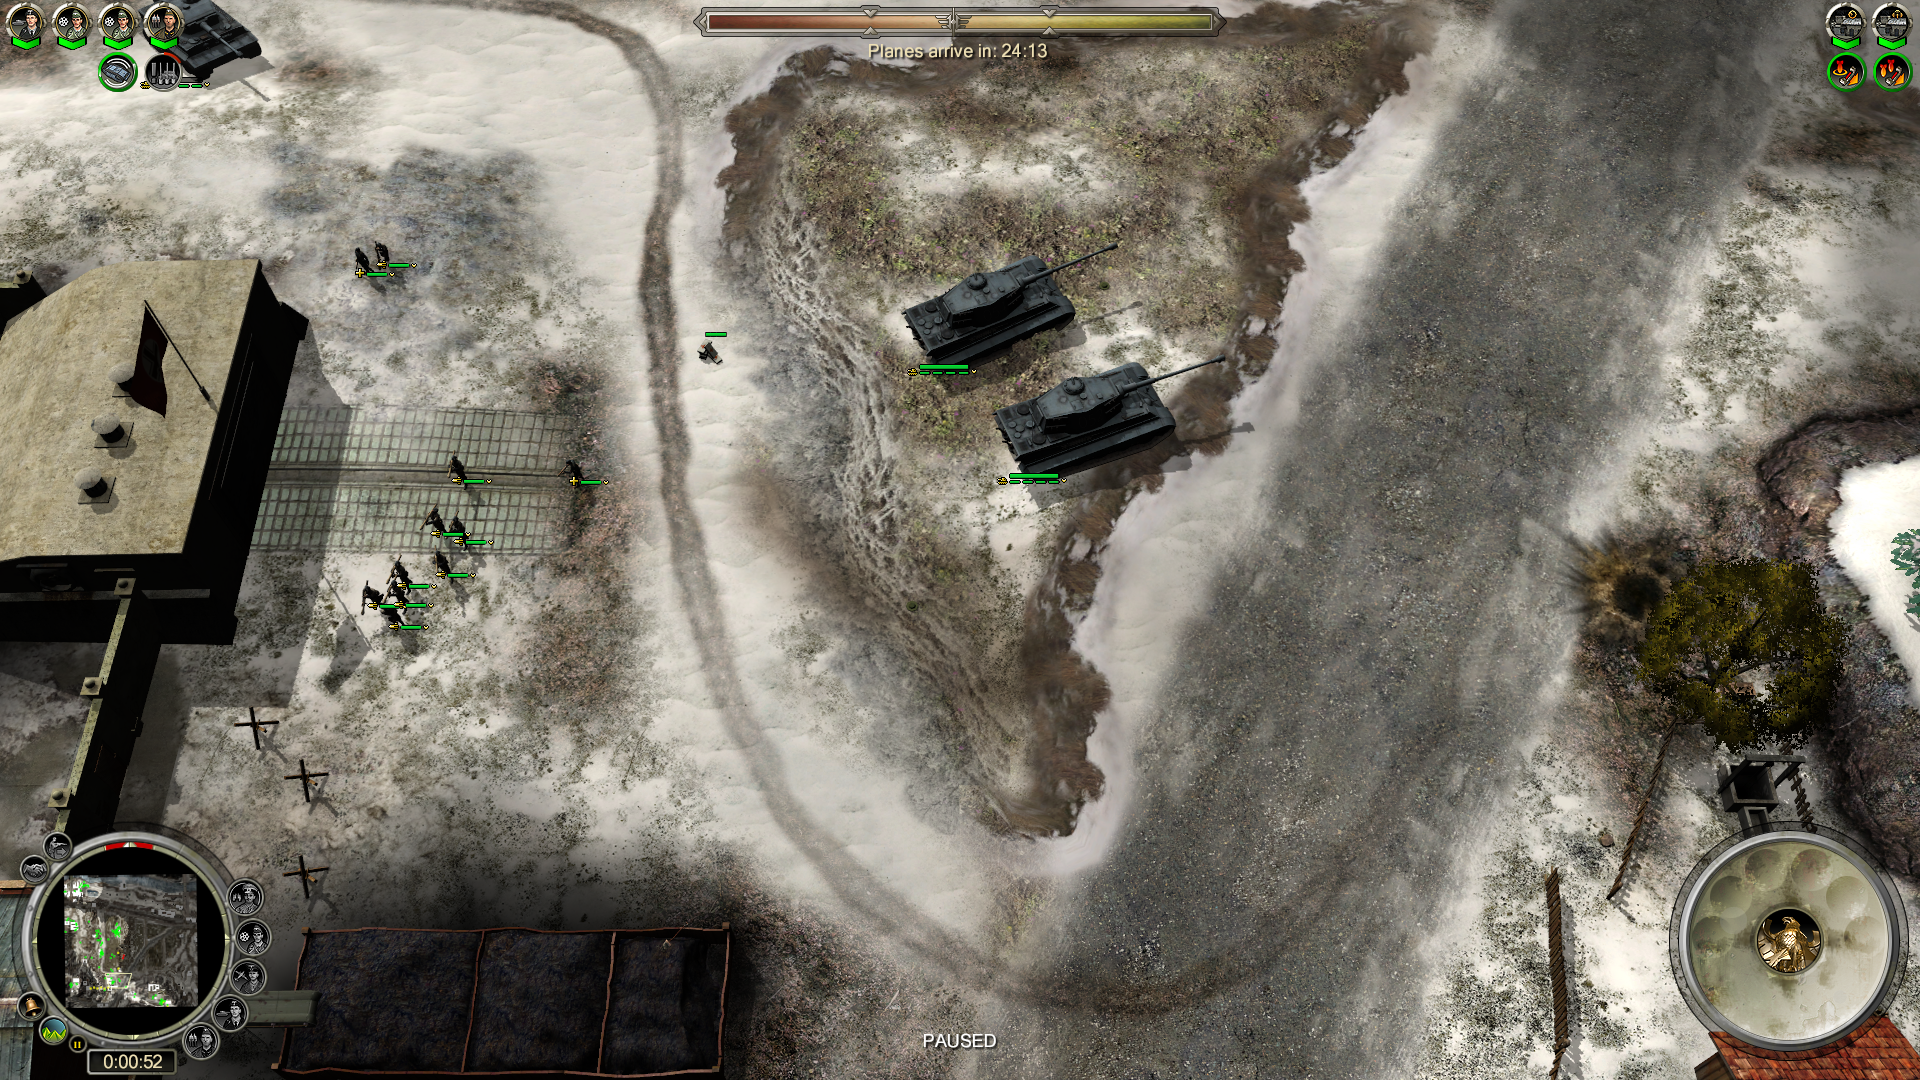
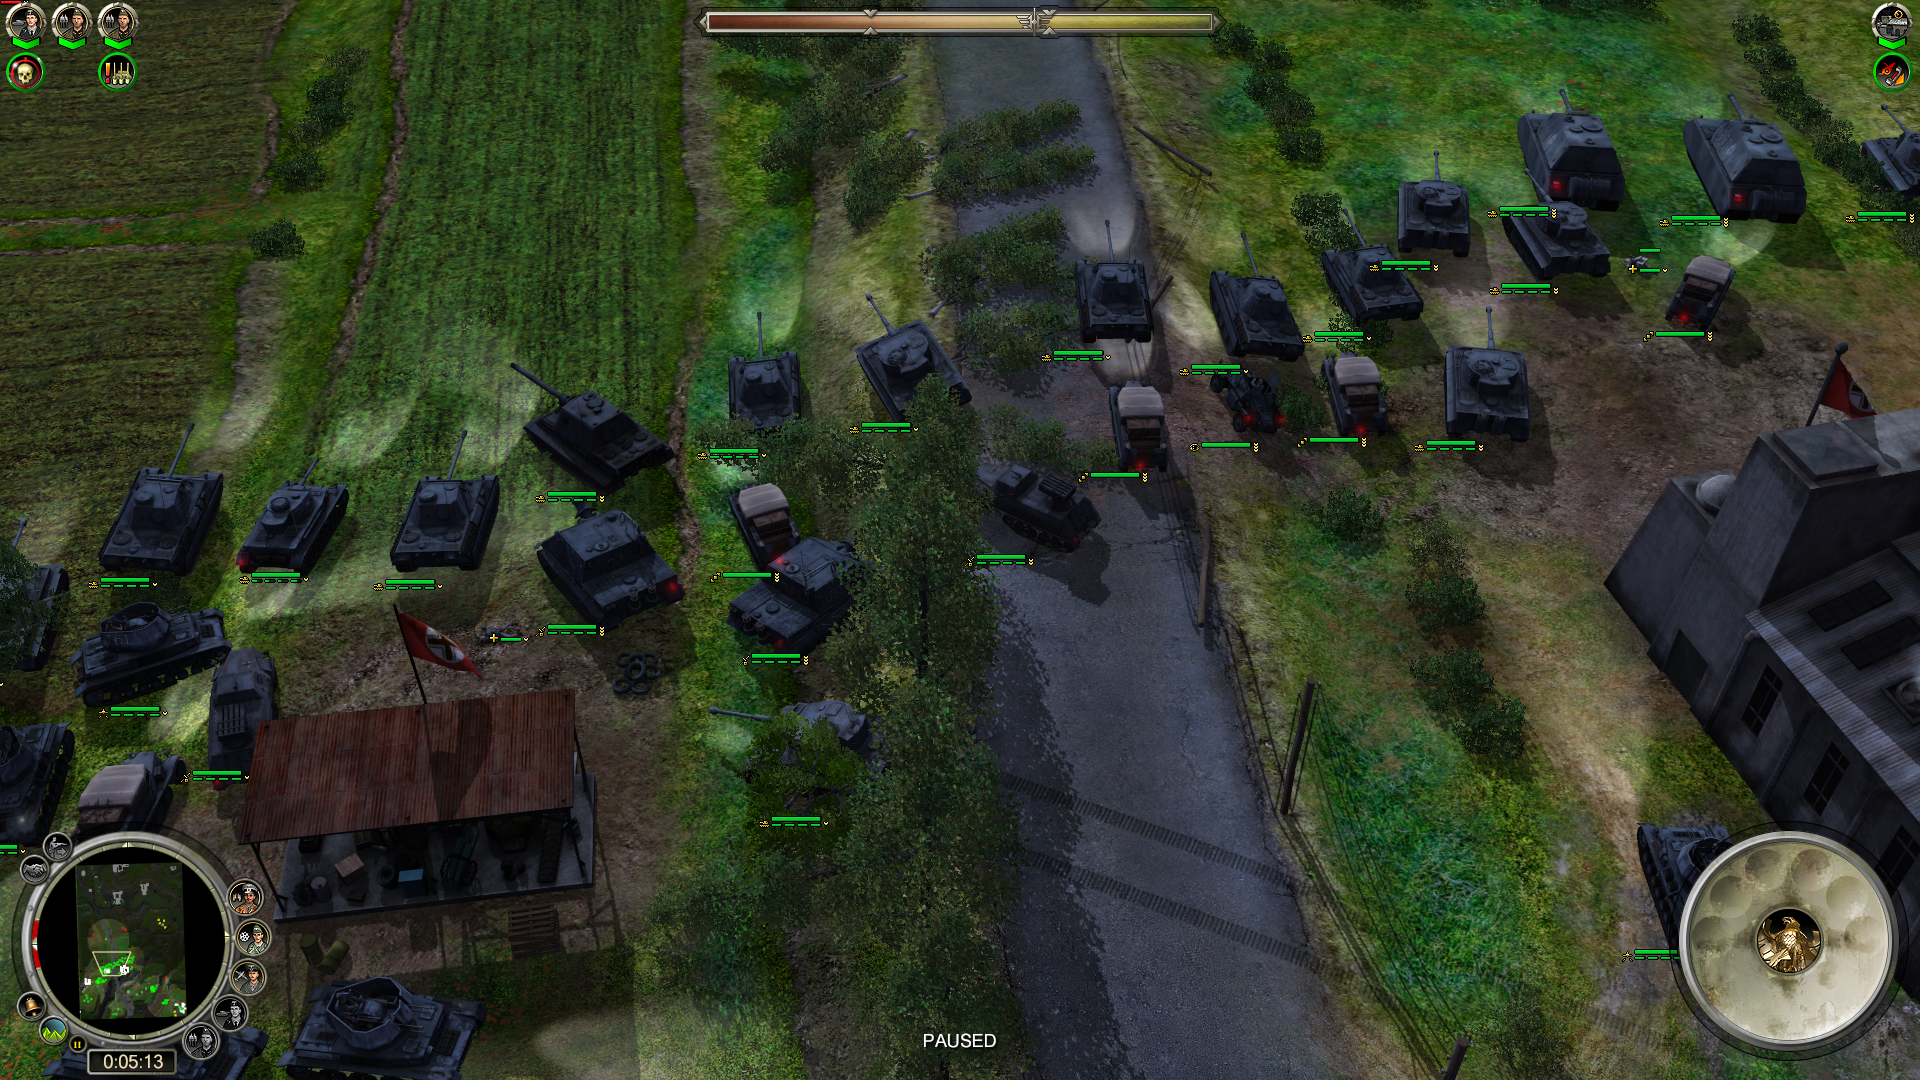